
Planting
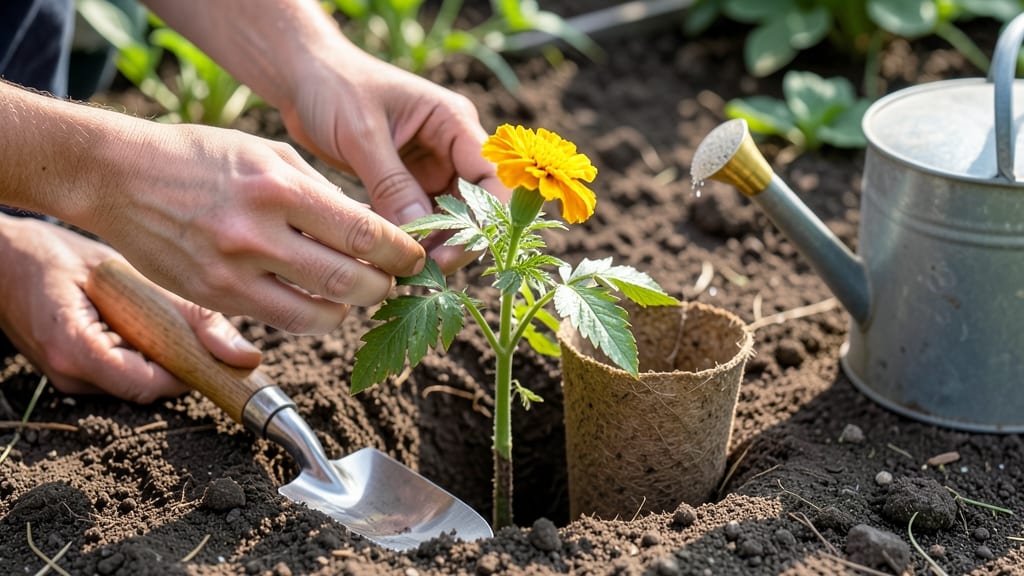
Put the seed in the soil at the right depth—or watch your germination dreams turn to dust. ✨ I’ve lost count of the packets of seeds I’ve buried wrong—until I learned the simple rule that works for every type, from tiny lettuce seeds to fat beans. The key isn’t guessing; it’s matching depth to seed size and soil type.
Start with loose, moist soil that crumbles easily between your fingers. For most seeds, depth equals their width multiplied by two or three—so a ¼-inch seed goes ½-inch down.
Tiny seeds like carrots or parsley barely need covering, while large ones like beans or peas can handle an inch of soil. The goal? Darkness for germination, but not suffocation.
You’ll see the first green shoots in as little as 3 days (fast germinators like radishes) or up to 3 weeks (slow starters like parsley). Proper spacing—1-2 inches apart for small seeds, 3-4 inches for medium—gives roots room to grow without competing.
Crowded seedlings mean weak plants that bolt or rot.
After planting, keep soil consistently moist (not soggy) and watch for true leaves—the second set after the initial seed leaves. That’s when you’ll know you’ve nailed the depth. Mistakes? Too deep = rot; too shallow = desiccation. Now grab your trowel and let’s get those seeds right.
📚 In This Guide
- What you need
- Instructions
- Tips and common mistakes
- Wrapping up and next steps
What you need
- ● Seeds: Choose high-quality, fresh seeds (check the packet for planting depth and spacing guidelines).
- ● Potting soil or garden soil: Well-draining, nutrient-rich soil (e.g., Miracle-Gro Potting Mix or FoxFarm Ocean Forest). 1-2 gallons per planting session (adjust based on quantity).
- ● Containers or garden bed: Containers: 4-6" deep pots for seedlings (e.g., Black plastic nursery pots or biodegradable peat pots).
- ● Garden bed: Loose, weed-free soil (amend with compost if needed).
- ● Planting tool: A small hand trowel (Fiskars 10015 Ergo Trowel) or your finger (for delicate seeds).
- ● Water: Room-temperature, gentle spray (e.g., watering can with a fine rose or spray bottle).
- ○ Optional but helpful: Seed-starting kit (includes trays, domes, and labels).
- ● Compost or worm castings (for extra nutrients).
- ● Plant labels (to track varieties).
- ● Grow lights (if indoors, 12-16 hours/day).
- ● Check the last frost date for your region (use the Almanac’s Frost Calculator 🌍).
- ● Prepare soil 1-2 weeks before planting (loosen, remove debris, and add compost if needed).
- ● Read seed packets for specific depth and spacing—it varies by plant!
Step-by-Step guide for planting seeds at perfect depth and spacing
Here's how I ensure every seed gets the ideal start—no guessing, no wasted effort.
🌱 Step 1: Prepare the Soil Surface for Seeds
Start with soil that's lightly fluffy, not packed down. Use your fingers to create small furrows or dimples about ¼ inch deep—just enough to cradle the seed without burying it too deeply. For tiny seeds like lettuce, I make a shallow trench with my fingertip. For larger seeds like beans, a slightly deeper groove works better.
Gently press the soil around the planting area to create a firm base. This prevents seeds from sinking deeper than intended when watered. A light misting with water helps settle the soil without disturbing the planting lines.
🌱 Step 2: Place Seeds According to Their Size
Most seed packets recommend planting depth as twice the seed's diameter. For example, a ¼-inch diameter tomato seed should go ½ inch deep. Tiny carrot seeds (about ⅛ inch) only need ¼ inch coverage. I use a toothpick to mark the depth if I'm unsure—just press it into the soil until it reaches the target depth.
Place seeds 1-2 inches apart for most vegetables, but check your packet—some like radishes can be spaced ½ inch apart. I like to tap the seed packet gently to release one seed at a time, then drop it into the furrow. Planting too many in one spot leads to weak, crowded seedlings later.
💧 Step 3: Cover Seeds Lightly and Water Gently
After placing seeds, cover them with a thin layer of soil—just enough to obscure their shape. For delicate seeds like marigolds, I use a fine mesh strainer to sift soil over them. Press down lightly with your fingertip to ensure good seed-to-soil contact, which helps with moisture uptake.
Water immediately with a spray bottle or fine rose attachment on your watering can. Avoid a heavy stream—it can wash seeds deeper than intended. The soil should feel damp but not soggy. I check by squeezing a handful; if water drips out, it's too wet.
☀️ Step 4: Label and Monitor for Germination
Label your planting rows immediately—once seedlings appear, identical-looking plants become impossible to distinguish. I use popsicle sticks and a permanent marker. Note the planting date and seed type to track growth progress.
Most seeds germinate best in warmth (65-75°F) and consistent moisture. Keep the soil surface damp (not wet) until you see first true leaves—those are the real leaves, not the initial seed leaves. This is your cue that the seedling is established and ready for sunlight.
⏰ Step 5: Thin Seedlings to Prevent Competition
Once seedlings have 2-3 true leaves, thin them to the recommended spacing (usually 6-12 inches apart for vegetables). Use scissors to snip unwanted seedlings at soil level—this avoids disturbing roots of nearby plants. I always thin on a cloudy day to reduce transplant shock.
Thinning might seem wasteful, but crowded seedlings compete for nutrients and light, leading to weak, leggy plants. After thinning, water deeply to help remaining seedlings recover. You'll see stronger, sturdier plants within days.
Tips & tricks for perfect seed planting
These little details make all the difference between healthy seedlings and wasted effort.
Seed Size Matters: The "twice the diameter" rule from Step 2 is your golden standard, but here's the secret: for seeds smaller than ⅛ inch (like parsley), just press them into the soil surface—no covering needed. For larger seeds like peas (about ¼ inch), you can go slightly deeper (½ inch) since they need more protection from birds and drying out. I keep a ruler nearby to double-check measurements when planting different varieties.
Soil Texture Tip: In Step 1, if your soil feels too dense after pressing, mix in a little compost or sand to improve drainage. Too much water in Step 3 can wash seeds deeper than intended, so aim for soil that holds moisture like a damp sponge—not dripping wet. I test by squeezing a handful: if water beads up on the surface, it's perfect.
Planting Precision: For Step 2 spacing, use the edge of a business card as a guide—most are about 2 inches wide. This helps maintain consistent spacing without guessing. When planting rows, leave at least 12 inches between them for easy access when thinning in Step 5. I mark row centers with small sticks to visualize the layout before planting.
Germination Conditions: The 65-75°F range in Step 4 is ideal, but if your garden runs cooler, consider using a mini greenhouse or clear plastic dome to trap warmth. For seeds that need darkness to germinate (like beets), press them just below the soil surface rather than covering with extra dirt. I check germination progress by marking the planting date on my calendar—most seeds sprout within 7-14 days.
Pro Tips for Put The Seed In The Soil
- These little details make all the difference between healthy seedlings and wasted effort.
- Seed Size Matters: The "twice the diameter" rule from Step 2 is your golden standard, but here's the secret: for seeds smaller than ⅛ inch (like parsley), just press them into the soil surface—no covering needed.
- Soil Texture Tip: In Step 1, if your soil feels too dense after pressing, mix in a little compost or sand to improve drainage.
Frequently asked questions
Got questions about planting seeds like a pro?
You’re in the right place! Here are answers to the most common queries about putting seeds in the soil—from timing to troubleshooting. Let’s dig in!
What’s the best time of day to plant seeds?
Plant seeds in the early morning or late afternoon to avoid the harsh midday sun. Cooler temps and lower evaporation help seeds stay moist while they germinate. If you’re planting in extreme heat, opt for cloudy days or shade to reduce stress on delicate sprouts.
How long does it take for seeds to germinate?
Germination time varies wildly by plant type—some (like lettuce) sprout in 3–7 days, while others (like okra or tomatoes) can take 10–20 days. Check the seed packet for specifics! Keep soil consistently moist (not soggy) and warm (60–85°F) to speed up the process.
Can I reuse soil from last year’s garden?
Reusing soil can work, but it’s risky unless you’ve sterilized it (bake at 200°F for 30 mins or solarize for 4–6 weeks). Old soil may harbor diseases, pests, or depleted nutrients. Mix it with fresh compost or potting mix to refresh it, or swap it out entirely for seed-starting.
What if my seeds rot instead of sprouting?
Seed rot usually means too much moisture or poor drainage. To fix it:
- Use well-draining soil (add perlite or vermiculite).
- Avoid overwatering—keep soil damp, not wet.
- Try shallow planting (just 2x the seed’s width).
- Check for fungal issues (fuzzy growth = discard soil).
Are there seeds I shouldn’t plant directly in garden soil?
Yes! Delicate or slow-starting seeds (like tomatoes, peppers, or herbs) often do better indoors first. Others, like beans, peas, or marigolds, thrive when direct-sown. Always check the seed packet—it’ll say “start indoors” or “direct sow”.
Pro Tip:
Label your seeds or containers right after planting—mistakes happen, and you’ll thank yourself later! Use toothpicks + masking tape for a DIY solution.
Wrapping up and next steps
Mastering the art of putting seeds in the soil is your first step toward a thriving garden! Whether you're a beginner or a seasoned gardener, the right depth and spacing unlock the potential for lush, healthy plants.
Remember: patience and precision pay off—your green thumb is just a seed away from blooming.
Ready to take the next step? Start small with a single plant or row, track your progress, and soon you’ll be confidently planting an entire garden. Happy growing—your future harvest is waiting! 🌱✨