
Propagation
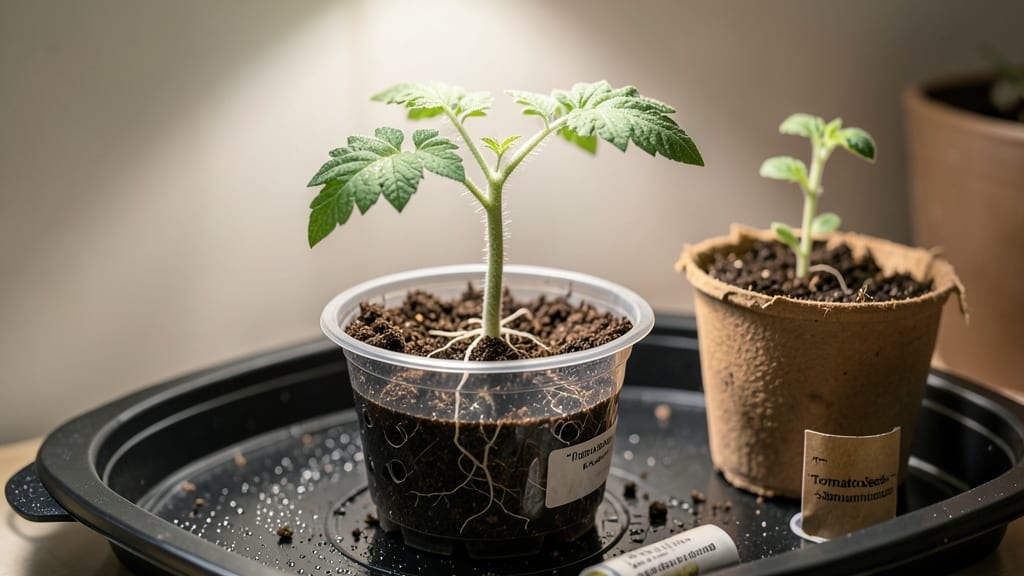
The secret to tomato seed germination isn't luck—it's a simple test that saves you from weeks of waiting on seeds that might never sprout. 🌱 I learned this the hard way after drying seeds only to watch them fail in the soil, and now I never skip this step.
It takes just 10 minutes and a paper towel to know which seeds are worth planting, cutting wasted time and frustration. All you need is a few paper towels, a spray bottle, and a plastic bag.
The process mimics how seeds germinate naturally, letting you see which ones are viable before you even plant them. Most seeds show signs of life within 3-5 days, and the whole setup fits on your kitchen counter.
Once you've confirmed your seeds are ready, you'll move to planting with confidence—knowing exactly when to start them indoors for your last frost date. The first tiny roots peeking through the towel are the most exciting part, and it's a game-changer for seed-saving gardeners.
This method works for any tomato variety, whether you're growing heirlooms or hybrids. It's especially useful if you've saved seeds from store-bought tomatoes or are testing new varieties. Let's get those seeds sprouting right!
📚 In This Guide
- What you need
- Instructions
- Tips and common mistakes
- Wrapping up and next steps
What you need
- ● Fresh tomato seeds: Harvest from ripe, healthy tomatoes (10–20 seeds per test batch).
- ● Paper towels or coffee filters: 2–3 sheets (unbleached, seed-safe).
- ● Spray bottle (8–16 oz): Fill with room-temperature water (avoid tap water if heavily chlorinated).
- ● Plastic zip-top bags (quart-sized): 1–2 bags (resealable, clear preferred).
- ● Permanent marker: For labeling bags (e.g., seed variety + date).
- ○ Ruler or measuring tape: To track seed placement (optional but helpful).
- ● Plastic tray or shallow container: For organizing bags (e.g., baking dish).
- ○ Heating mat (optional): Set to 70–80°F (21–27°C) to speed germination (e.g., seedling heat mat).
- ● Notebook or spreadsheet: To log germination progress (date, count, % viability).
- ○ Desiccant packets (optional): For long-term seed storage after testing.
- ● Magnifying glass: To inspect tiny seeds or early sprouts.
- ● Time commitment: 7–14 days (check daily for sprouts).
- ● Space: Warm, dark spot (e.g., pantry, closet shelf).
- ● Patience: Some seeds may take longer to germinate!
How to test tomato seed viability before germination
Here's my foolproof method to save time and avoid disappointment—no guesswork, just results.
🧪 Step 1: Prepare the Paper Towel Test Setup
Lay out four clean paper towels on a flat surface—this is where you'll test your seeds. I like to use white towels because they show moisture changes clearly. Fold each towel into a rectangle about 8 inches wide and 12 inches long, then place them side by side. This gives you space to label each variety if you're testing multiple types.
Lightly mist the towels with lukewarm water until they're damp but not dripping. You want them to feel like a wrung-out sponge—squeeze gently to check. Too much water and seeds will rot; too little and they won't germinate. Place a second set of dry towels on top to maintain moisture without suffocating the seeds.
🌱 Step 2: Arrange Seeds in Rows for Clear Tracking
Spread out 10 seeds per variety in a single row across each towel, spacing them about 1 inch apart. I use a toothpick to create tiny divots in the towel—this keeps seeds from sliding around when you stack the towels. Label each row with the tomato variety name and date using a fine-tip marker. This helps track which seeds sprout fastest.
Stack the second towel over the seeds to sandwich them between two layers. The top towel should be damp but not soaking. Place the entire stack inside a clear plastic bag—this traps humidity and mimics the warm, moist conditions seeds need to germinate. Seal the bag loosely so air can circulate slightly.
☀️ Step 3: Create Ideal Germination Conditions
Place the bagged towels in a warm, dark spot—75-85°F is perfect. I use the top of my fridge (not the inside!) because it stays consistently warm. If your kitchen runs cooler, try a sunny windowsill during the day and move it to a warm spot at night. Check daily for condensation on the bag—this confirms the right moisture level.
Watch for the first signs of germination in 3-7 days. You'll see tiny white roots emerge first, followed by the seed coat splitting open. Count how many seeds sprout in each row—this tells you the viability percentage. If fewer than 50% sprout, consider saving seeds from a different batch next year.
📝 Step 4: Record Results and Plan Next Steps
After 7 days, remove the towels from the bag and count the sprouted seeds. Record your results in a notebook or spreadsheet—include the variety name, number of seeds tested, and how many germinated. This becomes your reference for future planting. For example, if only 6 out of 10 seeds sprouted, you'll know to plant twice as many next time to ensure enough seedlings.
Discard the unused seeds—even if they didn't sprout, they're likely too old or damaged to perform well. Store your successful seeds in a cool, dry place (like the fridge) until planting season. This simple test saves you from sowing dozens of seeds only to have poor germination rates later.
⏰ Step 5: Transplant Sprouted Seeds (Optional)
If you want to get a head start, transplant the sprouted seeds into small pots filled with seed-starting mix once they've developed ¼-inch roots. Gently press the seed into the soil, root-side down, and cover lightly with more mix. Keep the soil consistently moist but not soggy—this prevents damping-off disease.
Place the pots under grow lights or in a sunny window and watch them grow. You'll have strong, healthy seedlings ready to transplant outdoors weeks before store-bought starts. This method gives you confidence that your seeds are worth the effort before you invest time in full germination.
Tips & tricks for perfect tomato seed viability testing
These simple tricks will help you get accurate results every time without the guesswork.
Moisture Balance is Key: In Step 1, when misting the paper towels, aim for dampness that feels like a wrung-out sponge. Too much water creates a soggy environment that can rot seeds before they sprout, while too little prevents germination entirely. I test by squeezing the towel gently—if water drips, it's too wet. If it feels dry, add a few more spritzes. This balance is what triggers those first crucial roots in Step 3's 3-7 day window.
Labeling System Saves Time: In Step 2, I use a fine-tip permanent marker to label each seed row with both the tomato variety and date. This prevents mix-ups when you're checking for germination in 3-7 days. Pro tip: Place labels on the edge of the towel rather than near the seeds—this keeps your writing dry and legible. Trust me, you'll thank yourself when you can instantly identify which heirloom variety is sprouting fastest.
Temperature Consistency Matters: The 75-85°F range in Step 3 is non-negotiable for reliable results. If your kitchen runs cooler, try placing the bagged setup on top of your fridge (not inside) or near a sunny windowsill during daylight hours. I've seen germination rates drop by 30% when temps fall below 70°F. Use a small thermometer if possible—it's worth the investment for consistent results. This temperature range is what triggers the metabolic changes that lead to those first visible roots.
Visual Cues Over Time: In Step 4, when checking for germination after 7 days, look for two key visual cues: tiny white roots (about ¼-inch long) and the seed coat splitting open. The roots will appear first, followed by the seed coat cracking like a tiny egg hatching. This is your signal that the seed has successfully broken dormancy. If you're transplanting in Step 5, wait until you see both these signs before moving seeds to soil.
Pro Tips for Tomato Seed Germination
- These simple tricks will help you get accurate results every time without the guesswork.
- Moisture Balance is Key: In Step 1, when misting the paper towels, aim for dampness that feels like a wrung-out spong...
- Labeling System Saves Time: In Step 2, I use a fine-tip permanent marker to label each seed row with both the tomato ...
Frequently asked questions
Got questions about getting your tomato seeds ready for storage? Here are some of the most common ones—and their answers—to help you navigate the germination process like a pro!
How long does it take for tomato seeds to germinate in a viability test?
Most tomato seeds will sprout within 5–10 days under ideal conditions (warmth, moisture, and darkness). If you don’t see sprouts by day 14, the seeds are likely non-viable. Speed up germination by keeping the paper towel or substrate consistently moist (not soggy!) and placing it in a warm spot, like on top of a fridge.
Can I use store-bought tomato seeds for germination tests?
Store-bought seeds are a great option for testing viability, especially if you’re unsure about the age of your homegrown seeds. Just follow the same steps—moisten a paper towel, sandwich the seeds, and monitor for sprouts. Pro tip: Label the seeds if you plan to save them for planting later!
What if my tomato seeds won’t germinate? How can I troubleshoot?
If your seeds aren’t sprouting, check these common culprits:
- Temperature: Too cold? Move the setup to a warmer spot (ideal range: 70–85°F).
- Moisture: Dry paper towels? Mist lightly and reseal the bag.
- Age: Seeds older than 2–3 years may have lost viability.
- Damage: If seeds are cracked or discolored, they may not sprout.
If all else fails, try a fresh batch of seeds!
Do I need to use paper towels, or can I use something else for the test?
Paper towels are the easiest and most reliable method, but you can also use:
- Coffee filters (lightweight and absorbent)
- Damp sphagnum moss (great for mimicking natural conditions)
- A small container with moistened peat moss or coconut coir
Just ensure whatever you use stays evenly moist and allows for airflow.
How do I know if a seed is viable but just slow to sprout?
Viable seeds may take longer to germinate if they’re freshly harvested (they need a brief drying period) or if the variety is naturally slow (like heirlooms). Look for plump, firm seeds—if they’re shriveled or hollow-sounding, they’re likely dead. Patience is key! Keep checking daily for tiny white roots or sprouts.
Wrapping up and next steps
Mastering tomato seed germination before drying ensures you start strong with healthy plants! 🌱 By testing viability early, you skip guesswork and save time—giving your seeds the best chance to thrive.
Whether you’re a seasoned gardener or just starting, this simple method builds confidence and sets you up for a bountiful harvest.
Ready to take the next step? Plant those viable seeds in soil and watch your garden grow! For extra success, keep track of germination rates and adjust your drying or storage methods based on what works best for your climate. Happy growing! 🌿