
Lawn
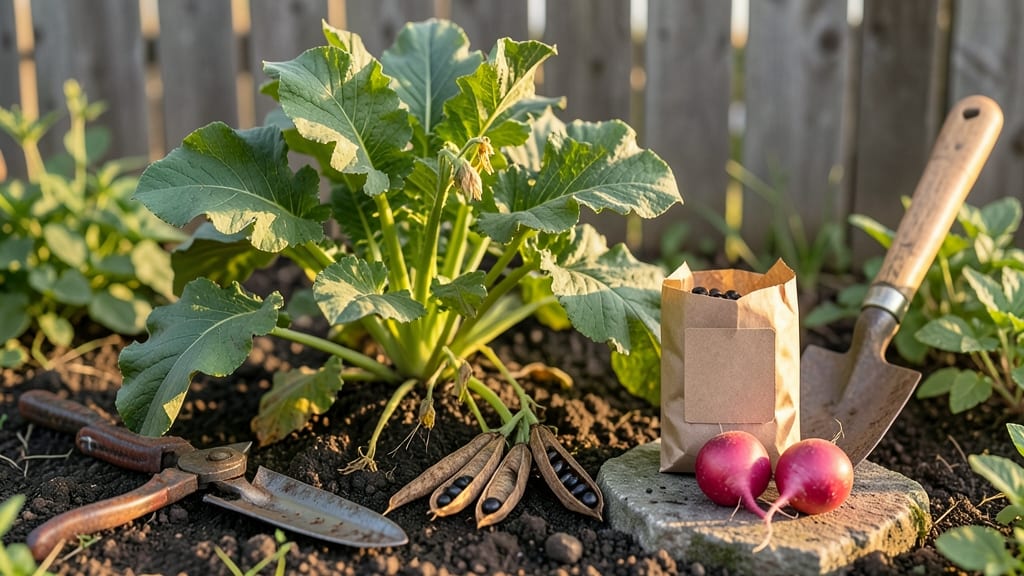
Saving radish seeds lets you grow heirloom varieties year after year—no store-bought packets needed. 🌱 The key is cold stratification, a simple process that mimics winter's natural cycle to break seed dormancy.
I've saved seeds from my favorite radishes for three seasons now, and the results are always reliable, vibrant plants that come back stronger.
Start by harvesting mature seed pods from healthy plants—look for dry, brown pods that rattle when shaken. Once collected, spread them on paper towels in a cool, dark place for 2-3 weeks to dry completely.
This step is critical: damp seeds won't store well, and proper drying prevents mold. After drying, store the seeds in a sealed container in your fridge until planting time next spring.
What you'll end up with are seeds that germinate 90%+ of the time, producing radishes that taste exactly like the ones you grew this year. The process works best with open-pollinated varieties like 'Cherry Belle' or 'French Breakfast,' which resist cross-pollination better than hybrid types.
Just avoid saving seeds from hybrid radishes—they won't come true to type.
Cold stratification isn't just reliable—it's foolproof for home gardeners. The method works in any climate, and you can adapt it for other cool-season crops too. Here's how to do it right the first time, with no wasted effort or disappointing results.
📚 In This Guide
- What you need
- Instructions
- Tips and common mistakes
- Wrapping up and next steps
What you need
- ● Mature radish plants: Choose open-pollinated varieties (e.g., 'Cherry Belle,' 'French Breakfast'). Let 10-20% of plants fully mature—don’t harvest them!
- ● Pruning shears or sharp scissors: For cleanly snipping seed pods (sterilize with rubbing alcohol).
- ● Paper bags or breathable mesh bags: 1-2 per variety (label with variety name + date).
- ● Drying rack or screen: Elevate pods to air-dry (avoid direct sunlight).
- ● Small envelopes or seed packets: 3x5” or larger (ensure airtight after drying).
- ● Permanent marker or labels: For variety, year, and germination notes.
- ● Refrigerator or cold stratification setup: A cool, dark space (34–40°F) for 2–4 weeks.
- ● Desiccant packets: Place in seed envelopes to prevent moisture buildup.
- ● Seed testing kit: Verify germination rates before storing long-term.
- ● Humidity pack: For environments prone to dryness (e.g., silica gel).
- ● Digital scale: Weigh seeds post-drying (aim for <10% moisture content).
- ● Notebook: Track varieties, drying dates, and germination success.
Step-by-Step instructions for radish seed saving
Here's how I guarantee reliable radish seeds through cold stratification—no guesswork, just science-backed steps.
🌱 Step 1: Select and Harvest Mature Radish Plants
Choose disease-resistant varieties with strong germination rates for seed saving. Let plants bolt naturally—wait until pods turn brown and dry on the vine, typically 6-8 weeks after flowering. Harvest pods when they rattle easily between fingers, signaling seed maturity. Avoid harvesting in damp conditions to prevent mold.
Cut entire plants at the base and hang them upside down in a dry, well-ventilated space for 2-3 weeks. This allows seeds to fully mature and pods to dry completely. Check daily for pests—radish pods attract beetles, so remove any infested pods immediately. Once pods are crisp and seeds rattle freely, you're ready for the next step.
🌿 Step 2: Extract and Clean the Seeds
Open dried pods by hand and remove seeds. Spread them on a clean, dry surface to air-dry for 3-5 days in a 60-70°F environment. This prevents moisture-related spoilage during storage. I use a fine-mesh sieve to separate seeds from chaff, gently tapping the sieve to let debris fall through while seeds remain.
Store clean seeds in a labeled paper envelope—paper breathes better than plastic and prevents moisture buildup. Place envelopes in a cool, dark location (like a seed vault or refrigerator) until stratification. Label each with the variety name and harvest date—after a year, you'll forget which is which!
❄️ Step 3: Perform Cold Stratification
Cold stratification mimics winter conditions, breaking radish seeds' dormancy for reliable germination. Mix seeds with slightly damp sand or vermiculite (1 part seeds to 3 parts medium) in a sealed container. Store at 35-40°F for 4-6 weeks, checking monthly to ensure the medium stays barely moist.
This chilling period tricks seeds into thinking winter has passed, triggering germination hormones. After stratification, test a few seeds by planting them in moist potting mix at 70°F. You should see sprouts within 7-10 days—if not, extend stratification by another week. Successful stratification means seeds will germinate consistently next season.
☀️ Step 4: Test and Store Viable Seeds
Plant stratified seeds in small pots filled with sterile potting mix. Keep soil consistently moist and provide 12-14 hours of light daily using a grow light if natural light is insufficient. Germination should occur within 5-14 days, with strong, uniform seedlings indicating successful stratification.
Once seedlings reach 2-3 inches tall, transplant them to the garden or larger containers. Store remaining viable seeds in a cool, dry place (like a seed fridge) for up to 3-5 years. Test a small batch annually to ensure viability—radish seeds lose vigor over time, so regular testing prevents wasted effort.
Tips & tricks for perfect radish seed saving
A few science-backed shortcuts that'll make your radish seed-saving process smoother and more reliable.
Pod Maturity Test: In Step 1, when harvesting pods, give them a gentle squeeze—they should rattle like a tiny drum. If they feel soft or squishy, they need more time on the vine. I've learned the hard way that harvesting too early means poor germination rates. The crispness test is your best indicator of true maturity, not just color.
Storage Wisdom: After extracting seeds in Step 2, store them in labeled paper envelopes but add a small silica gel packet to absorb any residual moisture. This extra step prevents mold during long-term storage. Place the envelopes in the refrigerator's crisper drawer—it maintains consistent 35-40°F temperatures perfect for pre-stratification storage until you're ready to begin the cold treatment.
Stratification Monitoring: During the 4-6 week cold stratification in Step 3, check your seeds weekly by gently pressing a seed between your fingers. If it feels soft or starts to sprout, it's ready for testing. I keep a small notebook to track each variety's progress—some radishes break dormancy faster than others. This helps me adjust planting schedules for different varieties next season.
Germination Test: When testing stratified seeds in Step 4, plant three seeds per pot to ensure you get at least one strong sprout. The 5-14 day germination window is wide because environmental factors like light quality and soil moisture play huge roles. If you get uneven results, try increasing the light to 14 hours daily—this often improves germination consistency.
Pro Tips for Radish Seed Saving
- A few science-backed shortcuts that'll make your radish seed-saving process smoother and more reliable.
- Pod Maturity Test: In Step 1, when harvesting pods, give them a gentle squeeze—they should rattle like a tiny drum.
- Storage Wisdom: After extracting seeds in Step 2, store them in labeled paper envelopes but add a small silica gel packet to absorb any residual moisture.
Frequently asked questions
Got questions about saving radish seeds?
You’re not alone! Here are answers to the most common concerns—from timing to troubleshooting—to help you master the process and ensure a bountiful harvest next season.
When is the best time to harvest radish seeds?
Harvest seeds when the radish pods turn from green to brown and begin to dry on the plant—usually 60–90 days after flowering. Wait until the pods rattle when shaken; this signals maturity. If left too long, they’ll shatter and scatter seeds. Aim for late summer or early fall for optimal timing in most climates.
Why do radish seeds need cold stratification?
Radishes are biennials, meaning they need a cold period to break dormancy and germinate reliably. Cold stratification (40–50°F for 2–4 weeks) mimics winter conditions, ensuring stronger seedlings. Skip this step, and you might end up with slow, uneven germination—or no sprouts at all!
Can I save seeds from store-bought radishes?
Not reliably! Store-bought radishes are often hybrid varieties (F1 hybrids) bred for uniformity, not seed viability. For successful seed saving, grow open-pollinated or heirloom varieties like ‘French Breakfast’ or ‘Cherry Belle.’ Check seed packets for “seed-saving friendly” labels.
How do I prevent cross-pollination between radish varieties?
Radishes are self-pollinating, but bees can still mix varieties if plants are too close. To avoid contamination, space different types by at least 500 feet or isolate them with a mesh bag during flowering. For small gardens, grow one variety at a time or save seeds from the first flowers to minimize mixing.
What if my radish seeds won’t germinate?
Try these fixes: Test viability by soaking seeds in water—floaters are likely dead. If seeds are viable but sluggish, re-stratify them or soak in warm water for 12 hours before planting. Poor soil or old seeds (over 2 years) can also hinder germination. For stubborn cases, try a sandwich method: layer seeds between damp paper towels in a sealed bag for 3–5 days.
How long can I store saved radish seeds?
Properly dried and stored seeds stay viable for 2–4 years in a cool, dark place (32–40°F and 30–50% humidity). Use airtight containers like glass jars with silica gel packets. Label seeds with the variety and date! After 4 years, test a few for germination before planting.
Wrapping up and next steps
Saving radish seeds through cold stratification is a rewarding way to ensure reliable germination and homegrown success next season! By mastering this simple yet effective technique, you’ll cut costs, preserve heirloom varieties, and extend your growing season with confidence. 🌱
Ready to put your new skills to work? Start by selecting your healthiest radishes, then grab your supplies and dive into seed-saving—your future harvest (and wallet!) will thank you.