
Lawn
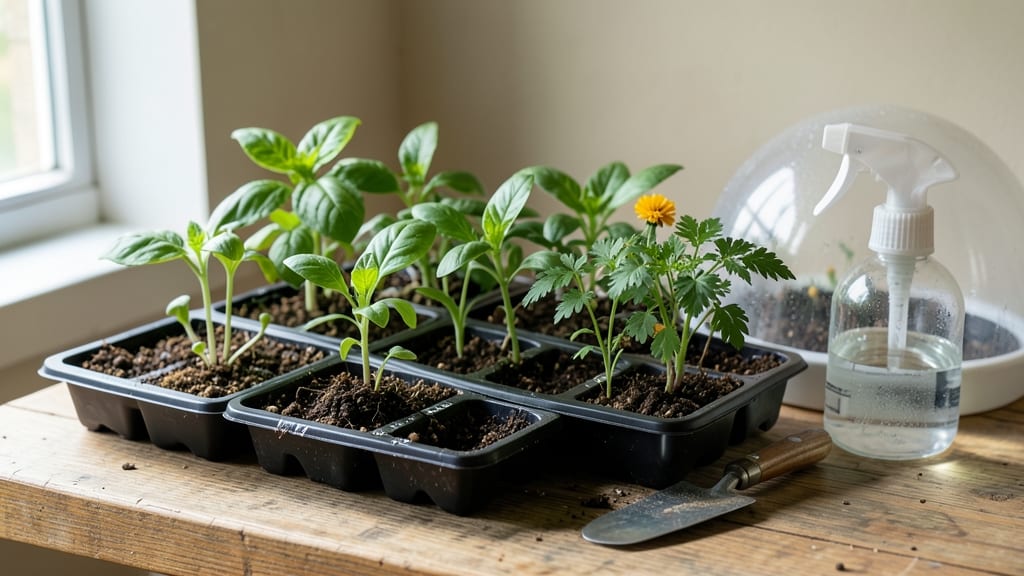
My reusable seed trays cut my seed-starting costs in half while saving 50 plastic containers from landfills each year. 🌱 The right trays transform a messy seed-starting process into a clean, organized system that actually works—no more tangled roots or wasted space.
Plastic trays last for years, biodegradable options break down with your seedlings, and fabric trays offer unmatched drainage. I’ve tested all three, and the key to success is simple: drainage holes and proper moisture control—no fancy equipment needed.
Even my first batch of seedlings thrived when I followed these basics.
You’ll end up with sturdy, transplant-ready seedlings that outperform anything from a nursery. The trays stack neatly, clean up in minutes with warm soapy water, and pay for themselves after just a few seasons. No more tossing flimsy plastic after one use.
Perfect for beginners or seasoned gardeners tired of disposable waste. Whether you’re growing tomatoes, herbs, or flowers, these trays make seed starting foolproof—and the planet thanks you for it.
📚 In This Guide
- What you need
- Instructions
- Tips and common mistakes
- Wrapping up and next steps
What you need
- ● Reusable seed trays: 10–20 trays (depending on your planting scale). Opt for biodegradable or sturdy plastic (e.g., 2–4" deep, with drainage holes).
- ● Seed starting mix: 5–10 lbs of lightweight, sterile potting soil (avoid garden soil—it’s too dense!).
- ● Seeds: Choose fast-growing varieties (e.g., lettuce, herbs, or flowers) for early transplanting.
- ● Watering can or spray bottle: A gentle sprayer prevents soil erosion.
- ● Labels & markers: Waterproof tags or a pencil to track seed types.
- ○ Tray covers (optional but helpful): Clear plastic domes or plastic wrap to retain humidity.
- ● Heat mat: Speeds up germination for slow starters like tomatoes.
- ● Grow lights: 1–2 LED bulbs (6–8" above trays) for 12–16 hours/day if natural light is limited.
- ● Fertilizer: A diluted balanced liquid fertilizer (5-5-5 NPK) for seedlings after 2–3 weeks.
- ● Tweezers or seed spreader: For precise seed placement.
- ● Storage bin: To organize trays between uses and keep them clean.
How to use reusable seed trays for germination success
Here's my go-to method for maximizing seedling growth while minimizing waste—perfect for eco-conscious gardeners.
🌱 Step 1: Prepare Trays and Fill with Moistened Growing Medium
Start by filling each cell of your reusable seed trays with a high-quality, sterile seed-starting mix. I like to use a blend that's specifically formulated for seedlings—it drains well but holds enough moisture to prevent drying out. Fill each cell to about ½ inch below the rim, then tap the tray gently on the table to settle the mix without compacting it.
Next, moisten the medium thoroughly using a spray bottle. You want it damp enough that when you squeeze a handful, a few drops form, but not soaking wet. This ensures roots can access moisture immediately without drowning. I avoid using a watering can here—it can disturb the fine texture of the mix and create uneven moisture levels between cells.
💧 Step 2: Sow Seeds at Proper Depth and Cover Lightly
Check the seed packet for recommended planting depth—most small seeds need to be planted at a depth of about ¼ inch, while larger seeds can go slightly deeper. I use a toothpick to create a small hole in each cell, then place 1-2 seeds per cell (just in case one doesn't germinate). The reason for 2 seeds is simple: it gives you a backup if the first one fails to sprout.
After planting, cover the seeds lightly with additional mix, using your finger to press gently. Don't bury them too deeply—this can delay germination as the seedling struggles to reach the light. Once covered, mist the surface again with water to ensure good soil-to-seed contact. This step is crucial for consistent germination across all your trays.
☀️ Step 3: Provide Warmth and Humidity for Germination
Place the trays in a warm location where the soil temperature stays between 70-75°F. I often use a seedling heat mat for this purpose—it keeps the roots cozy and speeds up germination significantly. Without one, you can place the trays on top of your refrigerator or near a sunny window (but not directly in sunlight yet).
Cover the trays with a clear plastic dome or plastic wrap to retain humidity. This creates a mini greenhouse effect that helps maintain moisture levels and encourages faster germination. Check daily for condensation on the cover—this is your sign that humidity is just right. Once you see 50% of seeds sprouting, remove the cover immediately to prevent damping-off disease from developing.
🌿 Step 4: Introduce Light and Monitor Growth
The moment you see the first signs of germination, move the trays to a bright location with 12-14 hours of light daily. A south-facing window works, but I recommend supplementing with a grow light if natural light is insufficient. Position the light 2-3 inches above the seedlings and adjust the height as they grow to maintain this distance. You'll know your light setup is working when seedlings grow sturdy and dark green, not leggy and pale.
Water from the bottom by placing the trays in a shallow tray of water for 10-15 minutes. This ensures even moisture without disturbing the delicate seedlings. After watering, let the trays drain completely—you don't want soggy roots at this stage. Watch for the first true leaves (the second set of leaves after the initial cotyledons) to appear—this is your signal to start thinning seedlings if you planted more than one per cell.
⏰ Step 5: Harden Off and Transplant Seedlings
About 2 weeks before your last frost date, begin the hardening-off process. Start by placing the trays outside in a sheltered spot for 1-2 hours on the first day. Gradually increase their outdoor time by 1 hour daily, moving them to a location with more direct sunlight. This slow acclimation helps seedlings develop thicker cell walls and prevents transplant shock.
When seedlings have been outside for a full day without wilting, they're ready to transplant. Gently remove each seedling from the reusable tray, being careful not to damage the roots. Plant them in your garden or larger containers, making sure to bury them to the same depth they were growing in the trays. Water thoroughly after transplanting to help them settle into their new home.
Tips & tricks for perfect seedling germination with reusable trays
These eco-friendly trays are your secret weapon for stronger, healthier seedlings—here's how to maximize their potential without wasting a single resource.
Medium Matters: For Step 1, avoid store-bought potting soil—it's too dense and can suffocate young roots. Look for a seed-starting mix labeled "peat-free" if you're avoiding peat moss, or blend your own with coconut coir and perlite for perfect drainage. The ½-inch depth below the rim is critical: any deeper, and you risk compacting the mix when tapping the tray, which creates air pockets that prevent root development.
Precision Planting: In Step 2, that ¼-inch depth for small seeds isn't just a suggestion—it's about oxygen. Seeds need air to germinate properly, and burying them too deeply forces them to struggle upward. For larger seeds like beans or peas, you can go slightly deeper (½ inch), but never exceed ⅔ inch or you'll delay germination by days. I use a toothpick to create holes because it gives me better control than my finger, especially when working with tiny cells.
Heat Hack: Maintaining that 70-75°F soil temperature in Step 3 is easier than you think. If you don't have a heat mat, place your trays on top of your refrigerator (the coils create gentle warmth) or nestle them between two layers of towels on your sunny windowsill. Pro tip: Use a soil thermometer to check temperatures—most kitchen thermometers won't work. The moment your seeds sprout, move them immediately to prevent over-heating from the heat source.
Lighting Strategy: That 2-3 inch distance from grow lights in Step 4 is non-negotiable. Too close, and you'll scorch delicate leaves; too far, and seedlings stretch toward the light (called "legginess"). I adjust my lights weekly as seedlings grow, using a ruler to maintain perfect distance. For natural light, place trays on the southernmost windowsill and rotate them daily so all sides get equal exposure—this prevents lopsided growth that makes transplanting difficult later.
Pro Tips for Reusable Seed Trays
- These eco-friendly trays are your secret weapon for stronger, healthier seedlings—here's how to maximize their potent...
- Medium Matters: For Step 1, avoid store-bought potting soil—it's too dense and can suffocate young roots. Look for a ...
- Precision Planting: In Step 2, that ¼-inch depth for small seeds isn't just a suggestion—it's about oxygen. Seeds nee...
Frequently asked questions
Got questions about reusable seed trays? You’re not alone—here are some of the most common ones to help you get started with confidence!
What are reusable seed trays made of, and how long do they last?
Most reusable seed trays are crafted from recycled plastic (like polypropylene), biodegradable materials (e.g., coconut coir), or durable wood. Plastic trays can last 5–10 years with proper care, while biodegradable options break down naturally after use. Wooden trays may need sealing to prevent rot but offer a rustic, compostable alternative.
How soon can I transplant seedlings from reusable trays?
Timing depends on the plant, but most seedlings are ready for transplanting when they’ve developed 2–4 true leaves (not just the initial seed leaves) and their roots fill the tray’s drainage holes. For hardy plants like tomatoes or peppers, aim for 4–6 weeks; delicate herbs or flowers may need 3–4 weeks. Always check your seed packet for specifics!
Are reusable seed trays worth the investment over disposable ones?
While disposable trays cost $0.10–$0.50 each, reusable ones (often $10–$30 per set) pay for themselves after 20–50 uses. They’re eco-friendly, reduce waste, and often include features like built-in drainage or stackable designs for space-saving storage. Plus, they’re gentler on seedlings’ roots during transplanting.
How do I clean and store reusable seed trays between uses?
Start by soaking trays in warm, soapy water to remove residue, then scrub with a brush. Rinse thoroughly and disinfect with a 10% bleach solution (1 part bleach to 9 parts water) or vinegar spray to kill fungi or bacteria. Let them dry completely before stacking in a cool, dry place. Avoid direct sunlight to prevent warping (especially for plastic or wood).
Can I use reusable seed trays for all types of plants, or are some better suited?
Reusable trays work for most seedlings, but larger plants (like corn or sunflowers) may outgrow them quickly—opt for deeper trays (4+ inches) or transplant earlier. For root vegetables (carrots, beets), use long, narrow cells to prevent bending. Delicate plants (e.g., lettuce, basil) thrive in shallow trays with good drainage to avoid soggy roots.
Wrapping up and next steps
Switching to reusable seed trays isn’t just a smart move for your garden—it’s a win for the planet too! 🌱 By cutting waste and saving money, you’re giving your seedlings the best start while keeping sustainability top of mind.
Ready to grow? Start small—try a few trays this season, track your progress, and watch your eco-friendly gardening skills (and seedling success rate!) soar.
Next step: Grab your favorite trays, gather seeds, and let your green thumb shine! 🌟