
Lawn
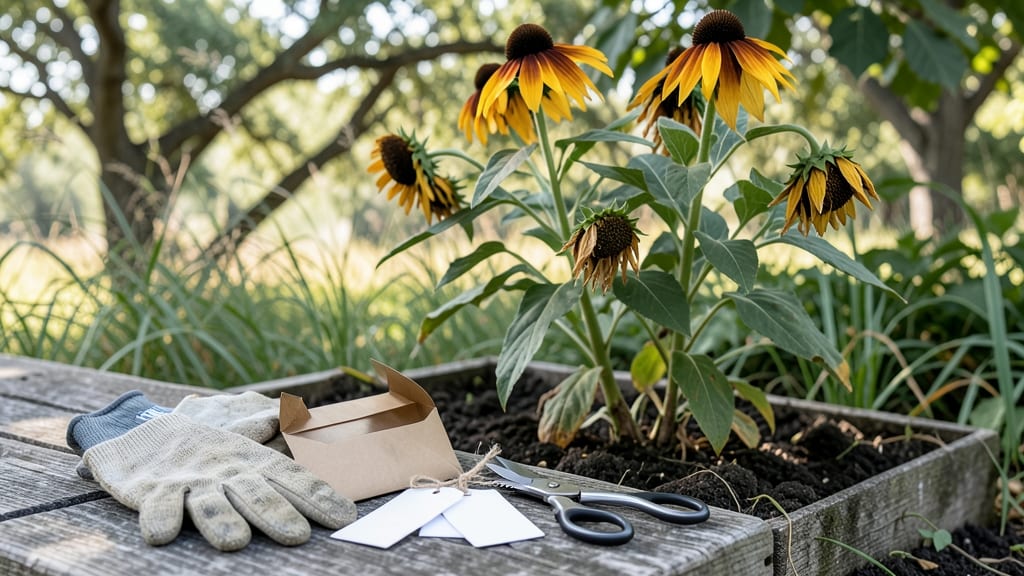
Rudbeckia seed collection is like saving sunshine for next summer—those papery brown seed heads hold the promise of bold, cheerful blooms all over again. 🌻 I’ve saved seeds from my rudbeckias for years, and the process is simpler than you’d think: wait for the seed heads to turn a crisp brown, then snip them before they scatter. The key is timing—harvest too early, and the seeds won’t be fully mature; wait too long, and they’ll fly away on the wind.
You’ll need just a few tools: sharp scissors or pruners, a paper bag for drying, and a cool, dry place to store them. The seeds themselves are tiny but mighty—each head can yield dozens of seeds for next year’s garden.
Once you’ve collected them, let the heads dry completely before breaking them open to release the seeds. This step ensures they’ll stay viable through storage.
By storing them in a sealed envelope or jar in a dark, cool spot, you’ll keep those seeds fresh for up to two years. Imagine next summer’s garden bursting with those same golden-yellow blooms, all from seeds you collected yourself.
The process is foolproof—even if you’ve never saved seeds before, rudbeckias are one of the easiest plants to work with.
This method works for any rudbeckia variety, whether you’re growing the classic ‘Goldsturm’ or a newer heirloom type. Once you’ve mastered it, you’ll never buy seeds again—just let nature do the work for you. Ready to turn this year’s flowers into next year’s garden?
📚 In This Guide
- What you need
- Instructions
- Tips and common mistakes
- Wrapping up and next steps
What you need
- ● Pruning shears or sharp scissors – A pair with clean, sharp blades (e.g., Felco or Fiskars) to snip seed heads without crushing them.
- ● Paper bags or brown lunch bags – 1-2 per plant (unbleached, breathable material prevents mold).
- ● Newspaper or seed-starting trays – For drying seeds indoors (1-2 trays or sheets).
- ● Small envelopes or airtight containers – 3x5” seed envelopes (or mason jars with lids) for long-term storage.
- ● Permanent marker – To label varieties (e.g., ‘Goldsturm,’ ‘Cherokee Sunset’).
- ● Glove – A lightweight pair to protect hands from thistly seed heads.
- ● Fan or dehumidifier – Speeds up drying in humid climates.
- ● Desiccant packs – For containers to absorb moisture during storage.
- ● Magnifying glass – Helps spot tiny seeds if your eyes need a boost!
Step-by-step guide to collecting rudbeckia seeds
Here’s how I save seeds from my rudbeckia blooms—simple, foolproof, and ready for next year’s garden.
🌱 Step 1: Wait for Seed Heads to Dry Completely
Leave the spent blooms on the plant until the seed heads turn a deep brown and feel dry to the touch. Rudbeckia seeds mature when the center cones crisp up like paper—this usually happens in late fall or early winter, depending on your climate. I know they’re ready when I can gently crush a seed head between my fingers and hear it crackle.
Don’t rush this step. Harvesting too early means immature seeds that won’t sprout. If frost hits before the seeds dry, cut the stems and hang them upside down indoors to finish drying. A sunny windowsill works perfectly for this.
🪴 Step 2: Harvest and Remove Seeds from Dried Heads
Once the seed heads are fully dry, cut the stems and bring them indoors. Place each dried head in a paper bag—this prevents seeds from scattering everywhere. Shake the bag gently or rub the seed head between your palms to release the seeds. You’ll see black, papery seeds falling out easily.
I like to do this on a clean sheet of newspaper or parchment paper to catch any stray seeds. Rudbeckia seeds are lightweight, so a slight breeze will carry them away if you’re not careful. A quiet workspace makes this step much easier.
💧 Step 3: Clean and Dry Seeds Thoroughly
Spread the collected seeds on a dry, clean surface to air-dry for an additional 3-5 days. This extra drying prevents mold during storage. I use a shallow tray or even a clean cookie sheet lined with parchment paper. Stir the seeds occasionally to ensure even drying.
Watch for any signs of moisture—if the seeds feel damp or sticky, give them a few more days. Once completely dry, they should feel light and brittle. Store them in a labeled envelope or small glass jar with a tight-sealing lid.
⏰ Step 4: Store Seeds in a Cool, Dry Place
Keep the sealed container in a cool, dark spot—like a pantry or refrigerator—where the temperature stays between 35-50°F. Rudbeckia seeds can last 2-3 years under these conditions, though germination rates drop slightly after the first year. I always label my jars with the variety and harvest date to stay organized.
Check the seeds occasionally for signs of moisture or pests. If you notice any issues, transfer them to a fresh, dry container immediately. Proper storage ensures you’ll have vibrant rudbeckia blooms year after year with minimal effort.
Tips & tricks for perfect rudbeckia seed collection
Took me a while to figure these out, so here goes—these little tricks make all the difference when saving rudbeckia seeds for next season.
Timing Secret: In Step 1, when you're waiting for those seed heads to dry, don't just rely on color—give them the "crush test." The crisp, crackling sound when you gently squeeze a seed head is your green light. I've learned this the hard way after planting immature seeds that never sprouted. If frost threatens, bring those stems indoors immediately and hang them upside down in a dry spot. A sunny windowsill is perfect for finishing the drying process.
Harvest Strategy: For Step 2, I've found that working on a clean sheet of newspaper or parchment paper saves more seeds than you'd think. Those lightweight rudbeckia seeds have a habit of floating away at the slightest breeze. Place your paper on a flat surface in a quiet room—this prevents seed loss and makes cleanup effortless. And here's what nobody tells you—give those dried heads a good shake over the paper first, then gently rub them between your palms to release every last seed.
Drying Wisdom: When you're air-drying those seeds for that extra 3-5 days in Step 3, don't just toss them on a tray and forget about them. Stir them occasionally to ensure even drying—this prevents mold from forming in any damp spots. I like to use a clean cookie sheet lined with parchment paper because it's easy to see if any seeds are still moist. Once they feel light and brittle, you're good to go. Pro tip: If you're in a humid climate, consider adding a small silica gel packet to your storage container later—it helps absorb any lingering moisture.
Storage Wisdom: For the final step, that 35-50°F temperature range is crucial. I keep my seed jars in the back of my pantry where it stays consistently cool and dark. The refrigerator works too, but avoid the door where temperature fluctuations occur. Labeling your jars with the variety and harvest date is a game-changer—next year when you're ready to plant, you won't waste time wondering which seeds are which. And here's another tip: I like to add a tiny packet of rice or silica gel to my jars before sealing them. This extra step helps maintain the perfect dry environment for years to come.
Pro Tips for Rudbeckia Seed Collection
- Took me a while to figure these out, so here goes—these little tricks make all the difference when saving rudbeckia seeds for next season.
- Timing Secret: In Step 1, when you're waiting for those seed heads to dry, don't just rely on color—give them the "crush test."
- Harvest Strategy: For Step 2, I've found that working on a clean sheet of newspaper or parchment paper saves more seeds than you'd think.
Frequently asked questions
Got questions about collecting rudbeckia seeds?
You’re not alone! Here are answers to the most common queries to help you master the process and ensure your seeds stay viable for next year’s vibrant blooms.
When is the best time to collect rudbeckia seeds?
Collect seeds when the flower heads turn brown and dry out—usually late summer to early fall (August–October, depending on your climate). Wait until the seed pods are crispy to the touch but haven’t scattered yet. Pro tip: Morning harvests avoid humidity, reducing mold risks!
How do I know if the seeds are ready to harvest?
Press a seed pod gently—if it crumbles easily and releases seeds, they’re ready! Look for dark, plump seeds inside (discard any shriveled or hollow ones). Test: Shake a dried head over paper; if seeds rain down, they’re perfect for collecting.
Can I collect seeds from hybrid rudbeckias?
Hybrid rudbeckias (like ‘Goldsturm’) may not produce true-to-type seeds. For consistent blooms, opt for heirloom varieties or save seeds from open-pollinated plants. Alternative: Ask local nurseries or seed swap groups for reliable sources!
How long can rudbeckia seeds stay viable in storage?
Properly dried and stored seeds (5–10% moisture, cool/dark) last 2–3 years. Check viability annually by planting a few—if germination drops below 50%, refresh your supply. Bonus: Label seed packets with the collection date!
What if birds or squirrels eat my seeds before I collect them?
Cover seed heads with fine mesh bags (like butterfly netting) once they dry. Remove the bags when harvesting to avoid trapping pests. Quick fix: Shake heads over a tarp daily to deter wildlife while they’re still maturing.
Do rudbeckia seeds need stratification to germinate?
Nope! Unlike some perennials, rudbeckia seeds do not require cold treatment. Simply sow them in spring or fall (after frost) in well-draining soil. Speed tip: Soak seeds overnight in warm water for faster sprouting.
Wrapping up and next steps
Collecting and storing rudbeckia seeds is a rewarding way to ensure vibrant blooms year after year—without breaking the bank! 🌻 With the right timing, tools, and care, you’ll have a stash of seeds ready to replant and share with fellow gardeners.
Whether you’re a seasoned gardener or just starting out, every seed you save is a step toward a more sustainable and beautiful garden.
Ready to put your new skills to the test? Grab your gloves, mark your calendar, and start planning your next planting season! Your future rudbeckia blooms will thank you.