
Lawn
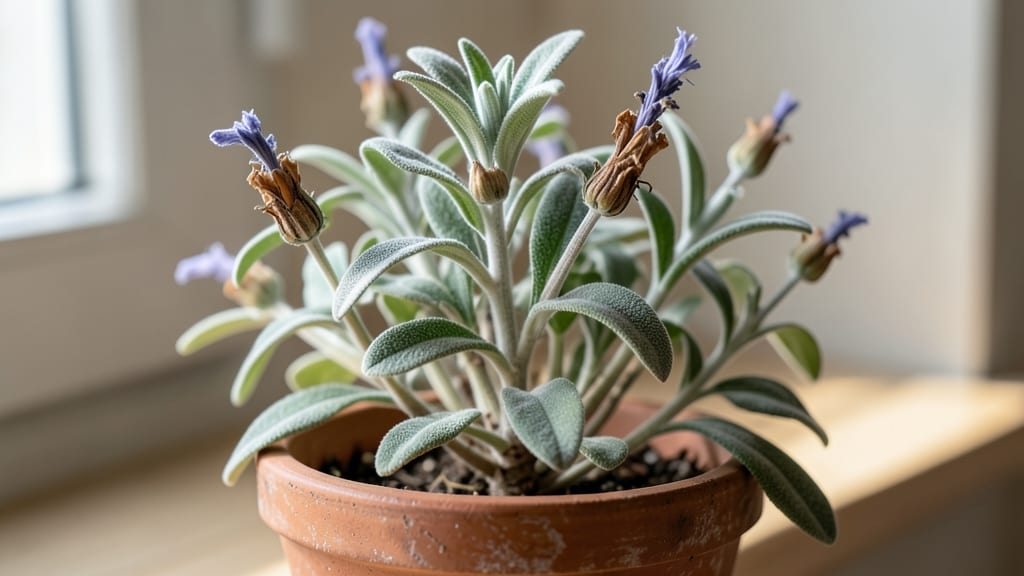
Harvesting sage seed pods before they twist shut is the secret to saving viable seeds all year. 🌿 I’ve spent years perfecting this method—because dried, brittle pods release seeds that won’t germinate, while fresh ones yield strong new plants.
The key moment comes when the pods turn light brown but haven’t fully hardened, usually in late summer or early fall.
You’ll need just three things: sharp pruning shears, a paper bag, and a warm, dry spot. Snip the pods when they’re still pliable, then gently twist them open to release the tiny seeds.
Spread them on a tray to dry completely before storing in an airtight container. This simple process turns a kitchen herb into a year-round gardening resource.
Once dried, these seeds need a cold treatment to break dormancy—just pop them in the fridge for 4-6 weeks before planting. Start them indoors in early spring for sturdy seedlings, or sow directly in well-draining soil after the last frost.
Young sage plants thrive in full sun and dry conditions, so don’t overwater—this hardy herb hates soggy roots.
Common mistakes? Harvesting too late or planting seeds without stratification. But once you nail the timing, you’ll have sage plants that outlast store-bought starts by years. The first harvest of your homegrown sage is worth every twist of those stubborn pods.
📚 In This Guide
- What you need
- Instructions
- Tips and common mistakes
- Wrapping up and next steps
What you need
- ● Mature sage plants (preferably Salvia officinalis or Salvia apiana) with fully developed seed pods (brown, papery, and slightly twisted). Aim for 10–20 plants for a bountiful harvest.
- ● Pruning shears or sharp scissors (sterilized with rubbing alcohol) to snip pods cleanly without damaging stems.
- ● Paper bags or breathable fabric sacks (2–3 large bags) to collect pods—avoid plastic to prevent moisture buildup.
- ● Brown paper or newspaper (1–2 sheets) for drying pods indoors.
- ● Air-tight glass jars or resealable containers (2–4 jars, 8–16 oz each) for long-term storage.
- ● Gloves (gardening or thin nitrile) to protect hands from prickly stems.
- ● Magnifying glass (for inspecting pods for pests or damage).
- ● Food dehydrator or oven (set to 100–110°F) for faster drying if humidity is high.
- ● Labeling tags & permanent marker to note harvest date and sage variety.
- ● Twist-tie or rubber bands to bundle stems for easier handling.
How to harvest sage seed pods without breaking them
Here's the gentle method I use to collect sage seeds year after year without damaging the pods.
🌿 Step 1: Identify and Wait for Mature Seed Pods
Look for seed pods that have turned from green to a deep brown color—this means they're fully mature and ready for harvest. You'll find them clustered along the sage plant's woody stems, usually in late summer or early fall. Gently squeeze one between your fingers; if it feels dry and brittle but doesn't crumble, it's ready.
Harvesting too early means the seeds won't be viable, while waiting too long risks them scattering on the ground. I like to check my plants every 3-4 days during peak seed production. The pods should feel light in your hand, almost hollow, which signals the seeds are fully developed inside.
🪴 Step 2: Cut the Pods Gently From the Stem
Use clean, sharp scissors or pruning shears to snip the seed pods directly from the stem. Cut just above the leaf joint to avoid damaging the plant. I always work on a dry day when the pods aren't damp—wet pods are more prone to breaking when handled.
Place the cut pods in a paper bag or envelope immediately. The paper helps absorb any moisture and prevents mold. Don't rinse the pods or subject them to water at this stage—excess moisture can cause them to split open prematurely and ruin the seeds inside.
💧 Step 3: Dry the Pods Completely Before Handling
Spread the pods out on a clean, dry surface in a single layer. I use a baking sheet lined with parchment paper for this step. Let them dry in a warm, well-ventilated area for 5-7 days, flipping them occasionally to ensure even drying. The pods are ready when they feel completely dry and make a hollow sound when tapped together.
If your climate is humid, you might need to extend the drying time to 10 days or use a small fan to circulate air around the pods. Proper drying prevents mold and ensures the seeds stay viable for planting next season.
✂️ Step 4: Extract Seeds Without Breaking the Pods
Once the pods are completely dry, gently twist each one with your fingers to open it. The seeds should come out easily without the pod crumbling. If a pod resists, it might not be fully dry—let it sit a little longer. I place a small bowl beneath my work area to catch any seeds that fall during the process.
For stubborn pods, use a clean, dry toothpick to carefully pry open the seam. Avoid pressing too hard, as this can damage the seeds inside. Once all the seeds are out, store them in an airtight container in a cool, dark place until you're ready to plant.
🌱 Step 5: Store Seeds for Long-Term Viability
Place the extracted seeds in a small envelope or airtight container with a silica gel packet to absorb any remaining moisture. Label the container with the date and sage variety. Store it in a cool, dark place like a refrigerator or basement. Sage seeds can remain viable for 2-3 years when stored properly.
Check the seeds periodically for signs of mold or pests. If you notice any issues, transfer the seeds to a new container immediately. Proper storage ensures you'll have fresh sage plants ready to grow whenever you need them.
Tips & tricks for perfect sage seed pod harvesting
Between us, harvesting sage seed pods without breaking them took me years to perfect—here's how I finally cracked it.
Timing is Everything: In Step 1, those 3-4 day checks are critical. I learned the hard way that waiting until pods are fully brown but still slightly flexible (not brittle) gives me the best chance of opening them cleanly later. If they're too green, seeds won't be viable; if too dry, they'll crumble when you try to twist them open.
Tool Selection Matters: For Step 2, I now use small pruning shears instead of scissors—they give me better leverage to cut cleanly just above the leaf joint. The key is making one clean cut rather than sawing back and forth. I also keep a small spray bottle of water nearby to quickly dampen any accidentally nicked stems, which helps prevent infection.
Drying Strategy: In Step 3, the 5-7 day drying period is non-negotiable, but I've found that placing the pods on a wire cooling rack instead of a baking sheet allows air to circulate on all sides, speeding up the process by about 24 hours. The hollow sound when tapped is your best indicator—it means the moisture content is perfect for seed extraction.
Storage Hack: For Step 5, I've switched to using small glass jars with vacuum seals instead of envelopes. The vacuum removes nearly all air, which dramatically extends seed viability. I also add a tiny pinch of food-grade diatomaceous earth to the bottom of each jar as a natural pest deterrent—it's completely safe for seeds but keeps insects away.
Pro Tips for Sage Seed Pods
- Between us, harvesting sage seed pods without breaking them took me years to perfect—here's how I finally cracked it.
- Timing is Everything: In Step 1, those 3-4 day checks are critical. I learned the hard way that waiting until pods ar...
- Tool Selection Matters: For Step 2, I now use small pruning shears instead of scissors—they give me better leverage t...
Frequently asked questions
Got questions about harvesting, storing, or using sage seed pods?
Here are some of the most common ones—and their answers!
When is the best time to harvest sage seed pods?
Harvest sage seed pods in late summer to early fall (August–September), when they turn brown and papery but haven’t split open. Wait until the seeds rattle inside—this means they’re fully mature and ready for collection. Avoid harvesting too early, or the seeds won’t be viable.
How long can I store sage seed pods before they lose viability?
Properly dried and stored sage seed pods stay viable for 1–2 years in a cool, dark place (like a sealed jar in the fridge or freezer). For longer storage, remove seeds from pods and keep them in an airtight container with a desiccant packet to prevent moisture damage.
What can I do if my sage seed pods keep twisting off before I harvest them?
Twisting is common! To prevent it, harvest pods in the morning when they’re dry and firm. Use sharp pruning shears (not your hands) to snip stems just above the pod. If pods still twist, try tying stems together with twine before they fully mature to stabilize them.
Can I use sage seed pods for anything other than saving seeds?
Once dried, the pods themselves can be used in herbal teas (for a mild, earthy flavor) or as natural potpourri. The seeds inside are also edible—sprinkle them on salads or toast them lightly for a nutty crunch. Just avoid overconsumption, as sage can be strong in flavor.
What should I do if my sage seed pods develop mold or pests?
If you spot mold, discard the affected pods immediately—moldy seeds won’t sprout. For pests (like aphids), spray plants with neem oil or insecticidal soap before harvesting. Store pods in mesh bags or paper bags (not plastic) to allow airflow and deter moisture-related issues.
Wrapping up and next steps
Harvesting sage seed pods with twist-resistant techniques ensures you can enjoy their benefits year-round—whether for culinary, medicinal, or ornamental use. By following the right steps and storing them properly, you’ll unlock a sustainable way to preserve nature’s bounty without the frustration of broken stems.
Now that you’re equipped with the know-how, why not try it this weekend? Grab your pruners, gather your supplies, and start your twist-free seed-saving adventure today! 🌿✨