
Planting
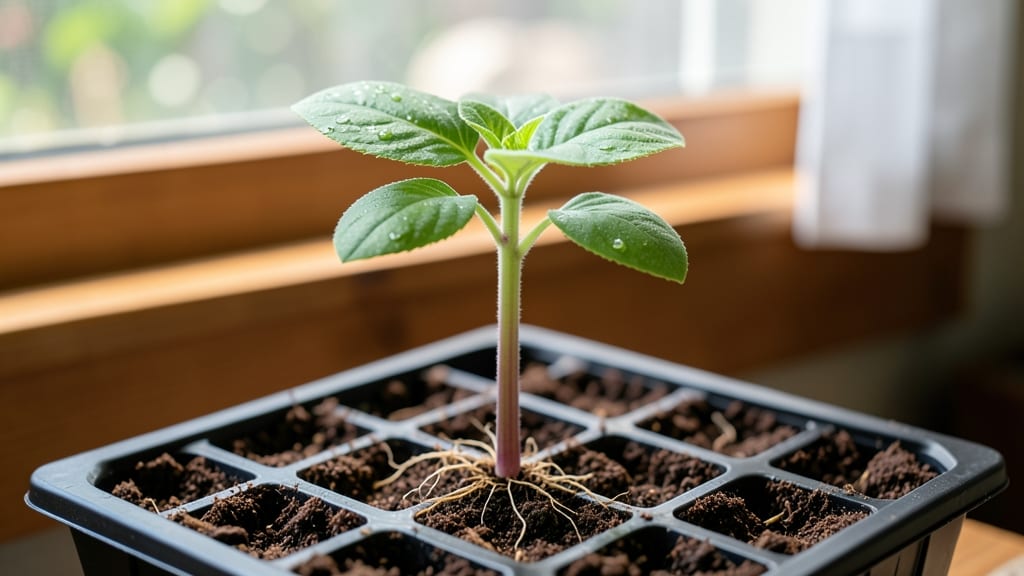
A single seed grows into a plant—the promise of life hidden in a tiny shell. 🌱 The journey from seed to mature plant isn’t magic; it’s science, patience, and a few simple care rules.
I’ve watched dozens of seeds sprout into strong seedlings by following these exact principles, and you can too.
First, the seed needs three things to wake up: warmth, moisture, and darkness. Plant it in damp soil, about twice as deep as the seed is wide, and keep it consistently moist.
A clear plastic dome or plastic wrap over the container creates the perfect humid microclimate. Within days, you’ll see tiny roots breaking through the seed coat—this is germination in action.
Once sprouts appear, move them to bright, indirect light. Thin seedlings if they’re crowded, giving each plant room to grow strong stems. Within 4-6 weeks, you’ll have sturdy seedlings ready for transplanting.
The key? Consistency: water when the top inch of soil feels dry, and avoid letting them sit in soggy soil.
This process works for tomatoes, herbs, flowers, or vegetables—just adjust timing and care based on the plant. The first true leaves (not the initial seed leaves) signal the real growth phase. By following these steps, you’ll go from seed to harvest-ready plants every time.
📚 In This Guide
- What you need
- Instructions
- Tips and common mistakes
- Wrapping up and next steps
What you need
- ● Seeds: Choose fresh, high-quality seeds (check the packet for germination rates). Pro tip: Start with easy-to-grow varieties like marigolds, beans, or basil for beginners!
- ● Growing Containers: Seed trays or pots (3–4 inches deep) – 3–6 per seed type (e.g., 4 for herbs, 6 for veggies).
- ○ Optional: Biodegradable pots (peat or coconut fiber) to avoid transplant shock.
- ● Growing Medium: Seed-starting mix (sterilized, lightweight, and free of weeds/fertilizers). Quantity: Enough to fill containers 2–3 inches deep.
- ○ Optional: Perlite or vermiculite (10–20% mix) for drainage.
- ● Water: Room-temperature, dechlorinated water (let tap water sit 24 hours or use filtered water).
- ● Spray Bottle: 8–16 oz with a fine-mist nozzle for gentle watering.
- ○ Heat Mat (Optional but Helpful): Germination mat (70–85°F range) for slow-germinating seeds (e.g., tomatoes, peppers).
- ● Grow Lights or Sunny Spot: LED grow lights (12–16 hours/day) or a south-facing windowsill (6+ hours of sunlight).
- ○ Optional: Humidity dome to retain moisture (especially for tropical seeds like ferns).
- ● Labels & Pencil: Waterproof labels + pencil to track seed types/planting dates.
- ● Temperature: Ideal range: 65–75°F (18–24°C). Check seed packets for specific needs (e.g., peppers need warmth!).
- ● Humidity: Keep soil consistently moist (not soggy!). Pro tip: Cover trays with plastic wrap until sprouts appear.
- ● Light: Avoid direct sunlight until seedlings are 1–2 inches tall (prevents legginess).
- ● pH Test Kit (aim for 6.0–7.0 for most seeds).
- ● Fertilizer (balanced, low-nitrogen starter like 5-5-5 or fish emulsion).
- ● Tweezers (for delicate seed handling).
- ● Thermometer (to monitor soil temp).
How to watch a seed transform into a thriving plant
Turn tiny seeds into sturdy seedlings with this foolproof method—no green thumb required.
🌱 Step 1: Prepare the Seed and Growing Medium
Start by soaking your seeds in lukewarm water for 12-24 hours. This softens the seed coat and kickstarts germination—especially important for hard-shelled varieties. Drain the water completely before planting, as excess moisture can rot seeds before they even sprout.
Fill a small pot or seed tray with light, well-draining soil mix (I like a blend of potting soil and perlite). Moisten it until damp but not soggy—think of a wrung-out sponge. Press the soil down gently to remove air pockets, then create a shallow depression about ¼ inch deep for your seed. This ensures proper contact with moisture and warmth.
💧 Step 2: Plant and Provide Ideal Conditions
Place your seed in the depression, covering it with just enough soil to hide it completely. For small seeds, a light sprinkle is enough—don't bury them too deep. Gently pat the soil around the seed to secure it without compacting it tightly. This balance keeps the seed in place while allowing roots to emerge easily.
Create a mini greenhouse by covering the pot with plastic wrap or a humidity dome. This traps warmth and moisture, which are critical for germination. Place the container in a warm spot—70-80°F is ideal—like on top of your fridge or near a sunny window. Check daily for condensation on the plastic; if it's dry, mist lightly with water to maintain humidity.
☀️ Step 3: Wait for and Care for Sprouts
Germination can take anywhere from 3 days to 3 weeks, depending on the seed type. Watch for the first sign of life—a tiny shoot pushing through the soil. Once you see this, remove the plastic cover immediately to prevent fungal growth. This is the moment you'll see the seed's energy turn into a real plant.
Move the pot to a bright location with indirect light for the first week. Direct sunlight can scorch tender seedlings, so a north-facing window or a shaded spot works best. Water gently from the bottom by placing the pot in ½ inch of water for 10 minutes, then let it drain completely. This prevents disturbing the delicate roots while ensuring even moisture.
🌿 Step 4: Support Early Growth and Prevent Common Pitfalls
When your seedling develops its first set of true leaves (the second set after the initial cotyledons), it's ready for a bit more care. Thin out weaker seedlings if you planted multiple seeds in one pot, leaving the strongest one. This gives the remaining plant room to grow without competing for nutrients.
Rotate the pot a quarter turn daily to encourage even growth toward the light. Leggy seedlings (long, weak stems) mean it's not getting enough light—move it closer to a window or under a grow light. Keep the soil consistently moist but never waterlogged; let the top inch dry out between waterings to prevent root rot.
⏰ Step 5: Transition to Independent Plant Life
After 4-6 weeks, when your seedling has 3-4 sets of true leaves, it's ready for the next phase. Harden it off by placing it outside in a sheltered spot for 1-2 hours the first day, gradually increasing time over 7-10 days. This prepares it for outdoor conditions without shock.
Once hardened off, transplant your seedling into a larger pot or garden bed, burying it up to the first set of true leaves. This encourages strong root development. Keep an eye on it for the first week, ensuring it gets enough water and light. You'll know it's thriving when new leaves appear and the plant stands upright on its own.
Tips & tricks for perfect seed germination
These simple tricks will help you turn seeds into thriving plants with confidence—even if you've never gardened before.
Soaking Secrets: For seeds with hard outer shells like beans or peas, the 12-24 hour soak is non-negotiable. I've seen seeds fail to sprout because they weren't soaked long enough—especially those thick-skinned varieties. After soaking, drain them thoroughly on a paper towel before planting. This prevents mold from developing while the seeds wait to meet their soil home. The key is balance: too little soaking leaves the seed coat intact, too much can cause it to split before sprouting.
Temperature Matters: That 70-80°F range isn't just a suggestion—it's the sweet spot where most seeds wake up from dormancy. Place your seed tray on top of your fridge (not inside!) or near a sunny window where ambient heat builds naturally. I once tried germinating seeds in my 65°F basement and waited weeks for sprouts—don't make my mistake! If your home runs cooler, consider a seedling heat mat ($15 at garden stores) for those first critical days. The warmth mimics spring conditions and speeds up germination dramatically.
Lighting Strategy: The first week's indirect light requirement is crucial—direct sun will fry those delicate sprouts before they get a chance to develop. I use a north-facing window because it provides bright light without the intensity of south-facing windows. For indoor gardeners without good windows, a simple LED grow light (like the 12" version from Amazon) for just 8-10 hours daily works wonders. The light should be close enough that you can almost touch the seedlings without burning them—about 6 inches away is perfect.
Harden Off Gradually: That 1-2 hour outdoor introduction during hardening off might seem short, but it's about acclimation, not duration. Start with just morning sun when temperatures are mild—think 50-60°F rather than hot afternoons. I've seen seedlings wilt dramatically after too much sun too soon. Increase time by 30 minutes each day while watching for signs of stress like drooping or yellowing. The goal is to let the plant adjust to wind, sunlight, and temperature fluctuations without shock.
Pro Tips for Seed Grows Into A Plant
- These simple tricks will help you turn seeds into thriving plants with confidence—even if you've never gardened before.
- Soaking Secrets: For seeds with hard outer shells like beans or peas, the 12-24 hour soak is non-negotiable.
- Temperature Matters: That 70-80°F range isn't just a suggestion—it's the sweet spot where most seeds wake up from dormancy.
Frequently asked questions
Got questions about how a seed grows into a plant? You’re not alone! Here are answers to the most common ones—whether you’re a beginner gardener or just curious about the magic of germination.
1. How long does it take for a seed to grow into a plant?
The time varies by plant! Fast growers like radishes or lettuce sprout in 5–10 days, while slowpokes like oak trees or roses can take weeks to months. Check the seed packet for specifics—it’s your best guide!
2. What’s the best way to speed up germination?
Keep seeds warm (70–85°F), moist (not soggy!), and in indirect light until sprouts appear. Soak seeds overnight in water for tough shells (like chias), and use a seedling heat mat for extra warmth. Patience is key—rushing can drown seeds!
3. Can I grow a plant from a seed without soil?
Try hydroponics (water + nutrients) or paper towels (place seeds between damp towels in a bag). Just transfer seedlings to soil once roots appear—some plants (like herbs) thrive this way! Pro tip: Avoid this for large seeds (e.g., beans) unless you’re experienced.
4. Why did my seed rot instead of sprouting?
Overwatering or poor drainage is the #1 culprit. Ensure pots have drainage holes, use a light potting mix, and water only when the top inch feels dry. Fungal issues? Sprinkle cinnamon or hydrogen peroxide (3%) on the soil to disinfect.
5. Do all seeds need sunlight to grow?
Not at first! Most seeds germinate best in darkness or low light (like underground). Once sprouts emerge, move them to bright, indirect light (south-facing windows or grow lights). Leafy greens need more light than fruiting plants—adjust as they grow!
Still stumped? Drop your seed struggles in the comments—we’ve all been there!
Wrapping up and next steps
The journey of a seed growing into a plant is a testament to nature’s resilience—and yours! 🌱 With the right tools, patience, and care, you’ve learned how to unlock this magical process. Whether you’re a gardening newbie or a seasoned green thumb, every sprouted seed is a victory worth celebrating.
Now, take that confidence and plant your first seed today! Start small with easy-to-grow varieties like marigolds or herbs, then expand your garden as your skills flourish. Happy planting—your future harvest (and happy plants!) are waiting. 🌿