
Lawn
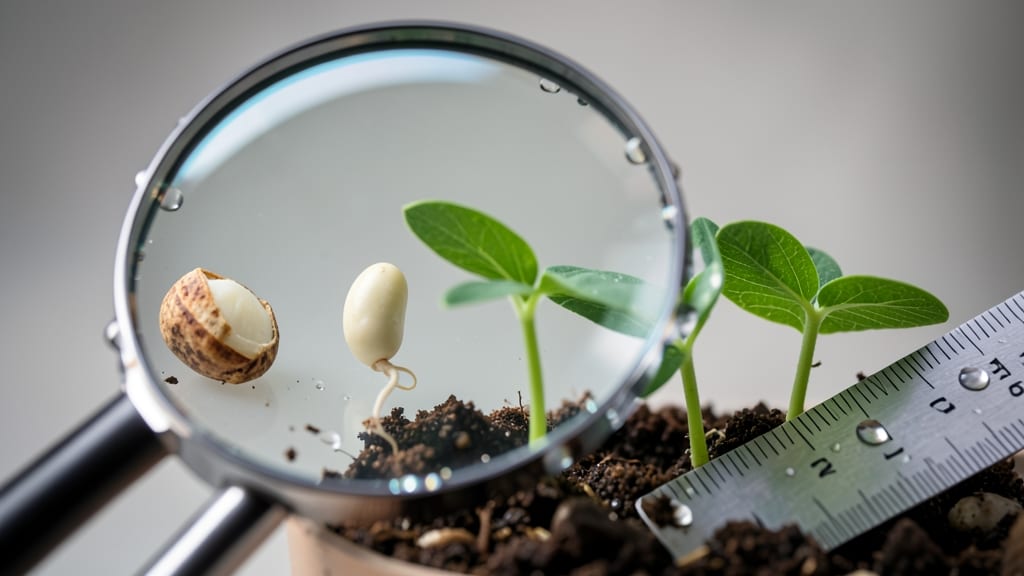
The first crack of life appears when seeds begin their stages of seed growing, and watching that tiny sprout push through soil is one of gardening’s most magical moments. 🌱 I remember my first tomato seedling—just a pale green toothpick breaking the surface—like it was yesterday.
That moment isn’t just about hope; it’s science, patience, and a little bit of luck coming together.
Each stage—from germination to flowering—has its own needs. The seedling phase demands gentle care: consistent moisture, bright (but not scorching) light, and temperatures between 65-75°F. Too much water drowns new roots; too little stunts growth.
I’ve lost count of the seedlings I’ve overwatered, but I’ve never forgotten the lesson: let the top inch of soil dry between waterings.
By the time you’re pinching back leggy seedlings and cheering on the first true leaves, you’re already halfway to a strong plant. The real transformation happens next—vegetative growth—where roots deepen and stems thicken. That’s when your plant starts looking like what you imagined, not just a fragile sprout.
With the right balance of nutrients and light, you’ll see it grow from a delicate stem to a powerhouse ready for flowering.
Advanced gardeners know the secret: each stage is a checkpoint. Too much nitrogen now? You’ll get leafy monsters with no flowers. Too little phosphorus? Roots stay shallow. But here’s the good news: once you understand these stages, you can troubleshoot problems before they start.
Whether you’re growing tomatoes, marigolds, or microgreens, these steps are your roadmap to success.
📚 In This Guide
- What you need
- Instructions
- Tips and common mistakes
- Wrapping up and next steps
What you need
- ● Seeds: Choose fast-growing varieties (e.g., radishes, marigolds, or grass seeds) for best results. Quantity: 10–20 seeds per container (adjust based on seed size).
- ● Growing Containers: Small pots (4–6 inches deep) OR
- ● Seed trays with drainage holes (for multiple seeds).
- ● Potting Soil: Seed-starting mix (lightweight, sterile, and well-draining). Quantity: 1–2 cups per container.
- ● Water: Room-temperature, dechlorinated water (let tap water sit 24 hours or use filtered water).
- ● Spray Bottle: For gentle watering (16 oz or larger).
- ○ Plastic Wrap or Clear Lid: To create a humidity dome (optional but helpful for germination).
- ● Grow Lights or Sunny Spot: Natural light: 6+ hours of sunlight daily OR
- ● Artificial light: LED grow light (12–16 hours/day, 6–12 inches above seeds).
- ● Gloves: Protect your hands from soil (nitrile or gardening gloves).
- ● Trowel or Small Spoon: For planting seeds (1–2 inches deep, depending on seed type).
- ● Plant Labels: To track seed types (toothpicks + masking tape work too!).
- ● Fertilizer: Balanced liquid fertilizer (5-10-5 ratio) for seedlings (dilute to half-strength).
- ○ Heating Mat (Optional): For cold climates (70–75°F speeds up germination).
- ○ Fan (Optional):strong> For airflow (prevents mold; place on low setting).
How to recognize and support each stage of seed growth
Watch your seeds transform from tiny specks into thriving plants—here’s exactly what to expect at each milestone.
🌱 Step 1: Imbibition – The Silent Soaking Phase
The moment you plant your seed, it begins a quiet transformation called imbibition. During this stage, the seed absorbs water through its outer coating, swelling slightly as it activates enzymes that break down stored nutrients. This process can take anywhere from a few hours to a full day, depending on the seed type and moisture levels.
You won’t see any visible changes yet, but this is where everything begins. The seed’s metabolic processes kick into gear, preparing for the next critical phase. Keep the soil consistently moist but not soggy—this ensures the seed stays hydrated without suffocating. If the soil feels dry to the touch, gently water it again until the top inch feels damp.
🌱 Step 2: Germination – The First Visible Sign of Life
Germination officially begins when the seed’s radicle (its embryonic root) emerges and pushes downward into the soil. This is the first true sign of life, and it typically occurs within 5-14 days, depending on the plant species and environmental conditions. You’ll notice a tiny white or tan root breaking through the seed coat, followed closely by the shoot emerging upward.
This is where warmth becomes critical. Most seeds germinate best in soil temperatures between 65-75°F. If your space runs cooler, consider using a seedling heat mat to speed up the process. Avoid disturbing the soil around the seed—even a slight shift can damage the delicate radicle. Once the shoot appears, you’ll see the seedling’s first true leaves unfurling within 3-7 days.
🌿 Step 3: Seedling Emergence – The First True Leaves
The moment the seedling’s first true leaves (not the initial cotyledons) appear is a major milestone. These leaves are the plant’s first functional foliage, designed to begin photosynthesis and sustain growth. You’ll recognize them by their shape—true leaves resemble the mature plant’s foliage, while cotyledons are usually simpler and rounder.
At this stage, the seedling is vulnerable to overwatering and poor light. Place it under bright, indirect light immediately to prevent leggy growth (stretched, weak stems). If using artificial grow lights, position them 2-4 inches above the seedlings and keep them on for 14-16 hours daily. You’ll see strong, compact growth when the leaves are dark green and evenly spaced.
🌿 Step 4: Vegetative Growth – Building Strength
Once the seedling has established its first true leaves, it enters the vegetative growth phase, where it focuses on developing a robust root system and foliage. This stage can last 3-8 weeks, depending on the plant. You’ll notice rapid leaf production, with new growth appearing every few days. The plant’s stem will thicken, and its roots will spread deeper into the soil.
This is the time to monitor soil moisture closely. Water when the top inch of soil feels dry to the touch, but avoid letting the soil become bone-dry. Overwatering now can lead to root rot, while underwatering causes stunted growth. If the seedlings start to look crowded, consider thinning them to 3-4 inches apart to give each plant room to grow.
☀️ Step 5: Transition to Maturity – Flower or Fruit Signals
As the plant matures, you’ll see distinct changes signaling its readiness for reproduction. For flowering plants, this means the appearance of buds or blooms. For vegetable plants, it could be the formation of fruit or the thickening of stems. This transition typically occurs 6-12 weeks after germination, depending on the plant type.
During this phase, adjust your care to support the plant’s new needs. Flowering plants may require less frequent watering as their roots grow deeper, while fruiting plants benefit from a balanced fertilizer to encourage production. Watch for signs of stress, such as yellowing leaves or wilting, which can indicate overwatering, nutrient deficiencies, or pest activity.
🌱 Step 6: Maturity – Harvest or Propagation Time
When the plant reaches full maturity, it’s ready for harvest, propagation, or long-term care. For vegetables, this is when they’ve reached their ideal size and flavor—think ripe tomatoes, fully grown leafy greens, or mature herbs. For ornamental plants, maturity might mean vibrant blooms or lush foliage. You’ll know it’s time when the plant’s growth slows and its features are fully developed.
Harvest at the peak of maturity to ensure the best flavor and quality. For example, pick leafy greens when they’re 3-6 inches tall, and harvest herbs just before they flower. If you’re propagating, take cuttings from healthy stems and root them in fresh soil. This is also the time to plan for the plant’s future—whether it’s overwintering, replanting, or saving seeds for next season.
⏰ Step 7: Post-Maturity Care – Sustaining the Plant
Even after maturity, your plant may still need care to thrive. For annuals, this could mean enjoying their harvest or blooms until the end of the season. For perennials, it’s about preparing for dormancy or future growth cycles. Pay attention to signs of decline, such as browning leaves or reduced productivity, and adjust your care accordingly.
Prune spent blooms or yellowing leaves to encourage new growth. For plants that will overwinter, reduce watering gradually and consider mulching to protect roots from temperature fluctuations. If you’re saving seeds, allow the mature plant to complete its cycle—let flowers fade and dry on the stem before collecting seeds. This stage is all about extending the plant’s life and ensuring it remains healthy and productive.
Tips & tricks for supporting seed growth through every stage
Here's what nobody tells you about nurturing seeds to maturity—these insights will help you avoid common pitfalls and maximize success.
Warmth is Non-Negotiable: During the critical 5-14 day germination window, maintain soil temperatures between 65-75°F. I learned this the hard way—cool soil delays germination, and impatient gardeners often overwater thinking the seed isn't responding. Use a seedling heat mat if your environment runs cooler than 65°F, especially for slower germinators like beans or peas. The radicle's emergence depends entirely on consistent warmth.
Light Timing Matters: Once those first true leaves appear, immediately transition seedlings to 14-16 hours of light daily. I've seen countless seedlings stretch toward weak, leggy stems because they didn't get enough light during vegetative growth. Position grow lights 2-4 inches above seedlings and use timers to automate this—consistent light schedules prevent that sad, elongated growth pattern. Remember, true leaves are your plant's first functional foliage for photosynthesis.
Moisture Balance is Everything: The top inch of soil should feel damp to the touch, but never soggy. I've ruined more seed starts than I care to admit by either drowning them or letting them dry out completely. During vegetative growth, overwatering leads to root rot while underwatering causes stunted development. Use a moisture meter if possible—it's the most reliable way to track soil moisture without guesswork. For container plants, water at the base rather than overhead to prevent fungal issues.
Thinning Strategy: When seedlings reach 3-4 inches tall and look crowded, it's time to thin. I know this seems harsh, but crowded seedlings compete for nutrients and light, resulting in weak plants. Use clean scissors to snip at soil level rather than pulling—this prevents disturbing the roots of remaining plants. The 3-4 inch spacing gives each plant room to develop strong stems and foliage during the 3-8 week vegetative phase.
Pro Tips for Stages Of A Seed Growing
- Here's what nobody tells you about nurturing seeds to maturity—these insights will help you avoid common pitfalls and...
- Warmth is Non-Negotiable: During the critical 5-14 day germination window, maintain soil temperatures between 65-75°F...
- Light Timing Matters: Once those first true leaves appear, immediately transition seedlings to 14-16 hours of light d...
Frequently asked questions
Got questions about watching your seed transform into a thriving plant? Here are some of the most common ones—and their answers!
How long does it take for a seed to sprout?
The sprouting time varies by plant type. Fast growers like radishes or lettuce may sprout in 3–7 days, while slower seeds (tomatoes, beans) can take 7–21 days. Check the seed packet for specifics—consistent moisture and warmth (65–75°F) speed things up! Pro tip: Keep soil damp (not soggy) to avoid mold.
Why isn’t my seed germinating after 2 weeks?
Patience is key! If seeds aren’t sprouting, check these fixes:
- Temperature: Too cold? Use a heat mat or move pots to a warmer spot.
- Moisture: Dry soil = dead seeds. Water gently until soil is evenly damp.
- Depth: Buried too deep? Most seeds need 2x their width of coverage.
- Freshness: Old seeds (over 1 year) may fail—test viability with the paper towel method.
How often should I water seeds?
Seeds need consistent moisture—water lightly every 1–2 days to keep soil damp (like a wrung-out sponge). Overwatering can drown them, while underwatering stalls growth. Use a spray bottle for delicate seedlings, and avoid soggy trays. Pro tip: Bottom-watering (placing trays in shallow water) reduces fungal risks.
Can I transplant seedlings too soon?
Yes! Seedlings are root-bound when they fill their container or have 2–3 true leaves. Harden them off first (acclimate to outdoor conditions over 5–7 days) to avoid shock. Transplant on a cloudy day or late afternoon. Warning: Delicate stems may snap—use a small trowel to lift gently by the leaves, not the stem.
What if I don’t have a garden? Can seeds grow indoors?
Herbs (basil, parsley), leafy greens (spinach, kale), and microgreens thrive indoors with:
- A sunny windowsill (south-facing is best) or grow lights (12–16 hrs/day).
- Small pots with drainage holes and lightweight potting mix.
- Humidity trays (pebble trays with water) to mimic greenhouse conditions.
Wrapping up and next steps
Watching a tiny seed transform into a thriving plant is nothing short of magical! 🌱 From germination to maturity, each stage—imbibition, radicle emergence, shoot growth, leaf development, tillering, flowering, and seed production—plays a vital role in nature’s cycle.
Whether you’re nurturing a garden, lawn, or just curious about growth, understanding these steps empowers you to support life with confidence.
Ready to put your knowledge into action? Start small—plant a seed today and observe the journey firsthand! 🌱💚 For bigger projects, research the best seeds and conditions for your space. Happy growing!