
Lawn
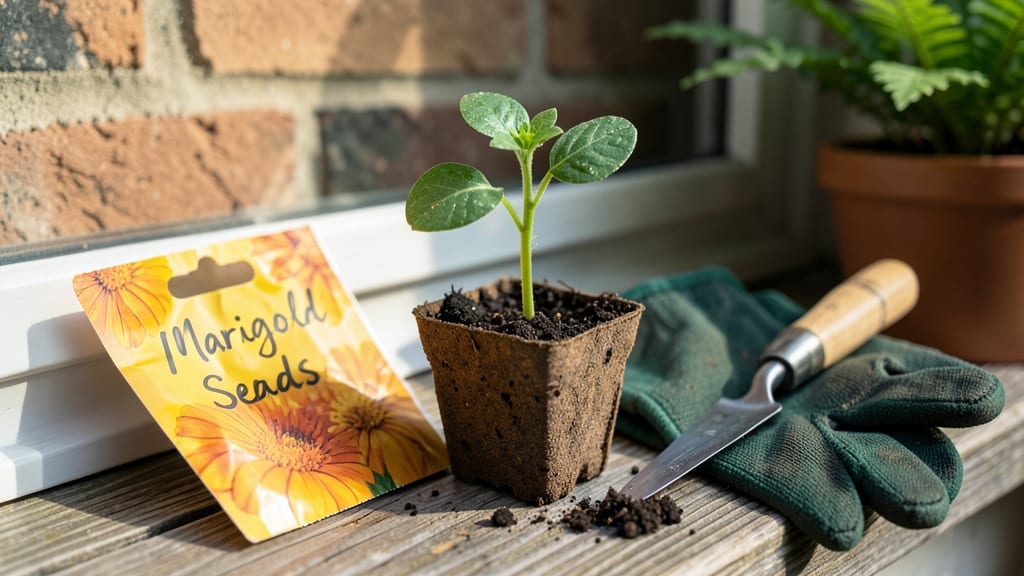
Planting seeds in the ground transforms your yard from bare soil to a thriving garden in just 60 days. 🌱 I’ve watched my own spring garden go from empty rows to blooming flowers and crisp vegetables by late June—all by following a few key steps that most beginners miss.
The secret isn’t luck; it’s preparation, patience, and knowing exactly how deep and how far apart to place each seed.
Start by loosening the soil with a fork or tiller to break up compaction, then mix in compost for nutrients. Different seeds need different depths—tiny seeds like lettuce go just ¼-inch deep, while larger ones like beans need 1-inch coverage.
Water gently after planting to settle the soil without washing seeds away, and keep it consistently moist until sprouts appear. This is where most gardens fail: too much water drowns seeds, too little dries them out.
Within weeks, you’ll see the first green shoots pushing through the soil, and by day 60, your garden will be lush with blooms or ready-to-harvest veggies. The key is consistency—check soil moisture daily, thin seedlings to give them space, and protect young plants from pests.
Even herbs like basil or flowers like marigolds will thrive if you follow these simple rules. The best part? You’ll eat or enjoy the results of your own hands.
This method works for almost any spring-planted seed, from tomatoes to zinnias, as long as you adjust depth and spacing for each type. The only mistake you can’t recover from is planting too late—so mark your calendar and get those seeds in the ground before the last frost.
Trust me, your future self will thank you when the garden bursts into color.
📚 In This Guide
- What you need
- Instructions
- Tips and common mistakes
- Wrapping up and next steps
What you need
- ● Seeds: Choose fast-growing spring varieties like marigolds, zinnias, sunflowers, or lettuce (packets typically contain 50–100 seeds).
- ● Garden soil: 1–2 cubic yards of well-draining, nutrient-rich potting mix (or amend existing soil with compost).
- ● Watering can or hose: With a gentle spray nozzle to avoid displacing seeds.
- ● Gloves: A pair of durable gardening gloves to protect your hands.
- ● Ruler or measuring tape: For marking planting rows (12–24 inches apart, depending on seed type).
- ● Hand trowel: For digging small holes (2–3 inches deep).
- ● Seedling trays: If starting indoors (6–12 packs, depending on seed quantity).
- ● Mulch: Straw or shredded leaves to retain moisture and suppress weeds.
- ● Plant labels: Wooden or biodegradable tags to track seed types.
- ● Fertilizer: Slow-release granular fertilizer (follow package rates).
- ● Check your last frost date (plant seeds 2–4 weeks before for warm-season crops).
- ● Choose a sunny location (6+ hours of sunlight daily for most flowers/veggies).
- ● Test soil pH (aim for 6.0–7.0; adjust with lime or sulfur if needed).
Step-by-Step guide to planting spring-blooming flowers
Here’s how to turn bare soil into a vibrant spring garden in just 60 days.
🌱 Step 1: Test and Prepare the Soil
Start by testing your soil’s pH and texture—spring-bloomers like sweet peas and pansies thrive in 6.0-7.0 pH and well-draining soil. If your soil is heavy clay, mix in 2-3 inches of compost to loosen it. I like to work the compost into the top 6 inches of soil, breaking up any clumps with a garden fork. This ensures roots have room to spread without struggling.
If your soil is sandy, add a handful of peat moss or coconut coir to help retain moisture. Water the area lightly after amending so the soil settles evenly. The goal is a crumbly texture that holds moisture but doesn’t stay soggy—think of it like damp potting soil. This prep takes about 30 minutes but saves headaches later when seedlings struggle to root.
🌱 Step 2: Choose and Plant the Right Seeds
Pick fast-growing spring annuals like snapdragons, sweet peas, or calendulas—they bloom in 4-6 weeks and handle cool spring temps. Plant seeds ¼ inch deep, spacing them ½ inch apart in rows 12-18 inches apart (check seed packet instructions). I use a small handheld seeder or just tap seeds from my fingers to avoid overcrowding—too many seeds in one spot leads to weak, leggy plants.
Cover seeds lightly with soil, then mist the area gently with water until the surface looks uniformly damp. Avoid soaking the soil, as this can wash seeds too deep. Place a small marker near each row to track what you’ve planted—spring bloomers grow fast, and you’ll forget which variety is which if you don’t label early.
☀️ Step 3: Water and Protect New Growth
Keep the soil consistently moist but not waterlogged for the first 2-3 weeks—this is critical for germination. Water deeply once daily in the morning, aiming for ½ inch of water per week. You’ll know you’re doing it right when the top 1 inch of soil stays damp but not muddy. Use a soaker hose or watering can with a fine rose to avoid disturbing seedlings.
If frost is still a risk, cover young seedlings with frost cloth at night. I’ve learned the hard way that even a light frost can kill tender new growth. Once seedlings show first true leaves (not the tiny cotyledons), thin them to 3-4 inches apart to reduce competition. Snip unwanted seedlings at soil level with scissors—this prevents disturbing roots of the plants you’re keeping.
✂️ Step 4: Fertilize and Encourage Blooms
When seedlings reach 3-4 inches tall, switch to a balanced, water-soluble fertilizer (like 10-10-10) diluted to half strength. Feed every 2-3 weeks to promote strong stems and abundant blooms. I mix the fertilizer into a watering can and apply it in the morning so the plants have time to absorb nutrients before evening. Avoid over-fertilizing—too much nitrogen makes plants leafy but flower-sparse.
Pinch back the tips of leggy seedlings to encourage bushier growth. This might seem counterintuitive, but removing the top ½ inch of stem forces the plant to branch out, leading to more flowers. Deadhead spent blooms regularly to redirect energy into new flowers. By week 6, you should see the first buds forming—this is your reward for patience!
🌿 Step 5: Maintain and Extend the Season
Once flowers appear, mulch around plants with 1-2 inches of straw or shredded leaves to retain moisture and suppress weeds. Keep the mulch 2 inches away from stems to prevent rot. Water at the base in the morning to avoid fungal issues from wet foliage. If your spring is rainy, space waterings out to every 3-4 days—soggy soil invites disease.
To extend blooms into early summer, deadhead regularly and consider a second planting of quick-germinating seeds like cosmos or zinnias in late May. These thrive in warmer soil and pick up where spring bloomers leave off. With this routine, your garden will stay vibrant for 8-10 weeks—proof that a little prep goes a long way.
Tips & tricks for spring-blooming success
These simple tricks will help you avoid common pitfalls and maximize your spring garden's potential.
Soil Prep Secret: Don't rush the 30-minute soil prep time in Step 1. This is where you set the foundation for healthy roots. I like to work the compost in while the soil is slightly damp—it mixes more easily and creates better aeration. If your soil feels too dry, sprinkle a little water and let it absorb before adding compost. This small step prevents future root struggles and gives your plants a strong start.
Seed Placement Technique: When planting seeds ¼ inch deep in Step 2, use a pencil or dowel to make small holes rather than pressing seeds directly into soil. This ensures consistent depth and prevents seeds from being buried too deep or too shallow. I also recommend planting in small batches—cover one row completely before starting the next. This keeps seeds from drying out while you work.
Watering Watch: The first 2-3 weeks after planting are critical for germination. Instead of relying on a schedule, check the top inch of soil daily. It should feel like a damp sponge—not soggy, not bone-dry. I've found that morning watering (as mentioned in Step 3) gives seedlings time to dry slightly before evening, reducing fungal risks. A spray bottle works well for small areas, while a soaker hose covers larger beds more efficiently.
Frost Protection Hack: If frost is forecasted after your seedlings sprout, don't wait until nightfall to cover them. Set up your frost cloth in advance and drape it loosely over plants during the day. This lets sunlight through while warming the soil. I've had seedlings survive temperatures down to 28°F this way. Just remember to remove the cloth during the day to prevent overheating—your plants need light too!
Pro Tips for Seed In The Ground
- These simple tricks will help you avoid common pitfalls and maximize your spring garden's potential.
- Soil Prep Secret: Don't rush the 30-minute soil prep time in Step 1. This is where you set the foundation for healthy...
- Seed Placement Technique: When planting seeds ¼ inch deep in Step 2, use a pencil or dowel to make small holes rather...
Frequently asked questions
Got questions about planting seeds for a stunning spring lawn? You’re not alone! Here are answers to the most common queries to help you get growing with confidence.
How deep should I plant grass seeds?
For most cool-season grasses, plant seeds ¼ to ½ inch deep—lightly press them into the soil so they make good contact with moisture. Warm-season grasses like Bermuda or Zoysia need ⅛ to ¼ inch of coverage. Over-deep planting can delay germination, while planting too shallow risks drying out.
Why isn’t my seed sprouting after 2 weeks?
Don’t panic! Germination times vary—cool-season grasses may take 7–21 days, while warm-season seeds can wait 10–30 days. Check soil moisture (keep it consistently damp, not soggy), temperature (ideal range: 60–75°F), and sunlight (at least 6–8 hours daily). If conditions are right, seeds will sprout soon!
Do I need to water seeds daily?
Yes! Water seeds lightly but frequently—aim for ¼ inch of water per day (or enough to keep the top 1–2 inches of soil moist). Use a gentle sprinkler or misting nozzle to avoid displacing seeds. Once seedlings reach 2–3 inches tall, gradually reduce watering to ½ inch per week.
Can I plant grass seed in fall instead of spring?
Fall planting (4–6 weeks before first frost) is often better than spring for many grasses. Cooler temps and consistent moisture help seeds establish roots before winter. Just adjust timing based on your grass type—cool-season grasses thrive in fall, while warm-season grasses need spring/summer heat.
How do I protect new seeds from birds or animals?
Birds and critters love fresh seeds! Cover planted areas with lightweight straw or a breathable erosion mat until germination. For stubborn pests, try chicken wire (½-inch mesh) or a temporary fence. Remove protective layers once seedlings are 1–2 inches tall to avoid smothering.
Wrapping up and next steps
Transforming your lawn into a vibrant spring masterpiece in just 60 days is totally within reach—you’ve got this! 🌱 By planting the right seed in the ground, nurturing it with patience, and staying consistent, you’ll soon enjoy lush, green grass that’s the envy of the neighborhood.
Remember, every expert gardener started with their first seed!
Ready to take the next step? Grab your tools, mark your calendar, and start planting today! Your future lawn is waiting for you—let’s grow something beautiful together. 🌟