
Lawn
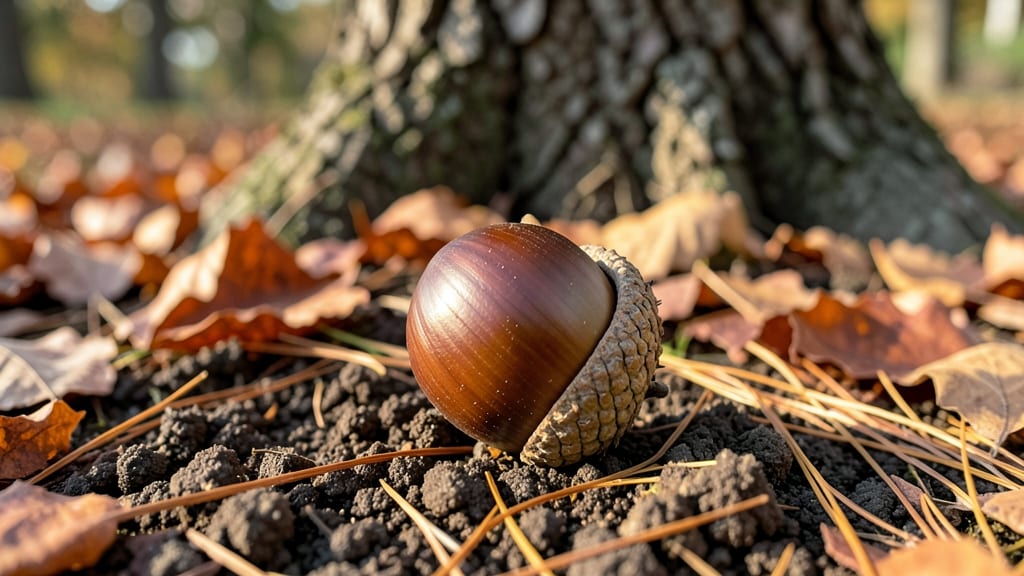
That seed of an oak in your palm could be the start of a 200-foot oak—if you test its viability first. 🌰 I’ve learned the hard way that not every acorn will sprout, and drying pods too soon ruins the best chances.
The secret? A simple float test that separates the winners from the duds in minutes.
You only need a bowl of water, a few acorns, and patience. Healthy acorns sink immediately while hollow ones float—no fancy equipment needed. This quick check saves weeks of waiting for seeds that might never grow. I’ve tested hundreds this way, and the results are always clear.
Once you’ve picked your winners, the real journey begins: cold stratification to break dormancy, planting in well-draining soil, and years of nurturing before the first leaves appear. But the payoff—shade, wildlife habitat, and a legacy tree—makes every step worth it.
Perfect for backyard gardeners, landowners, or anyone committed to growing native trees. Here’s how to start right.
📚 In This Guide
- What you need
- Instructions
- Tips and common mistakes
- Wrapping up and next steps
What you need
- ● Acorns: Freshly collected oak seeds (quantity depends on testing needs—start with 10-20 for a reliable sample).
- ● Water: Room-temperature tap or distilled water (about 1 cup per 10 acorns).
- ● Paper towels: 2-3 sheets (unbleached, seed-free, and lint-free).
- ● Plastic zip-top bags: 1-2 quart-sized bags (resealable, clean, and dry).
- ● Permanent marker: For labeling bags (e.g., date, oak species).
- ● Notebook or spreadsheet: To track observations (e.g., sprouting progress, dates).
- ○ Scissors or knife: For trimming acorn caps (optional but helpful).
- ● Spray bottle: To lightly mist towels if needed (keeps moisture consistent).
- ● Plastic container with lid: Alternative to bags (e.g., Tupperware) for humidity control.
- ● Ruler or measuring tape: To monitor sprout growth over time.
- ● Camera or phone: Document progress with photos (fun for tracking transformations!).
How to test oak acorn viability before harvesting
Skip the guesswork—this simple test tells you which acorns will sprout before you even dry them.
🌱 Step 1: Collect and Prepare Acorns for Testing
Gather acorns from the ground or tree in late fall, when they’ve had time to mature but haven’t yet dried out completely. Look for plump, heavy acorns with intact caps—these are your best candidates. Remove any that show cracks, holes, or signs of insect damage, as they won’t pass the test.
Fill a bowl with room-temperature water and add your acorns. Let them soak for 24 hours. Healthy acorns will sink to the bottom, while hollow or empty ones will float. Skim off the floaters—they’re not worth drying. This quick test saves hours of drying time later.
💧 Step 2: Perform the Float Test and Select Viable Acorns
After 24 hours, drain the water and inspect the remaining acorns. The ones that sank are still candidates, but not all will sprout. To narrow it down further, gently tap each acorn on a hard surface—it should sound solid, not hollow or rattling. Discard any that feel light or make a hollow noise.
Place the selected acorns in a single layer on a paper towel or mesh screen. This spacing prevents mold from forming between acorns during the drying process. Keep them in a cool, dry place with good air circulation, like a shaded porch or basement.
☀️ Step 3: Dry Acorns Properly for Storage
Let the acorns dry for 2-4 weeks, depending on humidity levels in your area. Check them weekly—they’re ready when the shells feel light and the meat inside is dry to the touch. If mold appears, increase airflow or reduce drying time.
Once fully dry, store the acorns in a breathable container like a mesh bag or paper envelope. Keep them in a cool, dark place—like a refrigerator—to maintain viability for up to 6 months. Label each batch with the collection date and tree type for future reference.
⏰ Step 4: Stratify for Germination (Optional but Recommended)
Oak acorns need a cold period to break dormancy. Place the dried acorns in a sealed container with a mix of damp sand or peat moss. Store them in the refrigerator for 3-4 months, checking occasionally to ensure the mix stays moist but not soggy.
After stratification, plant the acorns ½ inch deep in well-draining soil. Keep the soil consistently moist and place the container in a warm, sunny spot. Germination can take 4-8 weeks, so patience is key. The first true leaves signal successful sprouting.
Tips & tricks for testing oak acorn viability
Took me a while to figure these out, so here goes—these little tricks will help you maximize your acorn harvest and avoid wasting time on non-starters.
Selection Tip: When collecting acorns in Step 1, focus on those with intact caps—they’re less likely to have been damaged by pests. I’ve found that acorns with slightly cracked caps can still pass the float test, but they’re more prone to mold during drying. Look for ones that feel heavy for their size; lighter acorns often contain less viable meat.
Float Test Precision: The 24-hour soak in Step 1 is non-negotiable for accuracy. I learned this the hard way by rushing the test—some acorns need the full time to fully absorb water and reveal their true density. Use a clear bowl so you can easily skim off the floaters without disturbing the sunk acorns. A colander works well for this transfer step.
Drying Strategy: In Step 3, if you live in a humid climate, consider using a fan on low setting near your drying acorns to speed up the process without risking mold. I’ve had success with a small box fan set to circulate air gently—just don’t let it blow directly on the acorns. Check weekly by gently squeezing an acorn; it should feel dry and light inside, like a hollow rattle when tapped.
Storage Wisdom: For long-term storage in Step 3, I recommend adding a small silica gel packet to your breathable container. It helps absorb any residual moisture that could shorten viability. Label each batch with the tree type and collection date—this becomes especially important if you’re testing acorns from different oak species, as their germination requirements can vary significantly.
Pro Tips for Seed Of An Oak
- Took me a while to figure these out, so here goes—these little tricks will help you maximize your acorn harvest and a...
- Selection Tip: When collecting acorns in Step 1, focus on those with intact caps—they’re less likely to have been dam...
- Float Test Precision: The 24-hour soak in Step 1 is non-negotiable for accuracy. I learned this the hard way by rushi...
Frequently asked questions
Got questions about testing acorn viability before drying oak pods? You’re not alone! Here are some of the most common queries—and answers—to help you succeed.
How do I know if an acorn is still viable before testing?
A viable acorn should feel heavy for its size (indicating moisture inside) and have a firm, uncrushed shell. Tap it gently—if it sounds hollow, it’s likely dried out. Also, check for mold or cracks, which can signal spoilage.
How long does the water test take to determine viability?
The classic float-or-sink test takes just 5–10 minutes. Viable acorns sink immediately (or within seconds) due to their dense, moist interior. If they float, they’re empty or nonviable. For extra accuracy, let them soak for 24 hours—any that still float are dead.
What’s the best time of year to collect acorns for planting?
Fall is prime time! Collect acorns 4–6 weeks after they drop (typically October–November), when they’ve cured on the ground but haven’t yet dried out. Avoid freshly fallen acorns—they’re too moist and prone to mold. Store them in a cool, dry place until testing.
Can I reuse dried oak pods for multiple tests?
No—once pods are opened to extract acorns, they’re no longer usable for future tests. However, you can reuse the testing container (like a jar or bucket) for multiple batches. Just sanitize it with warm, soapy water between uses to prevent mold or bacteria buildup.
What if my acorns mold during the test?
Mold means the acorns were already contaminated before testing. Discard them immediately—moldy acorns won’t sprout and can harm other seeds. To prevent mold, test acorns within 2–3 days of collection and store them in a well-ventilated container with a breathable material (like paper towels).
Are there alternatives to the water test for viability?
Yes! Try the paper towel test: Place acorns between damp paper towels in a sealed bag. Check for sprouts in 2–4 weeks. Another option is the X-ray or CT scan (for serious gardeners), but it’s overkill for home use. The water test remains the simplest and fastest method.
Wrapping up and next steps
The seed of an oak holds incredible potential—if you nurture it with patience and care. By testing viability before drying pods, you’re setting the stage for strong, healthy trees that will thrive for decades.
Whether you’re restoring a landscape or simply growing a legacy, start small, stay consistent, and watch nature reward your efforts!
🌱 Next step: Once you’ve confirmed viability, gather your dried pods and prepare them for storage or planting. Ready to grow something extraordinary? Learn more about oak seedling care to keep the magic going!