
Lawn
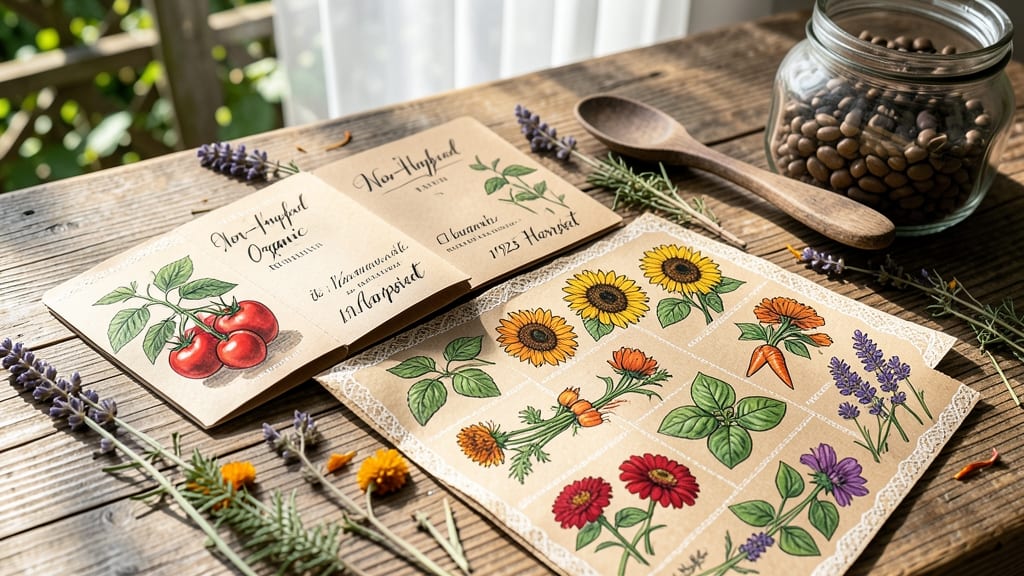
Your seed packet art becomes the first surprise in the garden. 🌱 These little envelopes hold more than seeds—they’re tiny canvases waiting to transform your yard into a storybook. I’ve turned ordinary packets into whimsical markers that pop open to reveal their secrets, turning planting day into an adventure.
The magic starts with what you already have: vintage packets, watercolors, or even a sharpie. No fancy supplies needed—just a little creativity and a love for the unexpected.
My favorite markers feature hand-painted flowers or pressed leaves tucked inside, so every time you plant, you’re uncovering a tiny piece of art.
By the end, your garden won’t just grow food—it’ll grow memories. Imagine pulling a packet labeled "Sunflower Dreams" and watching those cheerful blooms follow the sun. The art doesn’t stop at the garden; it spills into your home decor, journaling, or even framed displays.
Perfect for gardeners who love a little extra charm and beginners who want to make planting feel like play. Here’s how to start turning those plain packets into something extraordinary.
📚 In This Guide
- What you need
- Instructions
- Tips and common mistakes
- Wrapping up and next steps
What you need
- ● Seed packets: Any size or shape (aim for 5–10 for variety). Save old ones or buy blank ones online.
- ● Acrylic paint: Small bottles (1–2 colors per packet). Waterproof paint works best for outdoor durability.
- ● Paintbrushes: Fine-tip brushes (sizes 0–2) for details + a wider brush (size 4–6) for backgrounds.
- ● Mod Podge (matte or glossy): 1 small bottle for sealing. Adds weather resistance!
- ● Sandpaper: Fine-grit (220–400) to smooth rough edges if needed.
- ○ Clear sealant spray (optional but recommended): Like Mod Podge Outdoor for extra protection.
- ● Scissors or craft knife: For trimming or customizing packet shapes.
- ● Glitter or metallic paint: For a shimmery touch (use sparingly!)
- ● Stencils or vinyl decals: Pre-cut designs for precision.
- ● Twine or ribbon: To hang packets as mobile garden markers.
- ● Stamps & ink pads: For quick, professional-looking patterns.
- ● Eco-friendly varnish: If you want a non-toxic finish for edible gardens.
Step-by-step instructions for creating whimsical seed packet art
Turn ordinary seed packets into charming garden markers with this easy, creative process.
🎨 Step 1: Gather Your Supplies and Prep the Packets
You'll need blank seed packet envelopes (or repurposed ones with seeds already planted), scissors, glue sticks, decorative paper (like scrapbook paper or washi tape), markers or colored pencils, and a ruler. Start by removing any seeds from used packets—save those for planting! If using new packets, leave them sealed until after decorating to preserve freshness.
Lay out your packets and decide on a theme—whimsical animals, floral patterns, or retro designs all work beautifully. I like to sketch my ideas lightly in pencil first so I can adjust proportions before committing to ink. This prevents messy corrections later.
✂️ Step 2: Cut and Decorate the Packet Flaps
Carefully cut along the top flap of each packet, leaving a ½-inch border uncut to maintain structural integrity. This creates a "pop-open" effect when planted. Use your decorative paper to cover the front of the packet—glue it down smoothly, pressing out any air bubbles. For extra flair, add washi tape borders or stenciled designs with markers.
Here's the thing—play with textures! Layering thin papers or adding glitter accents (sparingly) gives depth. I always sign my designs in the corner with a tiny marker—it adds a personal touch that makes the garden feel like yours. Let everything dry completely before moving to the next step.
🌱 Step 3: Add Functional Labels and Planting Info
Flip the packet over to the blank side and write the plant name, variety, and planting date in neat, legible letters. Use a fine-tip marker for precision. If you're planting multiple seeds, note how deep to sow and spacing requirements—this turns your art into a practical garden guide. I like to add a tiny emoji or symbol next to each entry (like 🌿 for herbs or ☀️ for sun-loving plants) for quick visual reference.
For extra functionality, fold the bottom flap down to create a mini planting guide—write care tips like "water when soil feels dry" or "full sun" on the inside. This keeps all your info in one place without cluttering the front design.
🪴 Step 4: Plant and Display Your Artwork
Dig a small hole where you want your marker to stand—about 2-3 inches deep is plenty. Gently press the decorated packet into the soil, leaving the top flap exposed. Plant your seeds around it, following the spacing instructions on the packet. The marker will naturally pop open as the plant grows, revealing your artwork like a little garden surprise.
Arrange your markers in a curved line along garden beds or cluster them near seating areas for a cohesive look. I group mine by color or theme—like pastel packets near my morning tea spot or bold designs by the vegetable patch. Over time, the markers become part of the garden's character, blending function with beauty.
💧 Step 5: Maintain and Refresh Your Garden Art
Check your markers occasionally to ensure they're still standing upright. If rain or wind tilts them, simply press them back into the soil. For long-term durability, seal the paper with a clear acrylic spray (applied lightly) to protect against moisture. I refresh my designs every spring by adding new washi tape or swapping out faded markers—it keeps the garden feeling fresh and intentional.
Pro tip: Use these markers to track planting progress! A quick glance shows which crops are established and which need attention. Over time, you'll develop a system that makes garden maintenance feel like an art project—because it is.
Tips & tricks for perfect seed packet art
These little tricks will transform your garden markers from functional to fabulous with minimal effort.
Design Prep: Before sketching, trace the packet shape onto scrap paper first. This lets you experiment with layouts and proportions without wasting your good decorative paper. I always do this step—it saves me from ruining multiple packets when adjusting designs. Think of it as your digital mockup, but with pencil and paper!
Cutting Strategy: When cutting the top flap in Step 2, use a metal ruler and sharp scissors for clean lines. The ½-inch border is crucial—it prevents the packet from falling apart when planted. I mark the border with a pencil first to avoid cutting too close. A steady hand and slow cuts make all the difference in keeping your markers sturdy.
Durability Boost: For outdoor longevity, apply a light coat of clear acrylic spray to finished markers before planting. This protects against rain while keeping the colors vibrant. I seal mine right after Step 3 when all writing and decorating is complete. Just one light coat does the trick—no need to go heavy!
Planting Placement: The 2-3 inch deep hole in Step 4 is perfect for stability. Press the packet firmly into the soil, then gently pack dirt around the base. This prevents wind from toppling your artwork. I always plant markers in clusters of three—it creates a natural grouping that looks intentional and charming.
Pro Tips for Seed Packet Art
- These little tricks will transform your garden markers from functional to fabulous with minimal effort.
- Design Prep: Before sketching, trace the packet shape onto scrap paper first.
- Cutting Strategy: When cutting the top flap in Step 2, use a metal ruler and sharp scissors for clean lines.
Frequently asked questions
What’s the best way to preserve seed packet art after planting?
Once your seeds are planted, gently press the packet into the soil near the seedlings. For extra durability, seal the edges with a clear acrylic sealer or a light coat of waterproof glue. Avoid heavy rain or direct sunlight until fully dry—think of it like giving your markers a tiny raincoat!
Can I use seed packet art for flowers that bloom later in the season?
Seed packet art works for any plant, whether it’s fast-growing herbs (like basil ) or slow-to-bloom perennials (like lavender ). Just adjust your timeline: mark the packet with a pencil first, then paint once the seedlings emerge. Patience is key—your garden’s story unfolds over time!
What if I don’t have paint? Are there alternative materials?
No paint? No problem! Try:
- Acrylic markers (waterproof and vibrant)
- Fabric paint (for a textured look)
- Mod Podge + dried flowers/leaves (eco-friendly and artistic!)
- Stencils + spray paint (for bold designs)
Will seed packet art attract pests or deter them?
Seed packet art itself won’t harm pests, but bright colors (like red or yellow) can attract beneficial insects (e.g., ladybugs ). To deter pests, pair your art with companion plants like marigolds or basil. Avoid sticky glues near seeds—opt for water-based adhesives instead.
Can I reuse seed packets for multiple plantings?
Yes! Clean old packets with soap and water, then repaint or redecorate for new seeds. Just ensure the packet is intact and the seeds inside are still viable (check the expiration date!). It’s like giving your garden a second life—sustainable and stylish.
What if my art smudges or fades before seeds sprout?
No worries! Seal your design with a clear varnish or Mod Podge before planting. For outdoor exposure, choose UV-resistant paint. If smudges happen, a quick touch-up with a fine-tip marker (like Sharpie) saves the day. Think of it as a DIY masterpiece in progress!
Wrapping up and next steps
Seed packet art is more than just a creative twist—it’s a joyful way to personalize your garden while adding a touch of whimsy to your outdoor space. Whether you’re a seasoned crafter or just starting out, these handmade markers bring a smile every time you step into your garden.
Ready to try? Grab a few empty packets, unleash your creativity, and watch your garden bloom—literally and artistically!
🌱 Next step: Start with one packet today—you’ll be amazed at how easy (and rewarding!) it is.