
Lawn
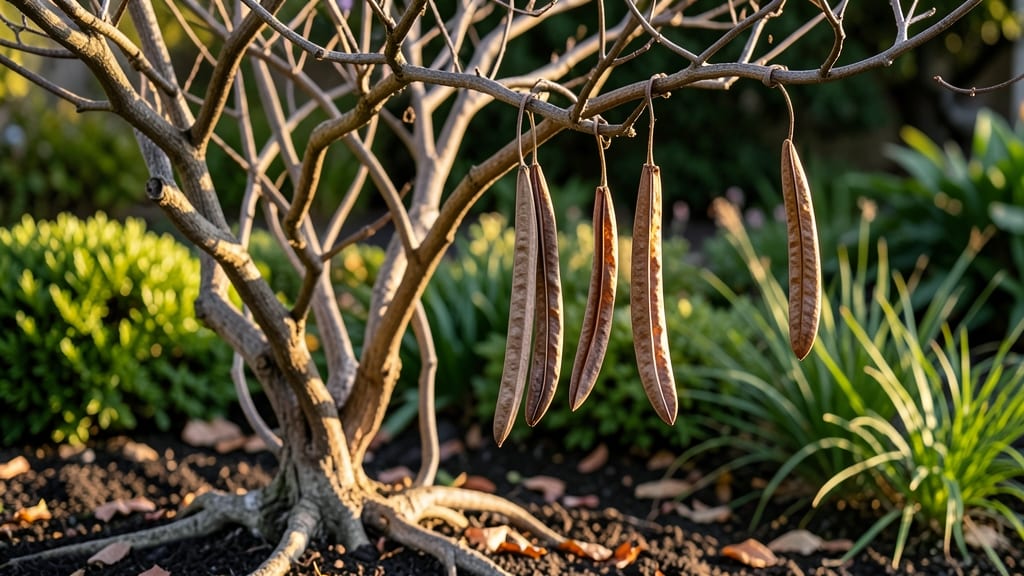
Growing wisteria from seed pods unlocks a wildly rewarding but challenging journey—one that pays off with fragrant blooms next spring. 🌱 I’ve struggled through failed attempts, but the key lies in cold stratification, a process that mimics winter’s natural dormancy.
Most gardeners skip this step and wonder why their seeds never sprout, but patience here makes all the difference.
You’ll need seed pods collected in late summer or early fall, a paper bag for drying, and a refrigerator for stratification. The process takes 3-6 months, but it’s worth it for the satisfaction of nurturing a plant from scratch.
Wisteria grown from seed is slower to bloom than grafted varieties, but the vines develop stronger roots and unique characteristics.
By spring, you’ll see tiny shoots pushing through the soil, signaling success. The vines will take 3-5 years to mature enough for those iconic cascading blooms, but each step—from seed to sprout—feels like a small victory.
This method is best for patient gardeners willing to invest time for a truly rewarding (if slower) result.
Fair warning: wisteria is a high-maintenance plant that needs strong support and regular pruning, but the fragrance and beauty make it unforgettable. If you’re up for the challenge, here’s how to get started the right way.
📚 In This Guide
- What you need
- Instructions
- Tips and common mistakes
- Wrapping up and next steps
What you need
- ● Mature wisteria seed pods: Harvest 10–20 pods from healthy, disease-free vines (ensure they’re fully brown and dry).
- ● Sharp pruning shears or scissors: For carefully opening seed pods without damaging the seeds.
- ● Paper towels or coffee filters: 2–3 sheets to line a container for seed drying.
- ● Small plastic bag or airtight container: A quart-sized zip-top bag works perfectly for stratification.
- ● Moistened potting mix: A 4-inch pot or seed tray filled with well-draining, sterile mix (cactus/succulent blend or 50% perlite/50% peat).
- ○ Plastic wrap or humidity dome: To maintain moisture during germination (optional but helpful).
- ● Refrigerator with a crisper drawer: For cold stratification (40–50°F / 4–10°C).
- ● Spray bottle with water: For gentle hydration without over-saturating seeds.
- ● Seed germination mat: Speeds up warming phase post-stratification.
- ● Grow lights or sunny windowsill: Ensures 6+ hours of light daily once sprouted.
- ● Labeling tags: To track seed varieties and planting dates.
- ● Fungicide (like hydrogen peroxide 3%): A quick soak for seeds to prevent mold.
- ● Trellis or support structure: For transplanting seedlings (wisteria grows fast!).
How to cold-stratify wisteria seed pods for successful germination
Cold stratification mimics winter's natural process—here's how to trick wisteria seeds into breaking dormancy reliably.
🌱 Step 1: Harvest and Prepare Mature Seed Pods
Collect seed pods when they turn brown and begin splitting open naturally, usually in late fall. Wisteria pods contain multiple seeds encased in a tough outer shell—this protective layer must be softened before germination. I like to soak the intact pods in lukewarm water for 24 hours first, which helps loosen the seed coat while preventing rot.
After soaking, gently pry open the pods to extract the individual seeds. You'll notice the seeds have a thick, dark outer shell—this is what blocks water absorption and delays germination. Don't rush this step; forcing the pods open too early can damage the seed's internal structure. Aim for 4-6 seeds per pod when fully mature, though yields vary by plant.
❄️ Step 2: Stratify Seeds Using the Wet Sand Method
Mix equal parts clean sand and peat moss in a shallow container—this creates ideal airflow while maintaining moisture. Place the seeds 1 inch deep in the mix, spacing them 2 inches apart to prevent fungal spread. The sand-peat blend should feel like a damp sponge when squeezed, not dripping wet.
Cover the container with plastic wrap and poke small holes for ventilation. Store it in your refrigerator's crisping drawer (typically 34-40°F) for 90-120 days. Check monthly—if the mix dries out, lightly mist with water until just damp. This cold period mimics winter's chilling requirements, breaking the seed's dormancy cycle.
☀️ Step 3: Transition to Warm Germination Conditions
After stratification, remove the container and place it in a warm, bright location with indirect light (a sunny windowsill works). You'll see the first signs of germination in 2-4 weeks—tiny white roots emerge first, followed by the seedling shoot. Keep the sand-peat mix consistently moist but never soggy; overwatering here causes damping-off.
When seedlings reach 2 inches tall, transplant them into individual 3-inch pots with fresh seed-starting mix. Wisteria seedlings are delicate—handle them by the leaves, never the stems. Provide 14-16 hours of light daily using a grow light if natural light is insufficient. Leggy growth signals insufficient light; adjust the light source within 2 inches of the seedlings.
🌿 Step 4: Harden Off and Plant Outdoors
Two weeks before your last frost date, begin hardening off seedlings by placing them outdoors in a sheltered spot for 1-2 hours daily. Gradually increase exposure over 10-14 days, ending with full sun. Wisteria seedlings develop a strong taproot—avoid transplanting after they've outgrown their pots, as root disturbance stunts growth.
Choose a permanent planting site with full sun and well-draining soil. Dig a hole twice as wide as the root ball but only as deep as the container. Plant at the same depth as in the pot, then water deeply to settle the soil. Mulch around the base with 2 inches of organic mulch to retain moisture and suppress weeds. First blooms may take 3-5 years, but proper stratification now ensures reliable flowering next spring.
Tips & tricks for perfect wisteria seed pod germination
These game-changing insights will help you bypass common pitfalls and achieve reliable germination every time.
Step 1: The Soaking Secret: The 24-hour soak isn't just about softening the seed coat—it's also a critical safety measure. If your pods start to smell funky after 12 hours, that's your cue to rinse them and start fresh. I've seen otherwise healthy seeds develop mold during this stage, so trust your nose. For extra insurance, add 1 teaspoon of hydrogen peroxide to the water (it dissipates quickly) to prevent bacterial growth while maintaining that essential moisture barrier.
Stratification Temperature Precision: While the crisping drawer typically runs 34-40°F, not all refrigerators are created equal. If your fridge's coldest setting is warmer than 40°F, consider using a dedicated seed stratification fridge or even a DIY setup with ice packs in a Styrofoam cooler. The goal is to maintain consistent chilling—any warmer than 45°F and you risk breaking dormancy prematurely, while colder than 32°F can damage the seeds. Think of it as Goldilocks: not too hot, not too cold, just right.
Light Transition Strategy: When moving from cold stratification to warm germination, don't rush the light exposure. Start with just 2-3 hours of indirect light daily during the first week, then gradually increase to the full 14-16 hours. This gradual acclimation mimics natural spring conditions and prevents seedling shock. I've seen seedlings that got too much light too soon develop yellowing leaves almost immediately—like they were sunburned.
Harden Off Like a Pro: The 1-2 hour daily outdoor exposure during hardening off might seem simple, but timing matters. Start these sessions in the late afternoon when temperatures are cooler. This gradual heat introduction prevents stress shocks that can stunt growth. Also, choose overcast days for the first few sessions—direct sun during this vulnerable phase can cause irreversible damage to tender seedlings.
Pro Tips for Seed Pods Wisteria
- These game-changing insights will help you bypass common pitfalls and achieve reliable germination every time.
- Step 1: The Soaking Secret: The 24-hour soak isn't just about softening the seed coat—it's also a critical safety measure.
- Stratification Temperature Precision: While the crisping drawer typically runs 34-40°F, not all refrigerators are created equal.
Frequently asked questions
Got questions about wisteria seed pods?
You’re not alone! Whether you’re a first-time grower or troubleshooting a tricky batch, here are the answers you need to ensure your wisteria seeds sprout successfully next spring.
Do wisteria seed pods always produce viable seeds?
Not always! Only mature, fully brown pods (typically in late summer/fall) contain viable seeds. Green or shriveled pods are usually sterile. Pro tip: Collect pods when they’re dry and crack open to check for plump, dark seeds—these are your best bet for germination!
How long does cold stratification take for wisteria seeds?
Wisteria seeds need 60–90 days of cold stratification (40–50°F) to break dormancy. Mix seeds with damp sand or peat moss, refrigerate in a sealed bag, and check moisture weekly. Patience is key! Skipping this step often results in failed germination.
Can I stratify wisteria seeds outdoors instead of in the fridge?
Yes! Bury seeds 4–6 inches deep in a well-draining garden bed in fall (before frost). Mulch lightly to protect them over winter. This mimics natural conditions, but monitor soil temps—if it thaws too early, move them indoors to avoid premature sprouting.
Why aren’t my wisteria seeds germinating after stratification?
Common culprits:
- Old seeds (wisteria seeds lose viability after 1–2 years).
- Poor moisture (keep stratification medium damp, not soggy).
- Improper warmth (after stratification, seeds need 70–75°F to sprout).
What’s the fastest way to grow wisteria from seed pods?
For speed, use cold stratification + a heat mat (70°F) after 3 months. Alternatively, grafting mature wisteria cuttings (spring or fall) yields blooms in 2–3 years—much faster than seeds! But seeds are rewarding for patience and unique varieties.
Wrapping up and next steps
Growing wisteria from seed pods is a rewarding journey that unlocks the magic of next spring’s blooms—but patience and precision are your best tools! 🌱 By mastering cold stratification and nurturing young seedlings, you’re not just planting seeds; you’re cultivating a legacy of fragrant, climbing beauty.
Whether you’re a first-timer or a seasoned gardener, every step brings you closer to those dreamy lavender flowers.
Ready to turn your garden into a wisteria haven? Start small: gather your pods, prep your setup, and dive into stratification this fall. Next spring, your hard work will bloom into something extraordinary! 🌸