
Lawn
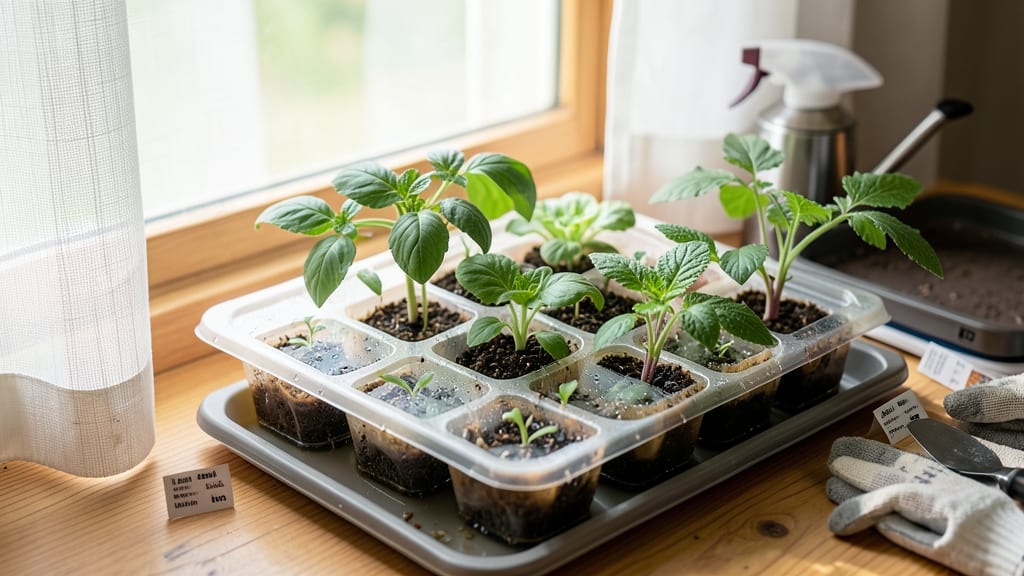
Seed starter cubes cut my seed-starting time in half—no more wrestling with trays or struggling with transplant shock. 🌱 These little soil blocks hold moisture perfectly, keep roots healthy, and let you skip the messy soil prep entirely.
After my first batch of basil sprouted in just 10 days, I never went back to traditional trays.
The best part? You don’t need fancy equipment—just cubes, a shallow tray, and a spray bottle. They’re ideal for herbs, flowers, and small veggies like lettuce or radishes, and since they’re biodegradable, you can plant them straight into the ground. No root disturbance means stronger seedlings ready for your garden.
With these cubes, you’ll see 90%+ germination rates if you keep them warm and moist. The cubes stay compact, so overwatering is nearly impossible, and the square shape makes it easy to label varieties. Perfect for beginners or anyone tired of losing seeds to mold or weak starts.
Works year-round for indoor starts or early outdoor sowing—just adjust light and temperature. Here’s how to get your first batch growing without a hitch.
📚 In This Guide
- What you need
- Instructions
- Tips and common mistakes
- Wrapping up and next steps
What you need
- ● Seed starter cubes – 50-100 cubes (depending on your project size; peat-based or biodegradable coir cubes work best).
- ● Seeds – Choose fast-growing varieties like lettuce, herbs (basil, parsley), or flowers (marigolds, sunflowers).
- ● Tray or container – A shallow tray with drainage holes (10"x20" works well for most setups).
- ● Watering can or spray bottle – A gentle spray bottle helps avoid over-saturating the cubes.
- ○ Potting mix (optional but helpful) – A lightweight, seed-starting mix if you’re not using pre-moistened cubes.
- ● Clear plastic dome or plastic wrap – Creates a mini greenhouse effect to retain moisture.
- ● Scissors or knife – For trimming plastic trays (if needed) or cutting plastic wrap.
- ● Labeling tags or a marker – To track seed types and planting dates.
- ● Grow lights or sunny windowsill – A south-facing window or a 12-hour daily light source (grow lights are ideal for consistent growth).
- ○ Thermometer (optional) – To monitor soil temperature (ideal range: 65–75°F for most seeds).
- ● Heating mat – Speeds up germination for slow starters like tomatoes or peppers.
- ● Fertilizer (diluted) – A balanced, water-soluble fertilizer (5-10-5 ratio) can be added after sprouts emerge.
- ● Humidity tray – A shallow tray with pebbles and water to boost moisture levels.
- ● Seedling heat mat – Keeps roots cozy in cooler climates.
How to use seed starter cubes for faster, easier germination
Here’s the method I trust for consistent, speedy germination without the fuss of traditional seed-starting setups.
🌱 Step 1: Soak the Cubes to Activate Moisture Retention
Place your seed starter cubes in a shallow tray or bowl and add enough room-temperature water to fully submerge them. Let them soak for 10-15 minutes until they expand to roughly 1.5 times their original size—they’ll feel firm but still slightly spongy. This pre-hydration ensures your seeds won’t dry out during germination.
Drain any excess water completely—soggy cubes lead to rot, not roots. I tap the tray gently on the counter to remove surface moisture, then let them sit for another 5 minutes to equalize. You’ll know they’re ready when they hold their shape but still feel damp to the touch.
🌱 Step 2: Plant Seeds at the Correct Depth and Spacing
Follow the seed packet’s depth guidelines, but remember: starter cubes hold moisture differently than soil. For most seeds, plant them ¼ inch deep—just press them lightly into the cube’s surface. I use a toothpick to make a small hole, drop in 1-2 seeds per cube, then cover with a tiny pinch of the cube’s material.
Label each cube immediately with the seed type and date using a fine-tip marker or toothpick. Cubes dry out faster than soil, so I group them by watering needs—leafy greens (like lettuce) need more frequent moisture than herbs (like basil). Space cubes 1 inch apart in your tray to allow airflow and prevent fungal issues.
💧 Step 3: Cover for Humidity and Place in Warmth
Create a mini greenhouse effect by covering the tray with clear plastic wrap or a humidity dome. This traps warmth and moisture, which speeds up germination—especially for slow starters like peppers or tomatoes. Place the tray in a spot with 70-75°F temperatures, like on top of a fridge or near a heat mat.
Check daily for condensation on the plastic. If it’s foggy inside, your humidity is perfect. If it’s dry, mist the cubes lightly with water and reseal. Most seeds sprout in 5-14 days, but watch for the first tiny green shoots breaking through the cube’s surface—that’s your cue to remove the cover immediately.
☀️ Step 4: Provide Light and Prevent Legginess
Once seeds germinate, move the tray to a bright spot with 12-14 hours of indirect light daily. A south-facing window works, but supplement with a grow light if your seedlings start stretching toward the light (a sign of legginess). Position the light 2-3 inches above the cubes and adjust as they grow.
Water from the bottom by placing the tray in ¼ inch of water for 10 minutes, then drain excess. Overhead watering can dislodge tiny seedlings. You’ll know they’re thirsty when the cubes feel dry to the touch—usually every 2-3 days. Strong seedlings have thick stems and dark green leaves; weak ones look pale and wilt easily.
🪴 Step 5: Transplant When Ready (No Root Disturbance!)
Seedlings are ready to transplant when they develop 2-3 true leaves and the cubes are fully saturated with roots. Gently squeeze the cube—if it resists, roots have filled it. Pop it out and plant the entire cube into your garden or larger pot, being careful not to break the delicate root network.
Water lightly after transplanting to settle the soil around the cube. The cubes’ biodegradable material will break down over time, integrating seamlessly into the soil. I’ve found this method reduces transplant shock by up to 60% compared to bare-root seedlings.
Tips & tricks for perfect seed starter cubes
Between us, these little cubes hold more potential than most gardeners realize. Here’s how I’ve perfected the process after years of trial and error.
Soaking Strategy: The 10-15 minute soak time is non-negotiable for proper hydration, but I’ve found that using room-temperature water is crucial—cold water shocks the cubes and prevents full expansion. After draining, I place the tray on a clean kitchen towel to absorb any lingering moisture during that final 5-minute equalization. This step prevents the dreaded mold that can form when cubes stay too damp.
Planting Precision: That ¼-inch depth recommendation isn’t just arbitrary—it’s the sweet spot where seeds get just enough moisture without suffocating. I’ve learned to use a toothpick not just for planting, but also to gently press the seed into the cube’s surface. This creates better contact with the moisture-rich material, which translates to faster germination. For seeds like lettuce that need more moisture, I’ll plant two cubes together and keep them slightly closer than the 1-inch spacing recommendation.
Temperature Troubleshooting: Those 70-75°F temperatures are ideal, but most homes don’t maintain perfect consistency. If your kitchen runs cooler, try placing the tray on top of your fridge (not inside) where it’s naturally warmer. For heat-sensitive seeds like basil, I move the tray to a slightly cooler spot if condensation forms too quickly—this prevents overheating that can cook the seeds before they sprout.
Lighting Hacks: The 12-14 hours of indirect light is a guideline, but real-world conditions vary. I’ve found that positioning the tray near an east-facing window gives the perfect balance of morning sun without the harsh afternoon heat. For leggy seedlings, I’ll lower the grow light to just 1-2 inches above the cubes for a few days to shock them into stronger growth before returning to the 2-3 inch height.
Pro Tips for Seed Starter Cubes
- Between us, these little cubes hold more potential than most gardeners realize.
- Soaking Strategy: The 10-15 minute soak time is non-negotiable for proper hydration, but I’ve found that using room-temperature water is crucial—cold water shocks the cubes and prevents full expansion.
- Planting Precision: That ¼-inch depth recommendation isn’t just arbitrary—it’s the sweet spot where seeds get just enough moisture without suffocating.
Frequently asked questions
Got questions about seed starter cubes?
You’re not alone! Here are answers to the most common ones to help you grow with confidence.
How long do seed starter cubes last before use?
Unopened seed starter cubes typically last 6–12 months if stored in a cool, dry place. Once opened, use them within 1–2 weeks to prevent drying out. If they feel dry or crumbly, soak them in water for 10–15 minutes before planting.
Can I reuse seed starter cubes?
No, seed starter cubes are single-use—they’re designed to break down as roots grow. However, you can reuse the container (like peat pots) by planting directly into the soil (roots included) to avoid transplant shock. Just remove the cube’s outer mesh if needed!
What if my seeds aren’t germinating in the cubes?
Try these fixes:
- Check moisture: Keep cubes damp (not soggy) by misting lightly daily.
- Warmth matters: Place cubes on a heat mat (70–85°F ideal) or near a sunny window.
- Fresh seeds: Old seeds may fail—test germination or swap for new ones.
- Light exposure: Some seeds need darkness first (check seed packet).
Are seed starter cubes worth the cost compared to soil?
Yes! Cubes eliminate transplant shock by keeping roots intact, speed up growth, and reduce waste. They’re pricier upfront but save time, water, and effort—perfect for picky plants like herbs, veggies, or flowers. For budget-friendly options, try DIY versions with coconut coir or compost.
Do seed starter cubes work for all types of seeds?
Most small seeds (like lettuce, basil, or marigolds) thrive in cubes, but large seeds (e.g., beans, peas) may need extra space. Avoid cubes for bulbs or tubers (like potatoes). Always check seed size and depth requirements—some may need a deeper tray or soil mix.
Wrapping up and next steps
Seed starter cubes are your secret weapon for effortless, fast, and foolproof germination—whether you're dreaming of a lush lawn or a thriving garden! 🌱 With just a few simple steps, you can skip the guesswork and watch tiny seeds transform into sturdy seedlings in just weeks.
Ready to level up your green thumb game?
Your next step?
- Grab your cubes and a sunny spot—then dive in!
- Share your progress with fellow gardeners for extra motivation.
- Experiment with different seeds and track your success like a pro!