
Propagation
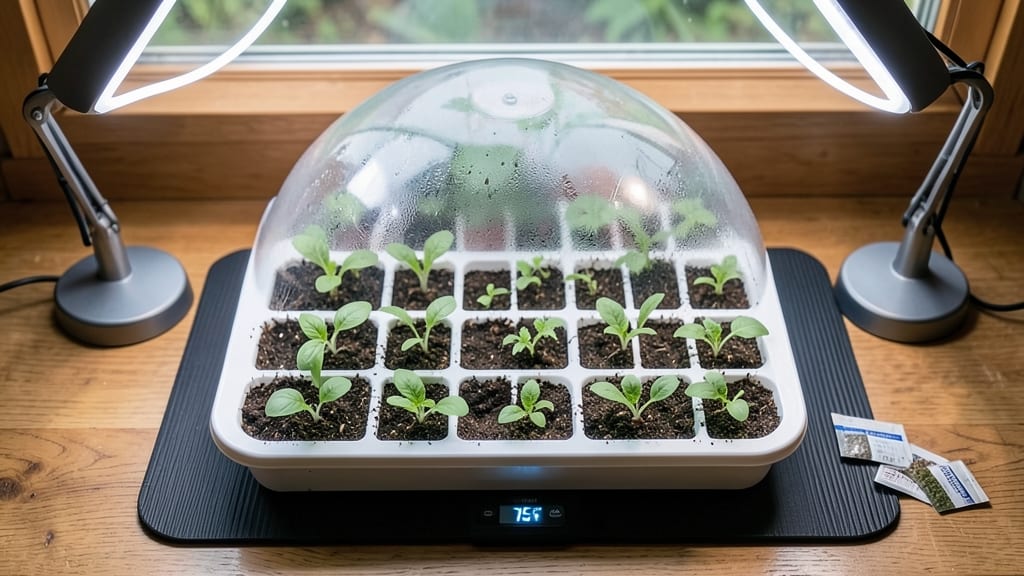
A seed starting heat mat turns cold windowsills into germination powerhouses—cutting weeks off your growing season. 🌱 I’ve watched seeds sprout in 3-5 days (instead of 10-14) using one, and the difference between a heat mat and no heat mat is like night and day for slow starters like peppers or tomatoes.
The secret lies in maintaining 70-85°F soil temps—just right for most seeds to break dormancy. Too hot? Roots scorch. Too cool? Seeds rot in their shells. My first heat mat had me checking temps hourly until I learned to trust the built-in thermostat (or DIY solution with a thermometer).
By the time you’re pinching seedlings for light, you’ll have stronger, more uniform starts than store-bought transplants. The mat pays for itself in saved space, faster harvests, and fewer lost batches. Just don’t skip the reflective surface underneath—it keeps heat where it belongs.
Works for everything from tiny herbs to giant squash, and DIY options (like heating cables under trays) prove you don’t need to spend big. Here’s how to use one without burning your seeds—or your patience.
📚 In This Guide
- What you need
- Instructions
- Tips and common mistakes
- Wrapping up and next steps
What you need
- ● Seed starting heat mat – Choose one with adjustable temperature settings (ideally 60°F–90°F range). Size depends on your seed tray (e.g., 10"x20" or 12"x24" for standard trays).
- ● Seed trays or containers – Use shallow trays with drainage holes (e.g., plastic or biodegradable pots). Quantity depends on your seed volume.
- ● Seed starting mix – Lightweight, sterile potting mix designed for seedlings (avoid garden soil). A 10-quart bag covers most small setups.
- ● Seeds – High-quality seeds suited for your climate and growing season.
- ● Misting bottle or spray nozzle – For gentle watering without disturbing seeds.
- ○ Clear plastic dome or humidity tent – Helps retain moisture (optional but recommended for humidity-loving seeds).
- ● Thermometer – A small digital probe thermometer ensures accurate temperature monitoring.
- ● Grow lights – LED or fluorescent lights (12–16 hours/day) for seedlings needing extra light.
- ● Heating pad controller – For precise temperature adjustments (some mats include this).
- ● Seedling labels & markers – To track varieties and planting dates.
- ● Bottom watering tray – Keeps moisture consistent without overwatering.
- ● Fan (small, adjustable) – Encourages strong stems by preventing leggy growth.
How to use a seed starting heat mat for faster germination
Here's the straightforward method I trust to jumpstart seeds and get them growing strong in half the time.
🌱 Step 1: Position the Heat Mat Correctly Under Trays
Place your seed starting heat mat on a flat, stable surface—preferably a table or shelf where it won't get bumped. I like to use a small tray underneath to catch any condensation that forms. The mat should extend at least 1 inch beyond all sides of your seed trays to ensure even warmth distribution.
Don't cover the mat with anything—it needs to breathe. If you're using a humidity dome, position it directly on top of the seed trays without pressing down on the mat itself. The ideal temperature range is 75-85°F at the soil surface, which most quality heat mats maintain automatically.
💧 Step 2: Prepare Trays and Moisten Soil Before Placing
Fill your seed trays with moistened seed-starting mix up to 1 inch below the rim. Press down lightly so the surface is firm but not compacted. Before placing the trays on the heat mat, water them gently from the bottom by setting the trays in ½ inch of water for 10-15 minutes—this ensures even moisture without disturbing the soil.
Remove the trays and let any excess water drain completely. You'll know the soil is ready when it holds together when squeezed but doesn't crumble. This step is crucial because dry soil conducts heat poorly, and seeds need consistent moisture to germinate.
☀️ Step 3: Place Trays on the Mat and Monitor Conditions
Set your seed trays directly onto the heat mat, spacing them evenly so air can circulate between them. Watch for condensation on the underside of the trays—this is normal and indicates the right humidity level. If you notice water droplets forming on the soil surface, that's a sign the humidity is too high; prop the humidity dome slightly off the trays to improve airflow.
Keep the trays in indirect light at first. Once you see the first signs of germination—tiny green sprouts breaking through the soil—move them to a brighter location. The heat mat ensures rapid germination, but seedlings still need light to grow strong after they sprout.
⏰ Step 4: Maintain Consistent Conditions Until Germination
Check the soil moisture daily—it should stay evenly damp but not soggy. If the top layer feels dry to the touch, mist it lightly with a spray bottle. Avoid overwatering, as excess moisture can lead to mold or damping-off disease, which will kill your seedlings before they even get started.
Most seeds germinate within 5-10 days when using a heat mat, but this varies by plant type. Once 50% of your seeds have sprouted, remove the humidity dome completely to prevent fungal growth. At this stage, you'll want to keep the heat mat on for another 3-5 days to give the seedlings a strong start before transitioning them to regular growing conditions.
🌿 Step 5: Transition Seedlings Off the Heat Mat
When seedlings have their first set of true leaves—those are the second set after the initial cotyledons—they're ready to move off the heat mat. Gradually reduce the heat over 2-3 days by turning it off for increasing periods each day. This helps prevent shock to the young plants.
Once they're fully acclimated, you can remove the heat mat entirely. At this point, focus on providing 14-16 hours of light daily to keep them growing strong. The heat mat gave them a head start, but now they need light to develop into healthy, sturdy plants ready for transplanting.
Tips & tricks for perfect seed starting with heat mats
Here's what I learned after years of experimenting with heat mats—and how to avoid the mistakes I made.
Heat Mat Placement: In Step 1, make sure your heat mat sits on a stable, level surface. I ruined my first batch when I placed it on a wobbly kitchen counter—uneven heat distribution caused patchy germination. That 1-inch overhang around your trays isn't just decorative; it ensures consistent warmth all the way to the edges of your soil. Trust me, the corners need love too!
Soil Preparation: When you're prepping your seed-starting mix in Step 2, focus on that 10-15 minute bottom-watering technique. This isn't just about moisture—it's about creating the perfect environment where seeds can draw up water without getting waterlogged. I learned this the hard way when my first batch developed mold because I overwatered from the top. The soil should feel like a damp sponge, not a soggy mess.
Germination Timing: Those 5-10 days of germination time in Step 4 can feel like forever, but here's the secret: different seeds have different needs. Fast germinators like radishes might pop up in 3-5 days, while slower ones like tomatoes can take the full 10 days. Once you hit that 50% sprouting mark, don't rush to remove the humidity dome—keep it on for those extra 3-5 days to give your seedlings that strong foundation. This is where the magic happens!
Transition Strategy: The 2-3 day tapering off in Step 5 is crucial. I made the mistake of turning off the heat mat too quickly, and my seedlings became leggy and weak. Instead, start by turning it off for just 30 minutes each day, then gradually increase that time. By day 3, you can remove it completely. This gradual transition helps your seedlings adjust to normal temperatures without shock.
Pro Tips for Seed Starting Heat Mat
- Here's what I learned after years of experimenting with heat mats—and how to avoid the mistakes I made.
- Heat Mat Placement: In Step 1, make sure your heat mat sits on a stable, level surface. I ruined my first batch when ...
- Soil Preparation: When you're prepping your seed-starting mix in Step 2, focus on that 10-15 minute bottom-watering t...
Frequently asked questions
Got questions about using a seed starting heat mat? You’re not alone! Here are some of the most common concerns—and their straightforward answers—to help you grow with confidence.
Do I really need a heat mat for seed starting?
A heat mat isn’t always required, but it’s a game-changer for slow-to-germinate seeds like tomatoes, peppers, or herbs. Without one, some seeds may take 2-3x longer to sprout. If you’re impatient (or just want faster results!), a heat mat is worth the investment.
How long should I keep seeds under the heat mat?
Most seeds germinate best with 70–85°F soil temps for 1–3 weeks, depending on the type. Once sprouts emerge, remove the mat to prevent leggy seedlings. Check your seed packet for specific timing—some (like lettuce) don’t need extra heat!
Can I use a heat mat without a seed tray?
Technically yes, but it’s riskier. Heat mats work best with insulated seed trays or a thick layer of damp paper towels to prevent overheating. Without insulation, seeds may dry out or overheat. For safety, pair your mat with a tray or a DIY setup like a damp towel in a shallow container.
What if my seeds aren’t germinating even with a heat mat?
Try these fixes:
- Check moisture: Seeds need consistent dampness (not soggy!). Mist lightly or use a spray bottle.
- Verify temperature: Use a soil thermometer—some mats run hotter than advertised.
- Test seed viability: Soak a few seeds in water; if they sink, they’re likely good. Old seeds may need scarification or stratification.
- Adjust light: Some seeds need darkness to germinate (e.g., parsley). Cover with a damp paper towel until sprouts appear.
Are there cheaper alternatives to a heat mat?
Yes! Try these budget-friendly hacks:
- DIY heat pad: Use a reusable heating pad (like for pets) on low under a tray.
- Bottom watering: Place trays in a shallow dish of warm water to boost humidity and warmth.
- Greenhouse effect: Cover trays with plastic wrap to trap heat (remove once sprouts emerge).
- Warm location: Set trays on top of a fridge or near a sunny window with a clear plastic dome.
Wrapping up and next steps
Starting seeds with a seed starting heat mat is a game-changer for gardeners eager to see faster, healthier sprouts! 🌱 Whether you're a beginner or a seasoned pro, the right warmth and consistency can make all the difference in your propagation success.
Now that you’re equipped with the knowledge—from setup tips to troubleshooting—it’s time to put that heat mat to work and watch your garden dreams take root.
Ready to dive in? Grab your seeds, set up your heat mat, and start your green-thumb journey today! 🌿✨