
Propagation
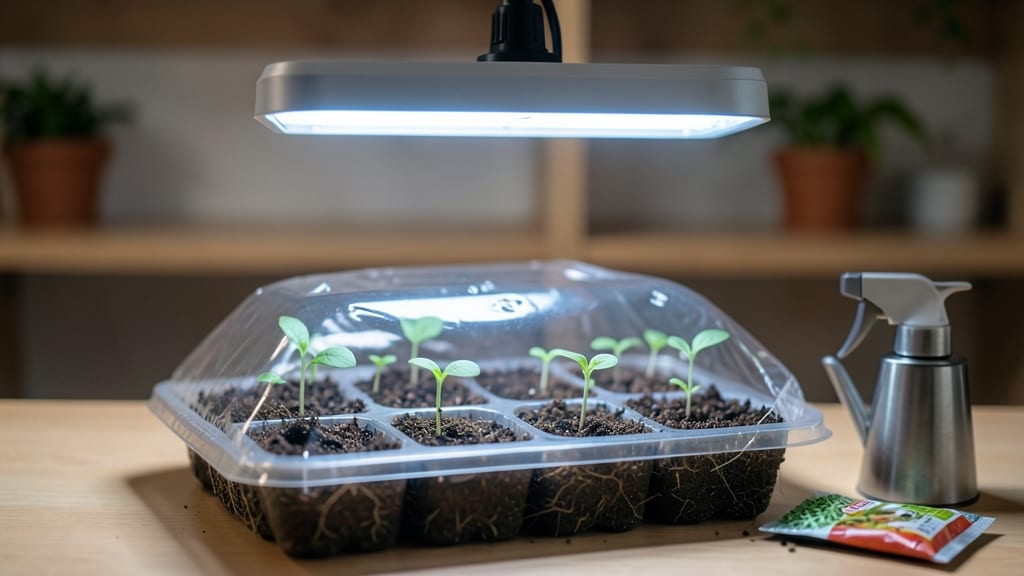
A seed starting kit with light transforms your kitchen counter into a perfect greenhouse for seedlings. ✨ I’ve used mine for three seasons now, and the difference between these sturdy starts and the leggy, weak plants I used to buy is night and day.
The built-in grow lights eliminate the need for a sunny windowsill, and the humidity dome keeps everything cozy until the first true leaves appear.
You’ll need seeds, a growing medium (I swear by a mix of peat and perlite), and the kit itself—most include trays, lights, and a timer.
The light source is the star: full-spectrum LEDs mimic sunlight, and the timer ensures seedlings get 14-16 hours of light daily without you having to remember. Just set it up, plug it in, and let the kit do the work while you focus on the fun part—planning your garden layout.
By the time you’re ready to transplant, you’ll have stocky, dark-green seedlings with strong roots, not the etiolated sticks from store-bought flats. The transition to outdoor conditions is smoother too—just harden them off over 5-7 days by moving them outside for a few hours each day.
No more wilting shock or stunted growth; these plants hit the ground running.
Perfect for beginners, small spaces, or anyone tired of hit-or-miss germination. Whether you’re growing tomatoes, herbs, or flowers, this kit makes seed starting foolproof—no green thumb required. Let’s get those seeds sprouting!
📚 In This Guide
- What you need
- Instructions
- Tips and common mistakes
- Wrapping up and next steps
What you need
- ● Seed starting trays or pots: 10–20-cell trays (biodegradable or plastic) or 2–3" pots (quantity depends on seed volume).
- ● Seed starting mix: 1–2 bags of sterile, well-draining potting mix (avoid garden soil!).
- ● Seeds: Choose fast-growing varieties (e.g., lettuce, basil, or marigolds) for beginners.
- ● Grow lights: LED grow lights (12–24W, full-spectrum) or T5 fluorescent bulbs.
- ● Light stand or adjustable clamp lamp (height-adjustable, 6–12" above seedlings).
- ● Misting bottle or spray nozzle: For gentle watering without disturbing seeds.
- ● Humidity dome or plastic wrap: 1–2 domes (or clear plastic) to retain moisture.
- ○ Thermometer/hygrometer (optional): To monitor temperature (ideal: 65–75°F) and humidity (40–70%).
- ● Self-watering trays: Reduces maintenance for busy gardeners!
- ● Heat mat (for cold climates): Speeds up germination (70–80°F).
- ● Reflective material: Aluminum foil or Mylar behind trays to boost light efficiency.
- ● Timer for grow lights: Automate 12–16 hours of light daily.
Step-by-Step instructions for growing vibrant seedlings with a light kit
Here's how to turn tiny seeds into sturdy, vibrant seedlings using your grow light—no guesswork, just perfect results.
🌱 Step 1: Set Up Your Grow Light for Optimal Seedling Growth
Position your grow light 2-4 inches above the seed trays to deliver 14-16 hours of light daily. I always start with 4 inches for delicate seedlings like lettuce, then lower it gradually as they grow. Use a full-spectrum LED grow light—these mimic sunlight best and won’t overheat your seedlings. If your light feels warm to the touch, raise it immediately to prevent scorching.
Mount the light on an adjustable arm or use a timer to automate on/off cycles. This ensures consistent light exposure without you having to remember to flip switches. You’ll see the difference in strong, compact seedlings versus leggy, weak ones that stretch toward weak light.
💧 Step 2: Sow Seeds and Maintain Moisture Without Overwatering
Fill your seed-starting trays with moistened seed-starting mix (never garden soil—it’s too dense). Press it down lightly so the surface is firm but not compacted. Plant seeds at a depth of twice their diameter—this ensures they don’t dry out before germinating. For example, tomato seeds go ¼ inch deep, while large beans need 1 inch. Cover lightly with additional mix.
Water gently with a spray bottle until the soil looks evenly damp but not soggy. Overwatering now leads to damping-off, a fungal disease that collapses seedlings overnight. I like to water from the bottom by placing trays in a shallow tray of water for 10 minutes, then letting them drain. This keeps moisture consistent without disturbing the seeds.
☀️ Step 3: Monitor Light Exposure and Adjust as Seedlings Grow
Once seeds sprout, watch for first true leaves (the second set after the initial cotyledons). This is your signal to lower the grow light to 2 inches above the seedlings. Leggy growth means the light is too far away—you’ll see thin stems and leaves spaced far apart. Strong seedlings have thick stems, dark green leaves, and compact spacing between nodes. If you notice this, move the light closer immediately.
Rotate trays a quarter turn daily so seedlings grow straight toward the light, not lopsided. I mark the rotation direction with a pencil to avoid confusion. After 3-4 weeks, seedlings should be 3-4 inches tall with 3-4 true leaves—now they’re ready for hardening off before transplanting outdoors.
✂️ Step 4: Thin Seedlings and Prepare for Transplanting
When seedlings reach 2 inches tall, thin them to one per cell (or 2 inches apart in trays). Use clean scissors to snip weak seedlings at soil level—this prevents disturbing roots of the plants you’re keeping. I always thin on a cloudy day to reduce transplant shock. The remaining seedlings should have strong stems and no signs of yellowing. If you see leggy or pale seedlings, they need more light or nutrients.
Two weeks before your last frost date, start hardening off by placing seedlings outside in partial shade for 1 hour daily, gradually increasing time. This toughens them for outdoor conditions. You’ll know they’re ready when they don’t wilt after a full day outside. Transplant on an overcast afternoon to minimize stress, and water deeply at the base to encourage root growth.
Tips & tricks for perfect seed starting with grow lights
Here's what nobody tells you—these game-changing insights will transform your seedling game from mediocre to spectacular.
Light Distance Precision: That 2-4 inch range in Step 1 is your golden window, but here's the secret: start with 3.5 inches for most seedlings, then adjust daily. Use a small ruler to measure from the top of the tallest seedling to the light—this prevents uneven growth. The moment you see seedlings stretching toward the light (a sign of "etiolation"), lower it immediately. I keep a white card next to my setup to track height adjustments—it's a visual reminder to check daily.
Temperature Matters: While we're not baking here, ambient warmth plays a critical role in germination. Place your seed trays on a heating mat set to 70-75°F during the 14-16 hour light cycle—this mimics spring soil temperatures and speeds up germination by 30-50%. Just be careful not to exceed 80°F, or you'll risk damping-off. I run my heating mat only during the light cycle to maintain this perfect temperature window without overworking the system.
Moisture Management: The 10-minute bottom-watering technique in Step 2 is brilliant, but here's the pro move: use a clear plastic dome or zip-top bag to create a mini greenhouse effect after sowing. This traps humidity right where the seeds need it most during those critical first 24 hours. Remove it once you see sprouts emerging—this prevents condensation from settling on seedlings, which can cause fungal issues. I've seen germination rates double with this simple trick.
Growth Monitoring: Those 3-4 weeks in Step 3 feel like forever, but you can accelerate the process by supplementing with a small fan on low setting. Place it 6-12 inches away from seedlings for 15 minutes daily to strengthen stems—this creates what gardeners call "air pruning" that results in bushier, more compact plants. Just avoid direct airflow on seedlings, which can cause stress. I use a timer for this to make it completely hands-off.
Pro Tips for Seed Starting Kit With Light
- Here's what nobody tells you—these game-changing insights will transform your seedling game from mediocre to spectacu...
- Light Distance Precision: That 2-4 inch range in Step 1 is your golden window, but here's the secret: start with 3.5 ...
- Temperature Matters: While we're not baking here, ambient warmth plays a critical role in germination. Place your see...
Frequently asked questions
What’s the best time of year to start seeds with a grow light?
Most gardeners begin indoors 6–8 weeks before the last frost date in their zone. For example, if your last frost is April 15, start seeds around February 15–March 1. Early starters (like tomatoes or peppers) need more time, while fast growers (lettuce, herbs) can wait until 4–6 weeks out. Check your local frost dates for precision!
Can I use a regular LED bulb instead of a dedicated grow light?
While some LED bulbs (like full-spectrum or daylight LEDs) work, they’re not ideal for seed starting. Grow lights are designed to mimic sunlight’s blue (for growth) and red (for flowering) spectrums—critical for young seedlings. If you’re on a budget, look for 6500K (cool white) LEDs as a temporary fix, but upgrade for best results!
Why are my seedlings leaning toward the light? What should I do?
This is called etiolation, and it happens when seedlings stretch toward the light source. To fix it:
- Rotate trays daily (¼ turn) so all sides get even light.
- Raise the light gradually (start 2–3 inches above seedlings, then increase as they grow).
- Avoid touching leaves—they’re delicate!
How long should seedlings stay under grow lights each day?
Seedlings thrive on 14–16 hours of light daily. Use a timer to automate cycles—most grow lights pair well with plug-in timers ($10–$20). Too little light? Leggy, weak plants. Too much? Stress and heat damage. Balance is key! For fast growers (like basil), 12 hours may suffice.
What if my grow light isn’t working, or the seedlings look weak?
Troubleshoot with this quick checklist:
Issue
Fix
Light isn’t on
Check the bulb, outlet, or timer settings.
Seedlings are pale or stretched
Lower the light closer (start 2–3” away) or increase light hours.
Yellowing leaves
Overwatering! Let soil dry slightly between waterings.
Mold or dampness
Improve airflow with a small fan (on low) and reduce humidity.
Wrapping up and next steps
Starting seeds with a seed starting kit with light is your ticket to stronger, healthier plants and a thriving garden! By providing the perfect balance of warmth, moisture, and grow lights, you’ll give your seedlings the best possible head start—no matter the season.
Whether you’re a beginner or a seasoned gardener, this method simplifies the process and boosts your success rate.
Ready to greenify your space? Grab your kit, follow the steps, and watch those tiny seeds transform into vibrant, ready-to-plant seedlings. Next up: Choose your first seeds and let the growing adventure begin! 🌱✨