
Propagation
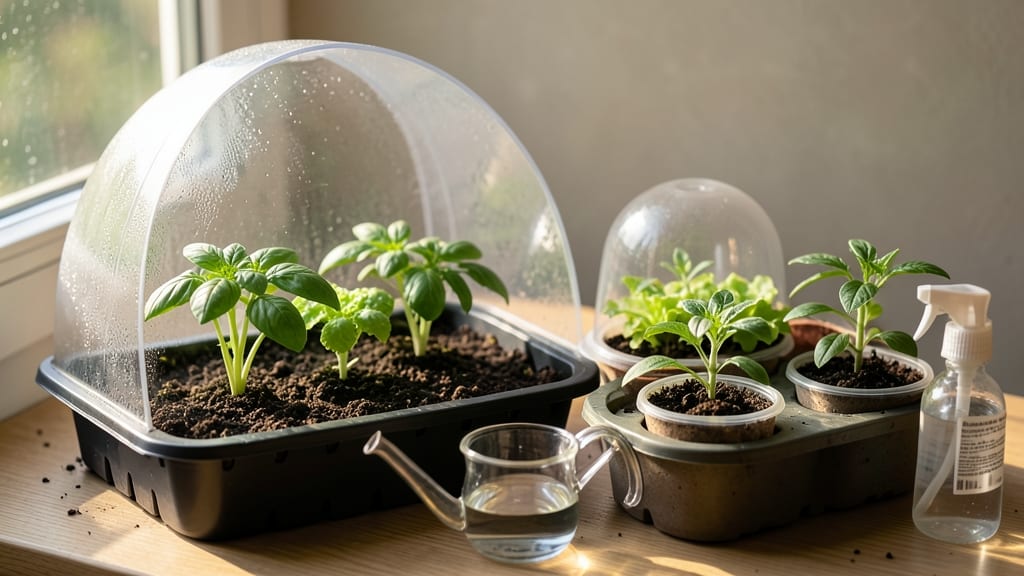
A small seed starting greenhouse turns your cluttered counter into a thriving nursery. 🌱 I’ve tested multiple setups, and the right one can double your germination rates while saving space—no more crowded windowsills or leggy seedlings reaching for the light.
The key lies in balancing light, warmth, and airflow—most store-bought greenhouses miss one of these. A simple DIY version with clear plastic domes, a seedling heat mat, and a small fan keeps costs low while delivering professional results.
My first batch of peppers germinated in just 5 days instead of the usual two weeks.
You’ll end up with stocky, dark-green seedlings ready for transplanting, not spindly stems that snap at the slightest breeze. The setup works year-round, whether you’re starting tomatoes in February or herbs in October, and adapts to any windowsill or basement nook.
Common pitfalls? Overwatering (root rot is real) and skipping ventilation (condensation = fungal problems). But once you nail the basics, you’ll wonder why you ever bought seedlings from a nursery—this is how you grow like a pro, even in tiny spaces.
📚 In This Guide
- What you need
- Instructions
- Tips and common mistakes
- Wrapping up and next steps
What you need
- ● Greenhouse Structure: Clear plastic sheeting (4-6 mil thickness, 4’x8’ sheet or custom size) OR
- ● A pre-made small greenhouse (e.g., 2’x4’ or 3’x5’ grow tent with ventilation)
- ● Growing Trays or Containers: Seed trays (1020 or 520 trays, 10-20 units depending on seed volume)
- ● OR biodegradable pots (2-3” diameter, 50-100+ units)
- ● Growing Medium: Seed starting mix (sterilized, peat-based or coco coir blend, 1-2 cubic feet)
- ● Seeds: Your chosen seeds (check packet for spacing needs)
- ○ Ventilation: Small fans (optional but helpful for airflow, 1-2 units)
- ● Ventilation kit (if using a pre-made greenhouse)
- ● Lighting: Grow lights (LED or fluorescent, 1-2 units, 12-16” above seedlings)
- ● Humidity Control: Humidity dome (for trays) or a spray bottle
- ● Thermometer/Hygrometer: To monitor temperature (50-75°F ideal)
- ● Heat Mat: For cold climates (1-2 units, 100-200W)
- ● Reflective Material: Aluminum foil or Mylar to boost light
- ● Automatic Timer: For lights (14-16 hours/day)
- ● Labels & Markers: To track seed varieties
Step-by-Step guide to building a functional small seed starting greenhouse
Here's how to create a space-efficient germination station that outperforms store-bought alternatives.
🪴 Step 1: Select and Prepare Your Base Structure
Choose a 4-foot tall frame made from PVC pipes or wooden stakes—I prefer PVC because it resists rot and won't warp over time. Assemble a 2-foot by 2-foot base with 12-inch tall sides (this keeps humidity stable while allowing airflow). For the top, create a sloped roof using clear plastic sheeting or glass panels—the slope prevents water pooling and maximizes light penetration.
Drill ¼-inch drainage holes along the bottom edges of all sides. This prevents root rot by letting excess water escape while maintaining humidity inside. Line the bottom with landscape fabric to block weeds and pests from invading your seed trays. The fabric also helps retain moisture without making the base soggy.
🌱 Step 2: Layer Insulation and Moisture Control
Place a 1-inch layer of vermiculite or perlite at the base—this improves drainage while keeping the root zone warm. Next, add 2-3 inches of seed-starting mix (never garden soil—it's too dense and may harbor pathogens). I like to mix in a slow-release fertilizer (follow package rates) to give seedlings a nutrient boost from day one.
Cover the soil with clear plastic wrap secured tightly over the top edges. This creates a mini greenhouse effect that raises soil temperatures by 5-10°F, which is critical for fast germination. Check daily for condensation—if the plastic fogs up, your humidity is perfect. If it stays dry, mist the soil lightly with lukewarm water until the surface glistens.
☀️ Step 3: Position for Optimal Light and Temperature
Place your greenhouse on a south-facing windowsill or under a grow light for 14-16 hours of light daily. Natural light works best, but if your window isn't sunny enough, supplement with a full-spectrum LED bulb positioned 4 inches above the seedlings. The light should be strong enough that you can't see shadows of the seedlings when held directly underneath.
Maintain 70-75°F soil temperatures—use a seedling heat mat if your space runs cooler. You'll know it's working when condensation forms on the plastic cover within 30 minutes of turning it on. Monitor with a thermometer taped to the inside frame. If temperatures exceed 80°F, crack the plastic cover slightly to prevent overheating.
💧 Step 4: Manage Humidity and Ventilation
After 50% of seeds germinate (usually 5-10 days), remove the plastic cover for 1-2 hours daily to harden off seedlings. This prevents damping-off disease, which turns stems to mush overnight. Start with short ventilation periods in the morning when humidity naturally drops, then gradually increase to full coverage removal by day 14.
Water from the bottom by placing trays in ½-inch of water for 10-15 minutes. This encourages strong root development downward instead of shallow, weak roots. You'll know moisture is right when the soil surface looks damp but not wet—no standing water should pool in the trays. Avoid overhead watering once seedlings emerge to prevent fungal diseases.
⏰ Step 5: Transplant When Ready
Seedlings are ready for transplant when they develop 2-3 sets of true leaves (not the initial seed leaves). Gently remove them by grasping the base of the stem—never pull by the leaves. Plant in individual pots filled with sterile potting mix, burying up to the first set of true leaves to encourage root growth. Water deeply immediately after transplanting to settle the soil around roots.
Hardening off takes 7-10 days—gradually expose seedlings to outdoor conditions by placing them outside for 1 hour daily, increasing time by 30 minutes each day. Watch for wilting or yellowing leaves—these are signs they're not ready for full sun yet. Once they tolerate 6+ hours of direct sunlight without stress, they're ready for the garden.
Tips & tricks for perfect small seed starting greenhouse
Here's what nobody tells you about building a greenhouse that actually works—these are the details that separate thriving seedlings from disappointing failures.
Material Selection Matters: For the base structure, PVC pipes are my go-to because they resist rot and won't warp over time like wood. If you choose wooden stakes, treat them with a non-toxic wood preservative to prevent mold growth that could harm seedlings. The ¼-inch drainage holes in Step 1 are non-negotiable—if you skip this, you'll end up with root rot before your seeds even sprout. I like to use a power drill with a step bit to make quick work of these holes along the bottom edges.
Soil Temperature Secrets: The 70-75°F soil temperature range in Step 3 is where the magic happens for germination. I've learned this the hard way—when temperatures drop below 70°F, seeds take forever to sprout, if they sprout at all. Use a small, inexpensive thermometer taped to the inside frame to monitor temperatures continuously. If your space runs cooler, a seedling heat mat placed underneath will make all the difference—just make sure it's designed for seedlings, not full-sized plants.
Lighting Strategy: For the 14-16 hours of light daily requirement in Step 3, natural light is ideal but not always available. If you're supplementing with grow lights, position the full-spectrum LED bulb 4 inches above the seedlings—any closer and you'll scorch them, any farther and they won't get enough intensity. I've found that LED bulbs designed specifically for seedlings use less energy and produce better results than regular household bulbs. Rotate your trays daily so all seedlings get equal light exposure, preventing them from leaning toward the light source.
Ventilation Timeline: The 1-2 hour daily ventilation starting after 50% germination (Step 4) is crucial for preventing damping-off disease. I recommend starting with just 30 minutes on the first day and gradually increasing by 15 minutes each subsequent day. Watch your seedlings closely—if you see condensation forming on the plastic cover during the day, that's a sign you're ventilating too much too soon. The goal is to harden them off slowly while still maintaining enough humidity for healthy growth.
Pro Tips for Small Seed Starting Greenhouse
- Here's what nobody tells you about building a greenhouse that actually works—these are the details that separate thri...
- Material Selection Matters: For the base structure, PVC pipes are my go-to because they resist rot and won't warp ove...
- Soil Temperature Secrets: The 70-75°F soil temperature range in Step 3 is where the magic happens for germination. I'...
Frequently asked questions
Got questions about your small seed-starting greenhouse?
Here are answers to the most common ones—so you can grow like a pro, even in tight spaces!
What’s the best time of year to start seeds in a greenhouse?
For most veggies and flowers, start seeds 6–8 weeks before the last frost date in your zone. Cool-season crops (like lettuce or peas) can go in earlier, while warm-season plants (tomatoes, peppers) need warmer soil—aim for late winter or early spring. Check your local frost dates for precision!
How do I keep my greenhouse from getting too hot or cold?
Use ventilation (crack a window or add a small fan) to prevent overheating, and consider a thermostat-controlled heat mat for chilly nights. A shade cloth (30–50%) can block excess sun in summer. Monitor temps daily—ideal seed-starting range is 65–75°F.
Can I make a small greenhouse from household items?
Repurpose a plastic storage bin with a clear lid, a fish tank with a grow light, or even a large terrarium. Just ensure it has proper drainage and a way to control humidity. DIY greenhouses are budget-friendly and perfect for tiny spaces!
Why aren’t my seeds germinating in the greenhouse?
Check these first: moisture (keep soil damp but not soggy), temperature (too cold?), and light (seeds need darkness to sprout—cover with a damp paper towel if needed). Old seeds or poor soil can also be culprits. Try a seed viability test if germination rates are low.
How much space do I need for a small greenhouse?
Aim for at least 12–18 inches of height and 6–12 inches of width/depth per seed tray. Stackable shelves maximize vertical space, and a 4’x2’ footprint can comfortably hold 10–20 trays. Just ensure airflow between layers!
Wrapping up and next steps
A small seed starting greenhouse is your ticket to bigger harvests and happier plants—even in tight spaces! 🌱 With the right setup, you’ll unlock faster germination, stronger seedlings, and a head start on the growing season.
Whether you’re a beginner or a seasoned gardener, this compact solution proves that great things come in small packages.
Ready to take the next step? Start small, dream big! Grab your supplies, follow the tips, and watch your tiny greenhouse transform into a thriving nursery. Check out our guide to pick the perfect kit or DIY project for your space—your green thumb is just one seed away! 🌿