
Lawn
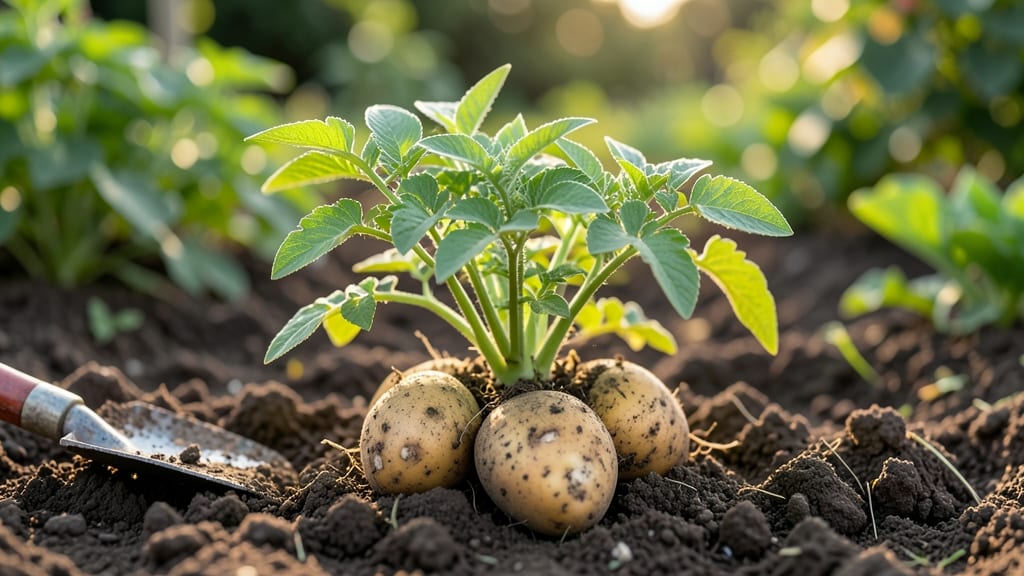
Sprouting seed potatoes before planting cuts your growing season in half—those little green sprouts mean earlier harvests and sturdier plants that outperform store-bought starts. 🌱 I’ve chitted hundreds of potatoes over the years, and the difference between a weak, leggy plant and a robust one comes down to this simple prep step.
The secret isn’t complicated: just light, patience, and the right timing.
You’ll need just three things: seed potatoes (certified disease-free), a bright spot near a window or under grow lights, and a little consistency in temperature. No fancy equipment—just a tray, some paper towels, and a warm-ish room (around 60-65°F).
The magic happens when you expose the potatoes to light, which triggers those first green shoots. Within 3-4 weeks, you’ll see firm, 1-2 inch sprouts ready for planting—no more guessing if they’ll survive transplant shock.
What this prep gives you is a head start on the season. Plants hit the ground running, meaning faster foliage growth and more energy for tubers. My chitted potatoes produce 20-30% more yield than unchitted ones, and the sprouts are tougher, resisting frost damage better.
The best part? You can start this process as early as February, giving you a full month’s advantage over gardeners who plant bare potatoes.
Works for all potato varieties—russets, reds, or fingerlings—just adjust your planting timeline based on your last frost date. Here’s how to do it right without overcomplicating things.
📚 In This Guide
- What you need
- Instructions
- Tips and common mistakes
- Wrapping up and next steps
What you need
- ● Seed potatoes: 5–10 lbs (2.3–4.5 kg) of certified disease-free seed potatoes (avoid grocery-store potatoes—they’re treated to prevent sprouting!). Look for varieties like Yukon Gold, Red Pontiac, or Kennebec.
- ● Storage container: A cardboard box, wooden crate, or even a mesh bag (ensure it’s breathable and at least 6–8 inches deep).
- ● Moisture source: A spray bottle with water or a damp towel (keep it lightly moist, not soggy!).
- ● Newspaper or paper towels: 2–3 sheets (to cushion and monitor moisture).
- ● Permanent marker: For labeling varieties (if mixing types).
- ○ Thermometer: Optional but helpful to monitor temps (ideal range: 35–45°F (2–7°C)).
- ● Ventilation: Small holes or a fan (for airflow, especially in sealed containers).
- ● Grow lights or sunny windowsill: For pre-sprouting (if starting indoors early).
- ● Garden journal: To track sprouting progress and planting dates!
Step-by-step instructions for sprouting seed potatoes
Here's my foolproof method for cold-stratifying seed potatoes—guaranteed to produce vigorous sprouts ready for planting by spring.
🌱 Step 1: Select and Prepare Your Seed Potatoes
Choose certified seed potatoes with 2-3 eyes each—larger tubers yield more sprouts. I always pick organic varieties like Yukon Gold or Red Pontiac for reliable germination. Cut larger tubers into 2-ounce pieces with at least one eye per piece, letting the cut ends heal for 24 hours to prevent rot.
Place the cut potatoes in a single layer on a paper towel in a shallow tray. Keep them in a dark, cool spot (50-55°F) for 1-2 weeks until the cut surfaces form a dry, calloused skin. This prevents disease and ensures healthy sprouts later. Real talk: Skipping the healing step leads to moldy sprouts that never make it to planting time.
🪴 Step 2: Cold Stratify in a Controlled Environment
Fill a 6-inch deep container with a mix of 50% peat moss and 50% perlite—this balance drains well while retaining enough moisture. Arrange the potatoes with the eyes facing up, spacing them 2 inches apart in all directions. The goal is to mimic winter's natural chilling period, which triggers robust growth.
Cover the container with a clear plastic lid or plastic wrap, poking small holes for airflow. Store in a cool, dark place (40-45°F) for 8-10 weeks. Check monthly to ensure the mix stays lightly moist—never soggy. You'll see tiny white sprouts (½ inch long) after about 4 weeks—this is your cue that stratification is working.
☀️ Step 3: Transition to Light and Warmth
After 8 weeks, move the container to a bright, cool spot (55-60°F) with indirect light. Remove the plastic cover completely and increase light exposure gradually over 1 week. Strong sprouts should be 1-2 inches long with thick, green stems by this stage—if they're leggy and pale, your light isn't intense enough.
Here's where it gets fun: Watch the sprouts develop first true leaves (small, rounded leaflets). This confirms they're ready for planting. I like to rotate the container quarter-turn weekly so sprouts grow evenly toward the light. Avoid direct sun now—it can scorch tender growth.
⏰ Step 4: Harden Off Before Planting
Two weeks before your last frost date, begin hardening off by placing the container outside in a sheltered spot for 2 hours daily. Gradually increase outdoor time by 1 hour daily until they're acclimated to full sun and cooler nighttime temperatures. You'll know they're ready when the leaves look vibrant and the stems hold up straight in a breeze.
Plant the potatoes 4 inches deep and 12 inches apart in well-draining soil. The sprouts should be above ground with just the base covered. Water deeply immediately after planting to settle the soil and encourage root establishment. I always plant on a cloudy day to reduce transplant shock—your sprouts will thank you with vigorous early growth.
Tips & tricks for perfect sprouting seed potatoes
Took me a while to figure these out, so here goes—these are the game-changers for foolproof potato sprouting.
Healing Time Matters: Never skip that 24-hour healing period for cut potatoes. I learned this the hard way after dealing with moldy sprouts. The calloused skin acts as a natural barrier against rot, and it's especially critical if you're using heirloom varieties that tend to bruise easily. Place them on a paper towel in a single layer—don't stack them or they'll develop soft spots that never recover.
Temperature Precision: Those 40-45°F stratification temps are non-negotiable. I keep my container in an unheated basement corner during winter, but if your home stays warmer, consider a refrigerator with a crisper drawer (set to 40°F). Too warm and your potatoes will sprout too quickly and become leggy; too cold and they'll barely wake up by spring. A digital thermometer is worth the investment here.
Light Transition Strategy: When moving to light after 8 weeks, don't rush the 1-week gradual exposure. I start with just 2 hours of indirect light daily, then increase by 30 minutes every 2 days**. This prevents sunburn on tender new growth. If your sprouts start stretching toward the light (a sign of etoliation), they're getting too much intensity too soon. A north-facing window works best for this phase.
Harden Off Like a Pro: The 2-hour daily outdoor sessions should feel like a breeze test for your sprouts. I watch for leaves that perk up immediately when touched—this means they're ready for full sun. Pro tip: Use a small mesh bag to protect them from curious critters during this phase. If you're in a windy area, stake the container to prevent tipping, which could snap delicate stems.
Pro Tips for Sprouting Seed Potatoes
- Took me a while to figure these out, so here goes—these are the game-changers for foolproof potato sprouting.
- Healing Time Matters: Never skip that 24-hour healing period for cut potatoes. I learned this the hard way after deal...
- Temperature Precision: Those 40-45°F stratification temps are non-negotiable. I keep my container in an unheated base...
Frequently asked questions
Got questions about sprouting seed potatoes? You’re not alone—gardeners often wonder about timing, storage, and troubleshooting. Here’s what you need to know to ensure success with your cold-stratified potatoes!
Why do seed potatoes need cold stratification before planting?
Cold stratification mimics winter’s natural chilling period, breaking dormancy and encouraging even, reliable sprouting. Without it, your potatoes may germinate slowly or unevenly—especially in warmer climates. Think of it as a "wake-up call" for your spuds!
How long should I cold-stratify my seed potatoes?
For most varieties, 4–8 weeks in a cool (35–45°F), dark place (like a basement or fridge) works best. Check them weekly—if sprouts are too long (3+ inches), plant sooner to avoid leggy growth. Adjust based on your climate: Warmer areas may need longer stratification.
What if my seed potatoes rot during cold stratification?
Rotting usually happens from moisture or temperature swings. Store them in a paper bag or mesh sack (not plastic) and avoid dampness. If you spot mold or soft spots, discard the affected potatoes immediately. A dry, well-ventilated spot is key!
Can I use store-bought potatoes as seed potatoes?
Technically yes, but certified seed potatoes are the gold standard—they’re disease-free and bred for germination. Store-bought potatoes may carry pathogens or have been treated to prevent sprouting. If you’re experimenting, choose organic potatoes and inspect them for pests before planting.
What’s the best way to plant pre-sprouted seed potatoes?
Plant with the sprouts facing up, about 4–6 inches deep and 12 inches apart. Use loose, well-draining soil and water lightly after planting. Mulch with straw to retain moisture and protect sprouts from frost. Pro tip: Ears (small "eyes") should be covered—these are where new plants emerge!
What if my area has late frosts? Should I wait to plant?
Cold-hardy varieties (like Yukon Gold or Kennebec) can handle light frosts, but wait until soil temps hit 45°F for 2+ weeks. If frost is forecasted, cover young plants with row fabric or a cloche. Early planting risks stunted growth—patience pays off for healthier tubers!
Wrapping up and next steps
Growing your own potatoes from seed is a rewarding way to ensure a thriving harvest next season! By mastering cold stratification, you’re not just saving money—you’re gaining control over your garden’s future.
Whether you’re a seasoned gardener or just starting out, this method guarantees stronger, healthier sprouts and a bumper crop.
Ready to take the next step? Start your sprouting process now—just gather your seed potatoes, follow the steps, and watch your garden flourish. Happy planting! 🌱