
Lawn
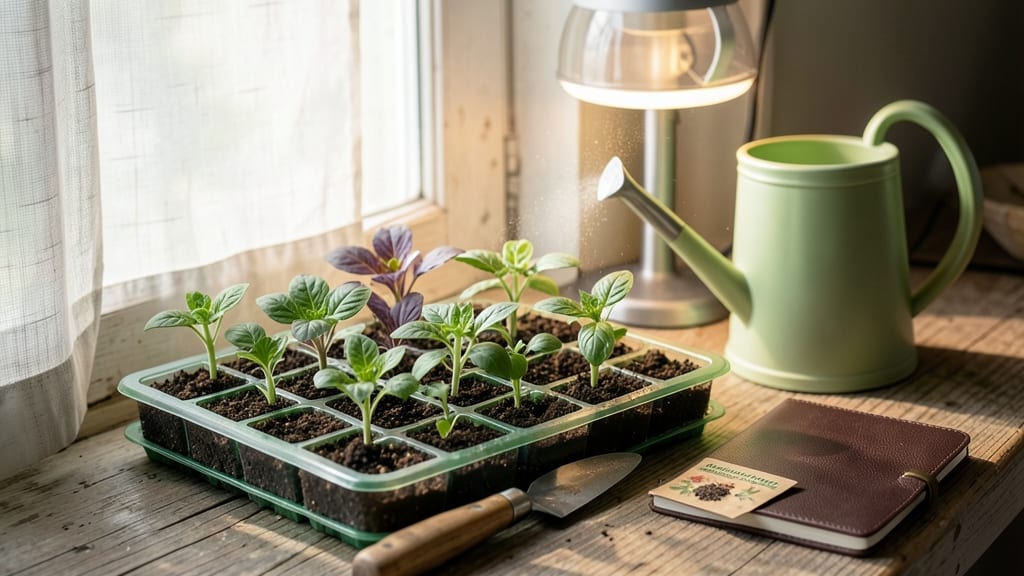
Fast germination starts with the right seed trays and lightweight loam mix. 🌱 I’ve wasted weeks waiting for seeds to sprout—until I switched to a fast-draining mix that keeps moisture consistent without drowning roots.
The secret isn’t fancy; it’s a simple blend of peat, perlite, and compost that works for almost any seed. You’ll need trays with drainage holes (biodegradable or plastic), a heat mat for cool starts, and a spray bottle for gentle watering. Skip the heavy garden soil—it compacts and slows growth.
My go-to mix stays fluffy enough to pop seeds right out of the tray when transplanting, with no root damage. Within 5-7 days, you’ll see those first green shoots breaking through.
The key is keeping trays warm (70-75°F) and covered with plastic wrap until germination begins—just remove it once sprouts appear. Overwatering is the #1 killer, so let the top inch dry between waterings.
For best results, use 2-3 inch deep trays for small seeds like lettuce and 4-6 inches for larger ones like tomatoes. Rotate trays daily for even light exposure, and avoid cold drafts. Once seedlings have two true leaves, they’re ready to graduate to bigger pots.
📚 In This Guide
- What you need
- Instructions
- Tips and common mistakes
- Wrapping up and next steps
What you need
- ● Seed trays: 1–3 trays (depending on quantity of seeds). Choose trays with drainage holes (e.g., 10"x20" plastic or biodegradable fiber trays).
- ● Lightweight loam mix: 50% peat moss or coco coir (for moisture retention and aeration).
- ● 30% perlite or vermiculite (for drainage and lightness).
- ● 20% compost or well-aged garden soil (for nutrients).
- ● Seeds: Choose fast-germinating varieties like annual ryegrass or creeping red fescue (check seed packet for depth requirements).
- ● Watering can with a fine rose nozzle (to avoid disturbing seeds).
- ● Misting spray bottle (for gentle hydration post-planting).
- ○ Clear plastic dome or humidity tray (optional but helps retain moisture during germination).
- ● Gloves (to keep hands clean and protect from sharp perlite).
- ● Small hand trowel or scoop (for mixing and filling trays).
- ● Level surface or tray stand (to ensure even water drainage).
- ○ pH testing kit (optional but helpful—ideal pH for lawn seeds: 6.0–7.0).
- ● Labeling tags & marker (to track seed types and planting dates).
How to create lightweight loam mix for speedier seed germination
Here's how I make a foolproof mix that keeps seeds happy and sprouts popping in record time.
🌱 Step 1: Combine Base Materials for Perfect Texture
Start by mixing 4 parts peat moss with 3 parts perlite in a large container. The peat moss provides moisture retention while the perlite creates air pockets that prevent compaction. I like to use my hands to gently fold these together—you want the mix to feel like damp, crumbly cake batter that holds its shape when squeezed but still breaks apart easily.
Add 2 parts vermiculite to the blend. This helps regulate moisture and provides minerals that support early root growth. Give everything a thorough mix until the color and texture look uniform throughout. The goal is a fluffy, lightweight medium that won't weigh down your seedlings as they grow.
💧 Step 2: Moisten the Mix Without Over-Saturating
Gradually add warm water to the dry mixture while stirring continuously. You're aiming for a consistency similar to a well-wrung-out sponge—when you squeeze a handful, a few drops should escape, but it shouldn't form a puddle. Overwatering now will create anaerobic pockets that stunt root development.
I like to let the mix sit for 10-15 minutes after adding water, then give it another quick mix. This lets any clumps break down naturally. Test the moisture by grabbing a handful—if it feels cool and slightly damp but not icy, you've got it right. This moisture level keeps seeds hydrated without suffocating them.
☀️ Step 3: Fill Seed Trays with Even Layers
Fill your 4 seed trays with the moistened mix, pressing down lightly as you go to eliminate air pockets. Use a ruler to ensure the surface is level—uneven layers cause inconsistent moisture distribution. I tap the trays gently on the table after each tray to help settle the mix without compacting it.
Leave about ½ inch of space below the tray rim. This prevents soil from spilling when you water and gives you room to firm the surface before planting. Run your finger across the top to create a smooth, even planting surface. You'll see tiny ridges where your finger pressed—these help seeds stay in place when you sow them.
⏰ Step 4: Sow Seeds at Proper Depth for Fast Germination
Follow the seed packet instructions for depth, but remember: most seeds only need to be covered with ½ their diameter of soil. I use a toothpick to make small holes at the correct spacing—this prevents overcrowding and makes thinning easier later. Place 1-2 seeds per cell (depending on seed size) and cover lightly with the mix.
Gently mist the surface with water until evenly moist but not soggy. You'll know it's right when the soil looks dark and slightly shiny—not wet like a sponge. Cover the trays with plastic wrap or a humidity dome to create a mini greenhouse effect. This keeps moisture consistent and speeds germination by 2-3 days compared to uncovered trays.
🌿 Step 5: Maintain Ideal Conditions for Sprouting
Place the trays in a warm location (70-75°F) where they'll receive indirect light until germination occurs. A seedling heat mat works wonders here—it keeps the soil warm enough to trigger faster sprouting. Check daily for condensation on the plastic; if you see water droplets, remove the cover for 10-15 minutes to prevent fungal growth.
Once you see the first green shoots (5-10 days for most seeds), remove the cover immediately. This prevents damping-off disease that attacks tender seedlings. Move the trays to a bright, south-facing window or under grow lights for 14-16 hours daily. You'll notice the seedlings reach for the light—this is your cue to keep them close to the light source to prevent leggy growth.
Tips & tricks for perfect seed starting mix
A few simple tricks that'll help you create the ideal environment for your seeds to thrive.
Texture is Everything: When mixing the 4 parts peat moss, 3 parts perlite, and 2 parts vermiculite in Step 1, aim for a consistency that resembles damp crumbly cake batter. This balance of ingredients creates the perfect air-to-moisture ratio for root development. If your mix feels too dense, add a little more perlite—it's the secret to preventing compaction that can stunt young roots.
Warm Water Wins: In Step 2, using warm water (around 75°F) helps activate the mix immediately. Cold water can create temperature shock and slow down the germination process. After adding water, let the mix sit for those 10-15 minutes—this resting period allows any clumps to break down naturally, giving you a smoother, more uniform planting medium.
Layering Like a Pro: For Step 3, use a ruler to check the levelness of your seed trays after filling them. Uneven layers can cause moisture pockets that lead to inconsistent germination. The ½-inch space below the tray rim is crucial—it prevents spillage when you water and gives you room to create that perfect smooth surface with your fingertip ridges, which help seeds stay put.
Speed Up Germination: The 2-3 day germination boost from covering your trays with plastic wrap in Step 4 is real! Check for condensation daily, and if you see water droplets forming, remove the cover for 10-15 minutes to prevent fungal growth. This humidity dome effect creates the ideal microclimate for seeds to sprout faster while keeping them protected.
Pro Tips for Starting Seed Trays
- A few simple tricks that'll help you create the ideal environment for your seeds to thrive.
- Texture is Everything: When mixing the 4 parts peat moss, 3 parts perlite, and 2 parts vermiculite in Step 1, aim for...
- Warm Water Wins: In Step 2, using warm water (around 75°F) helps activate the mix immediately. Cold water can create ...
Frequently asked questions
Got questions about starting seed trays?
You’re not alone! Here are some of the most common queries—and their straightforward answers—to help you grow with confidence.
What’s the best lightweight loam mix for seed trays?
A well-draining blend like 50% peat moss or coconut coir, 30% perlite/vermiculite, and 20% compost works best. Avoid heavy garden soil—it compacts and suffocates tiny roots. For extra fluffiness, add composted bark fines (10%) to improve aeration.
How long does it take for seeds to germinate in trays?
Germination time varies by plant: fast growers (lettuce, radishes) sprout in 3–7 days, while slower ones (tomatoes, peppers) take 1–3 weeks. Keep trays in a warm (65–75°F), humid environment and monitor moisture—consistency is key!
Should I water seed trays from the top or bottom?
Both methods work, but bottom-watering (via a tray) prevents seed displacement and over-saturation. For delicate seeds (like marigolds), mist the top lightly with a spray bottle. Pro tip: Use room-temperature water to avoid shocking seeds.
Can I reuse seed trays for multiple plantings?
Yes! Clean trays with a 10% bleach solution (rinse well) to kill pathogens. Replace the loam mix each time—old soil may harbor diseases. Warning: Avoid reusing trays for different plant families (e.g., tomatoes after peppers) to prevent soil-borne issues.
What if my seeds aren’t germinating at all?
Check these first:
- Freshness: Old seeds (over 1 year) may fail—test viability with a paper towel germination test.
- Depth: Most seeds need 2x their width of soil coverage (e.g., carrots go deeper).
- Light/Heat: Some seeds (like basil) need light to germinate—don’t bury them!
- Moisture: Dry soil = no germination. Use a humidity dome or plastic wrap until sprouts appear.
Wrapping up and next steps
Starting seeds in lightweight loam mix is a game-changer for fast, healthy germination—no fuss, just results! 🌱 You’ve got the perfect mix of materials, answers to common questions, and a foolproof method to kickstart your green thumb journey.
Now that you’re armed with knowledge, it’s time to get growing.
Your next step? Grab those seed trays, fill them with your custom blend, and watch your seedlings sprout in record time. Happy planting—your future garden awaits! 🌿✨