
Lawn
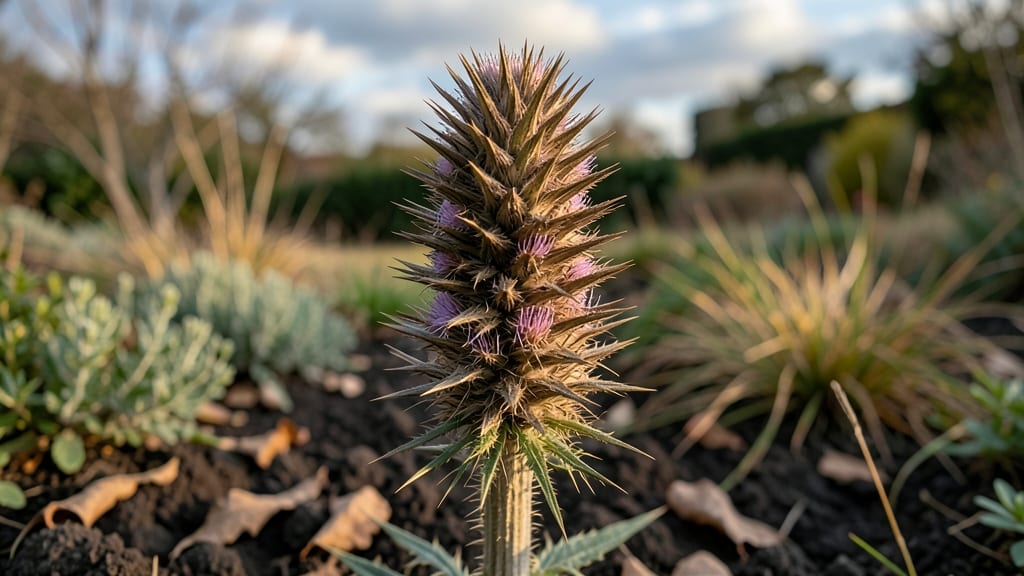
Those twist-resistant thistle seed heads are nature’s own dried floral art—easy to harvest, impossible to kill, and perfect for adding drama to your garden year-round. 🌿 I’ve used them in everything from rustic wreaths to winter bouquets, and they always steal the show with their spiky texture and deep brown hues.
The best part? They don’t wilt, fade, or require deadheading—just cut, dry, and display.
Thistles thrive in poor soil and full sun, making them the low-maintenance star of wildflower meadows or pollinator-friendly borders. Their seed heads attract finches and goldfinches, turning your garden into a bird buffet while adding architectural interest.
Harvest them in late summer when they’re fully formed but still green—this ensures they dry to a rich, uniform color without cracking.
Once dried, these seed heads bring bold texture to arrangements, whether tucked into dried flower bouquets or scattered across a winter table setting. They pair beautifully with grasses, eucalyptus, and dried berries for a natural, organic look.
Plus, their durability means you can reuse them season after season—no need to replace them like fresh flowers.
For extra flair, try pressing them into resin or embedding them in homemade candles for a rustic, handcrafted touch. They’re also a fantastic way to add height and contrast to garden beds, especially when planted alongside shorter perennials like lavender or sedum.
The possibilities are endless—and the best part is, they do all the work for you.
📚 In This Guide
- What you need
- Instructions
- Tips and common mistakes
- Wrapping up and next steps
What you need
- ● Thistle seed heads: 10–20 mature Cirsium or Carduus seed heads (e.g., globe thistle, Scotch thistle, or musk thistle). Ensure they’re fully dried (brown and brittle) for easy harvesting.
- ● Garden soil: Well-draining, slightly alkaline soil (pH 6.5–7.5). Amend with 1–2 cups of compost per square foot if your soil is heavy clay or sandy.
- ● Watering can or hose: With a gentle spray nozzle to avoid damaging delicate seedlings.
- ● Pruners or shears: Sharp, sterilized tools (e.g., Felco F-2) for harvesting or trimming.
- ● Gloves: Heavy-duty gardening gloves (thistles have prickly stems!).
- ● Plant markers: Biodegradable labels (e.g., wooden stakes or plant tags) to track varieties.
- ○ Stake or trellis (optional): 3–4 ft tall for taller thistle varieties to prevent seed heads from toppling.
- ● Seed collection bags: Breathable mesh bags (1–2 ft³ capacity) to store seed heads before processing.
- ● String or twine: For securing seed heads to stakes if wind is a concern.
- ● 🌡️ Timing: Plant seeds in early spring or late summer for optimal germination.
- ● ✨ Twist-Resistant Hack: Wrap seed heads in cheesecloth before hanging to prevent premature seed loss.
- ● 🔥 Wildlife Note: Thistles attract pollinators—place them near bee-friendly plants for a thriving ecosystem!
How to preserve thistle seed heads for long-lasting beauty
Here’s the simple method I’ve used to keep thistle seed heads fresh and stunning for months—no twisty stems or messy drops!
🌱 Step 1: Harvest at Peak Maturity
Pick thistle seed heads when the fluff is just starting to show but hasn’t fully dispersed—this is your sweet spot for preservation. Look for heads that are fully open but still holding their shape, with a deep, rich color. Avoid any with signs of wilting or brown edges, as these won’t dry properly.
Use sharp pruning shears to cut stems at a 45-degree angle about 2 inches below the base. This prevents water from pooling and rotting the stem later. I like to harvest on a dry morning after any morning dew has evaporated—this keeps the stems crisp and ready for drying.
☀️ Step 2: Dry the Heads Properly
Bundle the harvested thistle seed heads into small groups of 4-5 stems each and secure them with twine or floral wire. Hang them upside down in a dry, well-ventilated space with indirect sunlight—a garage, shed, or even a kitchen pantry works perfectly. Direct sunlight can bleach the color, so avoid placing them in full sun.
Drying takes about 2-3 weeks, depending on your climate. You’ll know they’re ready when the stems snap cleanly when bent and the seed fluff feels dry to the touch. If humidity is high, speed up the process by placing a small fan nearby to improve airflow.
✂️ Step 3: Trim and Store for Long-Term Use
Once fully dry, trim the stems to your desired length—6-12 inches works well for most arrangements. Remove any remaining leaves or browned bits with clean scissors. Store the dried heads in a paper bag or breathable fabric pouch to protect them from moisture and pests.
Place the pouch in a cool, dark spot like a closet or basement. With proper storage, these seed heads will stay vibrant and intact for up to a year. When you’re ready to use them, simply brush off any dust and arrange them in bouquets, wreaths, or dried floral displays.
🪴 Step 4: Refresh Before Arranging
Before using your stored thistle seed heads, give them a quick refresh to bring back their natural beauty. Hold each head over a bowl and gently tap the base with your fingers—this loosens any loose fluff and revives the texture. For extra flair, lightly mist the heads with a 50/50 water and rubbing alcohol spray to kill any hidden pests.
Now they’re ready to shine! Thistle seed heads add texture and movement to any arrangement, whether you’re crafting a rustic centerpiece or adding winter charm to your décor. Their twist-resistant structure means they’ll stay put without falling apart—perfect for effortless, long-lasting displays.
Tips & tricks for perfect thistle seed head preservation
Here's what nobody tells you about keeping these stunning botanicals looking fresh for months—game-changers I wish I'd known years ago!
Harvest Timing Secret: The 2-inch stem cut angle in Step 1 isn't just about aesthetics—it's about moisture control. That angled cut prevents water from pooling at the base, which would otherwise cause rot during drying. I've ruined batches by skipping this detail, so trust me on this. Also, harvest in the morning when stems are stiffest—this prevents wilting during transport to your drying space.
Drying Space Strategy: While Step 2 mentions indirect sunlight, I've found that adding a small fan creates a subtle breeze that speeds up drying in humid climates. Position it to gently circulate air around your bundles without directly blowing on them—this prevents the fluff from dispersing prematurely. The 2-3 week drying time assumes average humidity; in damp conditions, this can stretch to 4 weeks if you don't use airflow assistance.
Storage Wisdom: That "up to a year" storage promise in Step 3 only holds if you truly use paper bags or breathable fabric. I learned this the hard way when plastic containers trapped moisture and caused mold. For extra protection, add a few bay leaves to your storage pouch—they naturally repel pests without chemicals. And here's a pro move: label your pouches with the harvest date so you can rotate stock and use the oldest first.
Refresh Technique: The rubbing alcohol spray in Step 4 deserves more attention. That 50/50 ratio isn't just about freshness—it's about preservation. The alcohol kills any dormant pests or mold spores that might be hiding in the fluff. For really stubborn dust, I've found that gently brushing the heads with a soft makeup brush (like the ones used for eyelashes) removes debris without damaging the delicate structure. This makes all the difference when arranging them for weddings or events.
Pro Tips for Thistle Seed Heads
- Here's what nobody tells you about keeping these stunning botanicals looking fresh for months—game-changers I wish I'd known years ago!
- Harvest Timing Secret: The 2-inch stem cut angle in Step 1 isn't just about aesthetics—it's about moisture control.
- Drying Space Strategy: While Step 2 mentions indirect sunlight, I've found that adding a small fan creates a subtle breeze that speeds up drying in humid climates.
Frequently asked questions
Got questions about thistle seed heads?
You’re not alone! Whether you’re curious about their growth, uses, or how to manage them, here are some of the most common questions—and answers—to help you navigate these prickly but fascinating plants.
Are thistle seed heads edible or safe for wildlife?
While some thistle species (like Cynara cardunculus) produce edible buds, the seed heads themselves are typically too fibrous and may contain toxins in wild varieties. However, they’re a great food source for birds and pollinators like bees and butterflies. Always research local species before consumption!
How long does it take for thistle seed heads to form?
Thistle seed heads usually appear 60–90 days after planting, depending on the variety and growing conditions. Warmth and full sun accelerate growth, while cooler climates may delay flowering. Patience pays off—once established, they’ll regrow yearly with minimal effort!
Can I force thistle seed heads to stay upright for drying?
Yes! Use soft twine or floral wire to gently tie stems to a vertical support (like a trellis or stake) as they grow. Avoid tight binding—thistles are brittle and can snap. For drying, hang bundles upside down in a well-ventilated, dark space for 2–4 weeks.
Are thistle seed heads invasive? How do I control them?
Some thistle species (like Cirsium arvense) can spread aggressively, but ornamental varieties like Echinacea (coneflower) are non-invasive. To control them, pull young plants by hand or use a hoe to sever roots. For established patches, apply vinegar-based herbicide in late summer when growth is active.
What are some creative uses for dried thistle seed heads?
Beyond their ornamental value, dried thistle seed heads make stunning floral arrangements, natural brushes for artists, or even wind chimes. Crush seeds for birdseed mixes, or use the spiky stems as textured decor in winter wreaths. Just ensure they’re fully dry to prevent mold!
Wrapping up and next steps
Thistle seed heads aren’t just tough—they’re game-changers for gardeners craving low-maintenance, year-round beauty and harvests! 🌿 Their twist-resistant pods make them ideal for wildflower meadows, pollinator gardens, or even dried arrangements, requiring minimal effort for maximum impact.
Whether you’re a seasoned gardener or just starting out, these resilient plants prove that nature’s best designs often need the least intervention.
Ready to level up your garden? Start small—plant a few thistle seed heads this season and watch your space transform into a thriving, self-sustaining ecosystem. Your future self (and local pollinators!) will thank you. 🐝✨