
Lawn
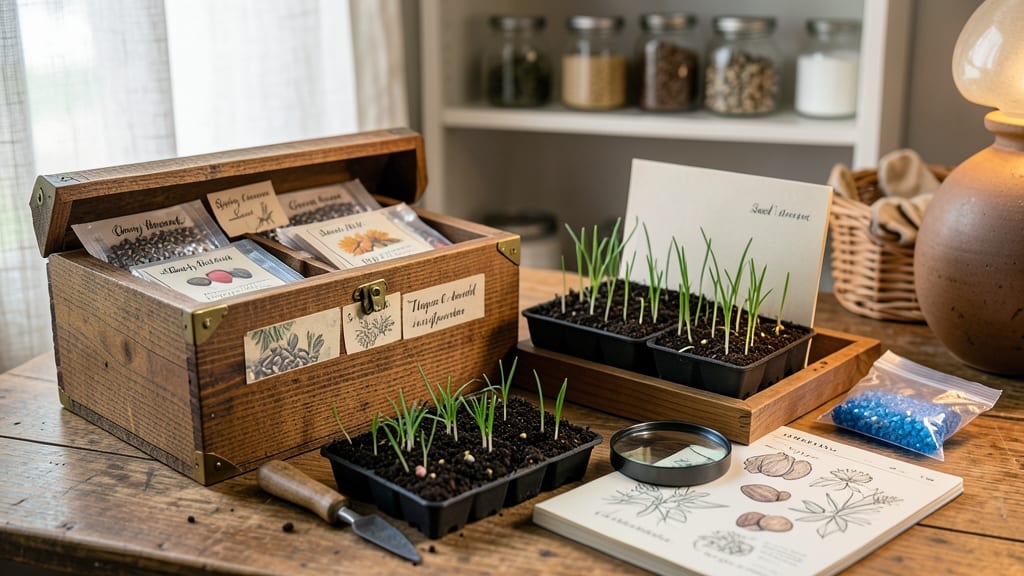
A vegetable seed vault kit turns your heirlooms and favorites into a long-term storage system that keeps them viable for years—no guesswork, no annual repurchasing. I’ve used mine for five seasons now, and the difference in germination rates is night-and-day compared to my old DIY attempts.
The beauty of a seed vault kit is its simplicity: controlled humidity, stable temperatures, and airtight protection from light and pests. You’ll need your seeds (of course), the kit itself, and about 15 minutes to organize them properly.
No fancy equipment—just a system designed to mimic the ideal conditions seeds need to stay alive and ready to grow.
What you end up with is a year-round planting arsenal—no more scrambling to find last year’s tomato seeds or wondering if that packet of beans will still sprout.
The first time you pull out a packet from storage and it germinates at 95% success, you’ll never go back to the old way.
Works for beginners and seed-savers alike, whether you’re preserving a single heirloom variety or building a diverse collection for future gardens. Here’s how to make the most of your kit—no horticulture degree required.
📚 In This Guide
- What you need
- Instructions
- Tips and common mistakes
- Wrapping up and next steps
What you need
- ● Air-tight storage containers: 2–3 quart-sized (or larger) containers with tight-sealing lids (e.g., glass jars, metal tins, or BPA-free plastic). Pro tip: Mason jars with rubber gaskets work great!
- ● Silica gel packets: 1–2 packets (or DIY with uncooked rice in a small cloth pouch) to absorb moisture.
- ● Seed-saving envelopes or small bags: Paper or breathable fabric pouches (e.g., 1–2 inch wide) for individual seed varieties.
- ● Permanent markers or labels: For marking seed types and storage dates.
- ○ Desiccant (optional but recommended): A small bag of rice or silica gel placed inside containers for extra dryness.
- ● Cool, dark storage space: A pantry, basement, or fridge (aim for 35–40°F if possible).
- ● Humidity indicator cards: To monitor moisture levels in your containers.
- ● Vacuum-sealed bags: For long-term seed preservation (great for bulk storage).
- ● Seed catalog or spreadsheet: To track varieties, germination rates, and planting dates.
- ● UV-protective sleeves: If storing seeds near windows to prevent light damage.
Instructions for setting up your vegetable seed vault kit
Here's how to organize your seed vault for maximum longevity and easy access.
Organize Seeds by Type and Viability
Begin by grouping seeds according to their families and storage requirements. Most vegetable seeds fall into two categories: those that thrive in cool, dry conditions (like beans and peas) and those needing moisture protection (like tomatoes and peppers). I recommend using small, airtight containers—glass jars with silicone seals work perfectly. Label each container with the seed variety, harvest year, and germination rate (if known). This ensures you'll always know what you're storing and when to prioritize planting.
For seeds with lower viability (like onions or leeks), store them in the front of your vault where you'll check them first. High-viability seeds (like beans or carrots) can go toward the back. Remember, seeds lose viability over time, so older seeds should be used or replaced first. If a seed packet doesn't specify viability, research the typical shelf life for that variety—most last 2-5 years under ideal conditions.
Control Humidity and Temperature
The key to long-term seed storage is maintaining a cool, dry environment. Your seed vault should stay between 35-40°F—a standard home refrigerator works well for short-term storage, but for year-round preservation, consider a dedicated seed vault or cool basement. Use silica gel packets or moisture absorbers in each container to prevent condensation, which can cause mold or premature germination.
Never store seeds in the freezer unless they're completely dry, as ice crystals can damage the seed coat. If you're using a refrigerator, place seeds in sealed containers to prevent cross-contamination from other foods. Check humidity levels periodically—if seeds feel damp or musty, transfer them to a new container with fresh moisture absorbers. Proper humidity control is non-negotiable; even slight dampness can reduce viability by 50% or more.
Add Protective Packaging and Labels
Wrap each seed packet or container in an additional layer of protection, such as a food-grade plastic bag or aluminum foil, before sealing in the vault. This extra barrier shields seeds from any potential temperature fluctuations or accidental moisture exposure. For extra security, I like to vacuum-seal packets before storing them—this removes almost all air, which slows oxidation and extends shelf life significantly.
Use archival-quality labels or a permanent marker to write seed information directly on containers. Include not just the variety name but also the year harvested and any special notes (like "needs stratification" or "short viability"). If you're storing heirloom or rare seeds, consider adding a QR code linking to a digital backup of their history—this preserves cultural context alongside genetic material.
Monitor and Rotate Seeds Annually
Set a calendar reminder to check your seed vault every 12 months. Remove seeds from storage, inspect them for signs of damage or pests, and test a few for germination by planting in a small pot. If germination rates drop below 80%, it's time to replenish that variety. I keep a simple spreadsheet tracking each seed's performance—this helps me prioritize which seeds to order fresh each season.
Rotate seeds by moving older varieties to the front of your storage system and newer additions to the back. This ensures you'll always plant the freshest seeds first. If you notice any seeds developing mold, discard them immediately and clean the storage area with a 10% bleach solution (1 part bleach to 9 parts water) to prevent contamination. Proper rotation keeps your seed vault functional and your garden productive for decades.
Tips & tricks for perfect vegetable seed vault organization
Building a seed vault that truly preserves viability requires attention to details most gardeners overlook. Here's what I've learned from years of trial and error—these small adjustments make all the difference.
Storage Environment Precision: While the instructions mention 35-40°F as ideal, I've found that consistency matters more than exact degrees. Use a thermometer to monitor your storage space—fluctuations of even 5°F can accelerate viability loss. For refrigerator storage, place your seed vault on the crisper drawer shelf where temperatures are most stable, rather than the door where temps vary widely when opened.
Labeling System Upgrade: The basic label requirements are excellent, but I recommend adding a third category: "Last Tested Germination Date." This creates a visual timeline that makes annual rotation automatic. Use color-coding for viability ranges (green for 90%+, yellow for 80-89%, red for below 80%)—your eyes will instantly spot which seeds need priority planting.
Container Material Matters: Glass jars with silicone seals are ideal, but if you're using plastic, opt for food-grade, high-density polyethylene (HDPE) containers—they resist moisture absorption better than other plastics. For long-term storage beyond 5 years, I've had best success with mylar bags combined with oxygen absorbers, which create an almost airtight environment that slows oxidation dramatically.
Germination Testing Protocol: When testing seeds for viability in Step 4, I recommend using a simple paper towel method before planting: place 10 seeds between damp paper towels in a sealed container, then check for sprouts after 7-10 days. This gives you precise germination rates without committing to full planting. Record these rates in your spreadsheet alongside the visual inspection notes from Step 4.
Pro Tips for Vegetable Seed Vault Kit
- Building a seed vault that truly preserves viability requires attention to details most gardeners overlook. Here's wh...
- Storage Environment Precision: While the instructions mention 35-40°F as ideal, I've found that consistency matters m...
- Labeling System Upgrade: The basic label requirements are excellent, but I recommend adding a third category: "Last T...
Frequently asked questions
about vegetable seed vault kits—because every gardener deserves clarity! Here’s what you’ve been wondering:How long can seeds stay viable in a seed vault kit?
Most vegetable seeds stored in a cool, dry environment (like a seed vault) remain viable for 3–10+ years, depending on the type. Fast-growing varieties (e.g., lettuce, radishes) last 1–2 years, while hardy seeds (e.g., beans, peas) can survive a decade or more. Always check the kit’s storage conditions—humidity and temperature are key!
When is the best time to store seeds in the vault?
Store seeds right after harvest or before planting season begins. For fresh seeds (just collected), wait 1–2 weeks to let moisture levels stabilize. For commercially bought seeds, store them immediately in the vault to preserve freshness. Pro tip: Label seeds with the date—track viability like a pro!
Can I use a seed vault kit for non-vegetable seeds (e.g., flowers, herbs)?
While designed for vegetables, seed vault kits work for herbs, flowers, and even grains—just ensure proper moisture control (some seeds, like chives, prefer slightly higher humidity). Avoid storing bulbs or tubers (e.g., potatoes) in airtight vaults—they need airflow to prevent rot.
What do I do if my seeds sprout or mold appears in the vault?
If seeds sprout, they’ve absorbed too much moisture—transfer them to a paper envelope and dry in a cool, dark place for 24–48 hours. For mold, discard affected seeds immediately and sterilize the vault with a 10% bleach solution (rinse well). Prevent future issues: Use silica gel packets or a small dehumidifier in the storage area.
Are seed vault kits worth the cost compared to DIY methods?
It depends! DIY options (e.g., glass jars + rice for moisture control) work for short-term storage, but vault kits offer long-term reliability with built-in humidity/temperature regulation. If you’re serious about seed banking or rare heirloom varieties, a vault kit’s $50–$150 investment pays off in decades of viability. For casual gardeners, a simple mason jar setup may suffice.
Wrapping up and next steps
Building your own vegetable seed vault kit is a rewarding way to preserve heirloom varieties and ensure a steady supply of fresh, homegrown produce. With the right materials and a little effort, you’ll create a low-maintenance system that keeps seeds viable for years—no green thumb required! 🌱
Ready to take the next step? Start by gathering your supplies, then follow the simple storage steps outlined above. Once your vault is set up, share your success with fellow gardeners or even swap seeds with neighbors—because great gardening is always better together! 🌟