
Propagation
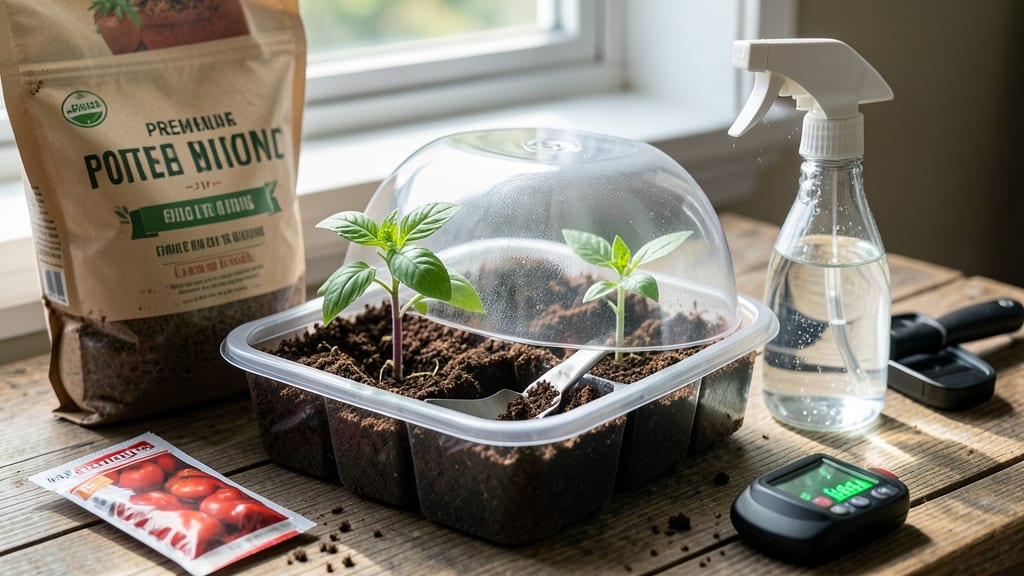
What soil to use for seed starting starts with the right mix—lightweight loam blend is your secret weapon. 🌱 I’ve seen seeds rot in dense potting soil or dry out in sandy mixes, but the perfect blend keeps them happy from day one. The key is air pockets for roots, moisture retention without sogginess, and a neutral pH to avoid shocking tender sprouts. Store-bought seed-starting mixes are foolproof—they’re sterile, fluffy, and designed to prevent damping-off disease. But DIY blends (like 50% peat moss, 30% perlite, and 20% compost) work too if you sterilize them first. Avoid garden soil—it’s too heavy, compacted, and full of pathogens that’ll smother your seedlings. Within 7-10 days, you’ll see those first green hooks breaking through, strong and ready to thrive. The right soil isn’t just about germination speed—it sets up seedlings to handle transplanting without shock. For larger batches, bulk coco coir blends are a great alternative—they hold moisture longer and stay light as seedlings grow. Just avoid anything labeled "potting mix" for mature plants; those mixes are too dense for tiny roots.
📚 In This Guide
- What you need
- Instructions
- Tips and common mistakes
- Wrapping up and next steps
What you need
- ● Seed-starting soil mix: Lightweight, sterile, and well-draining (e.g., a blend of 50% peat moss or coconut coir, 30% perlite or vermiculite, and 20% compost). 1–2 gallons (depending on your setup). Pro tip: Avoid garden soil—it’s too dense and may harbor diseases! 💡
- ● Seed-starting containers: 4–6 inch deep trays or pots with drainage holes. Options: Plastic cell packs (reusable)
- ● Biodegradable peat pots (eco-friendly)
- ● Small nursery pots (2–4 inches)
- ● Drainage trays or saucers: To catch excess water and prevent soggy roots.
- ● Seeds: Fresh, high-quality seeds (check the packet for depth and spacing needs!).
- ● Watering can or spray bottle: With a fine mist nozzle to avoid disturbing seeds.
- ● Grow lights or sunny windowsill: 12–16 hours of light daily (grow lights are ideal for consistent growth).
- ● Heat mat: For seeds needing warmth (e.g., peppers, tomatoes). 70–85°F range is ideal.
- ● Humidity dome or plastic wrap: To retain moisture until seeds germinate.
- ● Fertilizer: Low-dose, water-soluble (e.g., 5-10-5 or fish emulsion) once seedlings sprout.
- ● Labels and markers: To track seed varieties and planting dates.
- ● Fine mesh or screen: For covering trays to deter pests (like fungus gnats).
Step-by-Step guide to choosing the perfect soil for seed starting
Fast germination starts with the right mix—here’s how to pick and prep it like a pro.
🌱 Step 1: Understand Why Regular Soil Fails
Garden soil is too dense and packed with pathogens that can rot delicate seeds before they sprout. The goal is a lightweight, sterile mix that holds just enough moisture to hydrate seeds without suffocating them. I’ve learned the hard way—using garden soil leads to weak seedlings that struggle to break through compacted layers.
Look for a mix labeled specifically for seed starting or seedling growth. These blends are formulated to be fluffy and airy, with ingredients like peat moss, coconut coir, or perlite. You’ll see them advertised as "soilless mixes" or "seedling mixes"—these are your shortcut to faster germination.
🌿 Step 2: Mix Your Own Lightweight Loam
If you prefer a custom blend, combine 50% peat moss or coconut coir (for moisture retention), 30% perlite or vermiculite (for aeration), and 20% compost or worm castings (for gentle nutrients). This ratio ensures seeds get the air they need while staying hydrated.
Sift the mix through a fine-mesh screen to break up clumps—this prevents seeds from getting buried too deep or trapped in dense pockets. The texture should resemble crumbled cake: light enough to crumble between your fingers but not so dry it falls apart instantly.
💧 Step 3: Sterilize and Prep for Planting
Whether store-bought or homemade, sterilize your mix to kill fungus and bacteria. Spread it on a baking sheet and bake at 200°F for 30 minutes, or microwave it in 2-minute bursts until steaming. Let it cool completely before use—hot soil can scald seeds.
Fill your seed-starting trays or pots to 1 inch below the rim, leaving room for watering. Press the mix down lightly with your fingers—just enough to remove air pockets but not compact it. A good test: When you poke the soil, it should spring back slightly instead of staying indented.
☀️ Step 4: Test Moisture Before Planting
Water the mix until it’s evenly damp but not soggy. Squeeze a handful—water should bead on the surface but not drip. Overwatering now leads to mold, while too-dry soil causes seeds to dry out before germinating. I like to water from the bottom by placing trays in ½ inch of water for 10 minutes, then letting excess drain.
Let the mix sit for an hour before sowing. This ensures seeds land in consistently moist soil, not a puddle. The surface should look damp but not glistening—like a wrung-out sponge. This is your sweet spot for fast, even germination.
⏰ Step 5: Maintain Ideal Conditions After Planting
Keep the soil consistently moist (not wet) until seeds sprout. Use a spray bottle for gentle watering—it prevents disturbing seeds. Cover trays with a humidity dome or plastic wrap to trap warmth, but remove it as soon as 50% of seeds germinate to prevent damping-off.
Watch for first true leaves (the second set after the initial seed leaves). This is your cue to move seedlings to brighter light. If the soil surface dries out too fast, your mix lacks moisture retention—add a thin layer of sphagnum moss to slow evaporation.
Tips & tricks for perfect seed starting mixes
Here's what nobody tells you about getting those seeds to sprout like clockwork.
The Sterilization Secret: That 200°F for 30 minutes isn't just about killing pathogens—it's also your chance to reset the soil's structure. After baking, let it cool completely before use, but don't skip this step. I once rushed ahead and ended up with moldy seeds because I didn't wait for the mix to fully cool. The heat needs to penetrate evenly to truly sterilize, and hot soil can literally cook your seeds before they even get a chance to germinate.
Texture Test You Can't Skip: When you're checking that "crumbled cake" texture in Step 2, there's a pro trick: press a small handful firmly, then release. If it holds its shape but still crumbles easily, you're golden. If it stays compacted, add more perlite or vermiculite. If it falls apart completely, mix in a little more peat moss or coconut coir. This simple test saves you from ending up with either waterlogged or bone-dry soil.
Moisture Management Matters: That 10-minute bottom-watering technique in Step 4 is a game-changer, but here's the follow-up: after draining, let the excess water pool evaporate for about 5 minutes before sowing. This prevents seeds from sitting in standing water, which can cause rot. I learned this the hard way when my first batch of seedlings developed damping-off fungus because I didn't give that extra time. The mix should feel like a wrung-out sponge—damp but not dripping.
Optional Add-In: For seeds that need extra warmth to germinate (like peppers or tomatoes), you can optionally add a thin layer of sphagnum moss (about ¼ inch thick) on top of your mix. This helps maintain consistent moisture and warmth, but only use this if your seeds require it—it's not necessary for all varieties. The moss acts like a natural blanket, keeping the soil surface at the perfect temperature for germination.
Pro Tips for What Soil To Use For Seed Starting
- Here's what nobody tells you about getting those seeds to sprout like clockwork.
- The Sterilization Secret: That 200°F for 30 minutes isn't just about killing pathogens—it's also your chance to reset the soil's structure.
- Texture Test You Can't Skip: When you're checking that "crumbled cake" texture in Step 2, there's a pro trick: press a small handful firmly, then release.
Frequently asked questions
Got questions about seed-starting soil? You’re not alone—here are some of the most common concerns, answered in a flash! Whether you’re a first-time gardener or a seasoned pro, these tips will help you avoid pitfalls and grow with confidence.
What’s the best soil mix for seed starting?
A lightweight, sterile mix with good drainage and aeration is key. Look for a blend labeled for seed starting (often 50% peat moss or coco coir, 30% perlite/vermiculite, and 20% compost or worm castings). Avoid garden soil—it’s too dense and can harbor diseases. For a DIY mix, combine equal parts peat moss, perlite, and compost for a fluffy, fertile base!
Can I reuse last year’s seed-starting soil?
Generally, no—sterilized soil is a one-time-use product. Reused soil may harbor fungus, bacteria, or pests like damping-off disease. If you’re set on reusing it, bake it in the oven at 200°F (93°C) for 30 minutes to kill pathogens, or mix in fresh perlite and compost to refresh it. Pro tip: Label your soil mixes to track reuse attempts!
Is it cheaper to make my own soil mix?
Yes, if you source materials in bulk! Peat moss, perlite, and compost are affordable in large bags. A 5-gallon mix costs about $5–$10 to DIY vs. $10–$15 for pre-mixed bags. For long-term savings, compost kitchen scraps or collect leaves for homemade compost. Just ensure your mix is sterile—skip garden soil or yard waste unless sterilized.
What if my seeds aren’t germinating in the soil?
Check these first: Moisture (soil should stay damp, not soggy), temperature (most seeds need 65–75°F), and light (some seeds need darkness to germinate). If issues persist, test your soil’s pH (aim for 6.0–7.0) and consider adding a fungal inhibitor like hydrogen peroxide (1 tsp per gallon of water) to prevent damping-off. Pro tip: Try a fresh batch of soil—old or compacted mixes can suffocate seeds!
Can I use potting soil instead of seed-starting mix?
Not ideal! Potting soil is heavier and may lack the fine texture seeds need. However, in a pinch, you can amend it with perlite or vermiculite (1 part to 3 parts soil) to improve drainage. For delicate seeds (like lettuce or carrots), stick to a dedicated seed-starting mix. Warning: Potting soil often contains fertilizer, which can “burn” tender seedlings—opt for a “seedling” or “organic” blend if repurposing.
Wrapping up and next steps
Choosing the right soil for seed starting can make all the difference in jumpstarting your gardening journey! 🌱 A well-draining, lightweight loam mix (like a blend of coconut coir, perlite, and compost) gives your seeds the perfect foundation for fast germination and strong roots.
Remember, consistency is key—avoid heavy or compacted soils that can suffocate tender sprouts.
Now that you’re armed with the knowledge, it’s time to roll up your sleeves and get growing! Start small with a few easy seeds like basil or marigolds, then expand as you gain confidence. Happy planting—your green thumb is just one seed away! 🌿