
Flowers
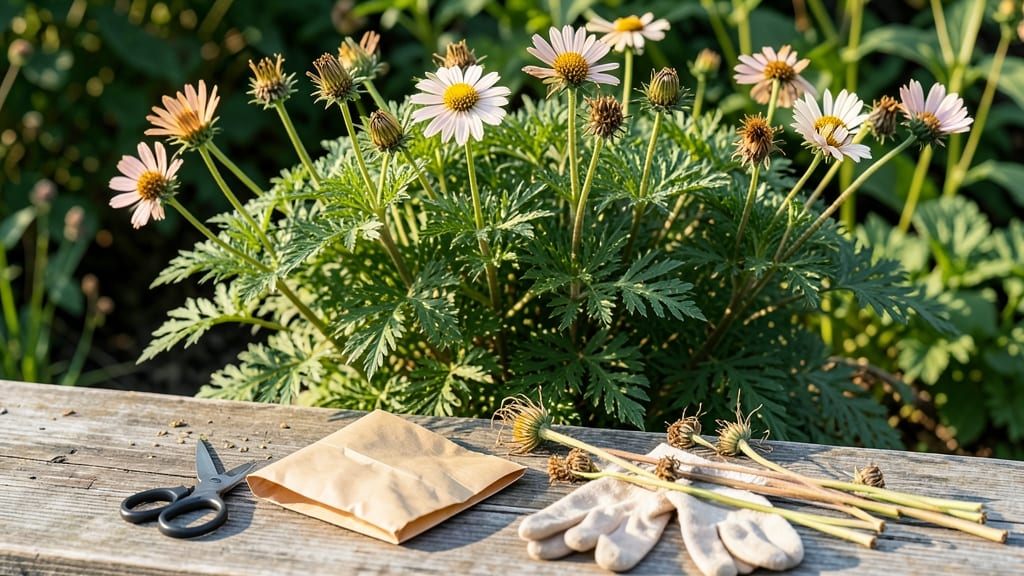
Whorled tickseed seeds grow into those cheerful, daisy-like blooms that keep coming back year after year—without the messy seed pods most coreopsis varieties create. 🌻 I’ve learned the hard way that skipping the right soil prep and planting timing leads to leggy seedlings that flop in summer heat.
The secret? Starting them indoors in late winter when days are still short but warming up. You’ll need just a few things: a seed-starting tray, well-draining potting mix (no peat-heavy blends), and a sunny windowsill or grow light.
These seeds germinate best in 60-65°F soil, so a heat mat helps if your home runs cooler. Plant them ¼ inch deep, barely covering them, since they need light to sprout. Most pop up in 7-14 days, but patience pays off—rushing leads to weak stems.
Once seedlings have 2-3 true leaves, transplant them outdoors after your last frost when soil reaches 55°F. Space them 12-18 inches apart—they’ll spread slowly but steadily, forming clumps over time. The real magic?
By mid-summer, you’ll have nonstop blooms from early June until frost, with almost no maintenance. Even my black thumb can’t kill these. Here’s the twist: no seed pod cleanup. Unlike other coreopsis, whorled tickseed’s flower heads stay tidy, dropping seeds naturally into the soil for next year’s free show.
Perfect for pollinators, drought-tolerant once established, and zone 3-9 hardy—meaning they’ll come back stronger every spring. Let’s get those seeds started!
📚 In This Guide
- What you need
- Instructions
- Tips and common mistakes
- Wrapping up and next steps
What you need
- ● Whorled tickseed plants (Coreopsis verticillata) – At least 3 mature plants for a decent seed yield (more if you want extra). Choose healthy, well-established plants with fully developed seed pods.
- ● Seed collection bags or breathable paper bags – 3-5 bags (8x10 inches each) to store seeds and prevent moisture buildup.
- ● Sharp pruning shears or garden scissors – 1 pair to cleanly snip seed pods without damaging the plant.
- ○ Gloves (optional but recommended) – 1 pair of lightweight gardening gloves to protect your hands from prickly stems.
- ● Labeling tags or masking tape + marker – 5-10 tags to mark seed bags with the harvest date and plant variety.
- ● Drying tray or clean cardboard – 1 large tray to lay out seed pods for drying (if harvesting indoors).
- ○ Fan or dehumidifier (optional) – To speed up drying in humid climates.
- ● Seed storage container (airtight) – 1 container (like a mason jar or resealable bag) for long-term seed preservation.
- ○ Magnifying glass (optional) – Helpful for inspecting seed pods for pests or damage.
Step-by-Step guide to growing whorled tickseed from seeds
Here's how to cultivate these drought-tolerant beauties with minimal fuss—no twisting pods or stubborn germination.
🌱 Step 1: Start Seeds Indoors for Early Blooms
Whorled tickseed (Coreopsis verticillata) thrives when begun indoors 6-8 weeks before your last frost date. Fill 4-inch seedling trays with sterile seed-starting mix (never garden soil—it compacts and resists moisture). Scatter seeds ¼ inch deep—they’re tiny, so I use a toothpick to space them ½ inch apart in rows. Press lightly to ensure soil contact without burying too deep.
Mist the surface with a spray bottle until the mix feels evenly damp but not soggy. Cover the tray with a clear plastic dome to retain humidity and warmth. Place in a warm spot (70-75°F)—a seedling heat mat speeds germination to 7-14 days. Avoid bottom-watering now; seedlings rot faster than they sprout if overwatered.
☀️ Step 2: Provide Bright, Indirect Light for Stocky Growth
Once seedlings emerge, remove the dome immediately to prevent damping-off (a fungal disease that collapses stems overnight). Move trays to a south-facing window or under grow lights for 14-16 hours of light daily. Whorled tickseed hates leggy growth—if stems stretch toward the light with pale leaves, your light is too weak or too far away.
Rotate trays ¼ turn daily so plants grow straight. When first true leaves (not the initial cotyledons) appear, fertilize lightly with ½-strength liquid fertilizer. You’ll see compact, deep green foliage in 3-4 weeks—this signals they’re ready for hardening off.
🪴 Step 3: Transplant to Full Sun and Well-Drained Soil
Choose a sunny, dry site—whorled tickseed tolerates full sun to partial shade but blooms best in hot, dry conditions. Amend native soil with compost if it’s heavy clay (these plants hate soggy roots). Dig holes twice as wide as the root ball but no deeper—planting too deep suffocates stems.
Space plants 12-18 inches apart (closer for borders, wider for mass plantings). Water deeply once after transplanting, then let soil dry between waterings. Mulch with 2 inches of gravel or coarse sand to improve drainage—this mimics their native prairie habitat. You’ll see new growth in 2 weeks if conditions are right.
✂️ Step 4: Deadhead and Maintain for Continuous Blooms
Pinch back spent blooms as they fade to encourage nonstop flowering from early summer to frost. Whorled tickseed self-seeds readily, but I remove wilted seed heads by late summer to redirect energy into current blooms. Avoid heavy pruning—shearing back more than ⅓ of the plant reduces next year’s vigor.
Fertilize once in early spring with balanced 10-10-10—these plants need minimal feeding. If leaves yellow between veins, your soil is too alkaline; amend with sulfur or peat moss for acid-loving varieties. Drought tolerance is their superpower—water only when soil is bone-dry to the touch in summer.
🌿 Step 5: Overwinter and Prepare for Next Year
Whorled tickseed is perennial in zones 3-9—cut back dead foliage to 2 inches in late fall after the first frost. This prevents disease buildup and lets sunlight reach the crown in spring. In zones 10-11, treat as an annual or mulch heavily with straw to protect roots.
Divide clumps every 3-4 years in early spring before new growth begins. Dig up plants, separate at the roots, and replant sections 12 inches apart. You’ll see vigorous regrowth in 2 weeks—proof the plant’s happy. Save seeds from healthy, disease-free plants for next year’s twist-free harvest.
Tips & tricks for perfect whorled tickseed cultivation
These insider tricks will help you avoid the most common pitfalls and grow thriving whorled tickseed with minimal fuss.
Seedling Heat Secret: Those 70-75°F temperatures in Step 1 aren't just ideal—they're critical for germination. I've found that using a seedling heat mat (or placing trays on top of a refrigerator) creates the perfect bottom warmth while maintaining humidity. If your home stays cooler than 70°F, consider using a small greenhouse under grow lights to maintain consistent warmth. The difference between 7-14 days germination and no sprouts often comes down to this temperature consistency.
Light Position Strategy: For Step 2's 14-16 hours of light, position your seedlings within 6 inches of the light source to prevent legginess. I rotate my trays ¼ turn daily using a simple timer reminder on my phone—this ensures even growth without bending stems. If you notice seedlings stretching toward the light with pale yellow leaves, they're begging for more intensity. Consider supplementing natural light with a T5 grow bulb if your window light isn't sufficient.
Transplanting Timing: The 2-week growth window mentioned in Step 3 is your cue to harden off seedlings gradually. Start by moving trays outside for 2 hours daily one week before transplanting, then increase exposure. This acclimation prevents transplant shock. I also recommend transplanting on a cloudy day or in late afternoon to reduce stress from direct sunlight and heat.
Overwintering Hack: For Step 5's fall cleanup, I've discovered that cutting back to 2 inches actually helps prevent snow mold in colder climates. After the first frost, I sprinkle a thin layer of compost over the cut stems—this provides insulation while adding nutrients for spring growth. In zones 10-11, I've had success using black landscape fabric instead of straw for mulching, which lasts longer in humid conditions.
Pro Tips for Whorled Tickseed Seeds
- These insider tricks will help you avoid the most common pitfalls and grow thriving whorled tickseed with minimal fuss.
- Seedling Heat Secret: Those 70-75°F temperatures in Step 1 aren't just ideal—they're critical for germination. I've f...
- Light Position Strategy: For Step 2's 14-16 hours of light, position your seedlings within 6 inches of the light sour...
Frequently asked questions
Got questions about whorled tickseed seeds?
You’re not alone! Here are answers to the most common queries—from planting tips to troubleshooting—so you can grow these twist-free pods with confidence.
How long does it take for whorled tickseed pods to mature?
Whorled tickseed (Coreopsis verticillata) typically matures in 60–90 days from sowing, depending on climate and growing conditions. Pods form in late summer to early fall, and seeds ripen when the papery husks turn brown and split open naturally. Pro tip: Harvest seeds on a dry day to avoid moisture-related issues.
Why aren’t my tickseed pods twisting or drying properly?
Twisting or uneven drying often happens due to overcrowding or high humidity. Space plants 12–18 inches apart for airflow, and harvest pods when they’re fully brown but before they crack open. If humidity is high, use a fan or dry pods indoors with silica gel.
Can I grow whorled tickseed from store-bought seeds, or do I need special ones?
Store-bought seeds work perfectly! Look for Coreopsis verticillata labeled as "whorled tickseed" or "threadleaf coreopsis." Avoid hybrid varieties (marked "F1") if you want seeds for next year—opt for open-pollinated seeds instead. Bonus: Save seeds from your plants for consistent results!
What’s the best time of year to plant whorled tickseed seeds?
Plant seeds in early spring (after the last frost) or late summer (6–8 weeks before frost). Whorled tickseed thrives in cool weather and may bolt (go to seed quickly) in hot climates. For faster germination, stratify seeds (chill for 2–4 weeks) before planting.
Are whorled tickseed pods good for anything besides seeds?
While the seeds are the star, the dried pods add texture to dried flower arrangements, and the foliage makes a great cutting garden for bouquets. Plus, deer and pollinators love them—making this plant both functional and beautiful. Fun fact: The name "tickseed" comes from the tick-shaped seeds!
Wrapping up and next steps
Whorled tickseed seeds offer a game-changing solution for gardeners seeking low-maintenance, drought-tolerant beauty with minimal fuss. Their twist-free pods make harvesting effortless, while their resilience and striking foliage add versatility to any landscape.
Whether you're a seasoned pro or a beginner, these seeds are your ticket to easy, rewarding gardening.
Ready to transform your garden? Start with a small batch—plant, observe, and let these resilient seeds do the work! 🌱✨