Lawn
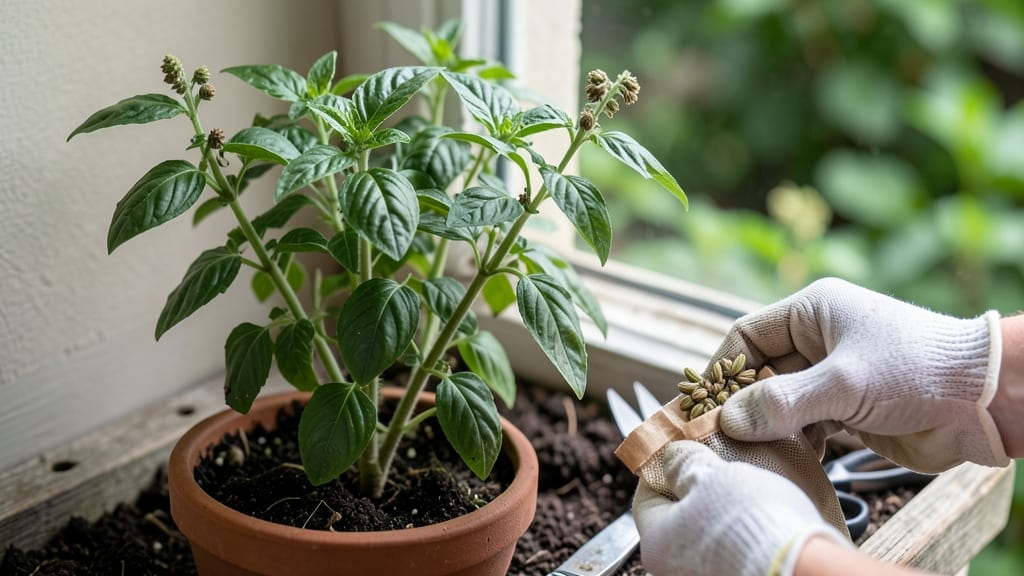
Growing basil seed pods from scratch means never paying for seeds again. 🌱 The secret to reliable harvests lies in patience—waiting for those pods to turn brown before extracting seeds, then storing them properly for next season's garden.
I learned the hard way that green pods won't work—they're still developing. Only fully dried, brown pods contain viable seeds. Once you crack open the right ones, you'll have enough to plant a whole garden for pennies, with no store-bought seed packets needed.
What you'll end up with is a stash of seeds that stay viable for 3-4 years when stored right. No more worrying about store-bought seeds losing potency or running out of your favorite varieties. The process takes about 90 days from planting to seed maturity.
Works for both potted basil and garden plants, and saves you money while keeping heirloom varieties alive. Here's how to do it right the first time!
📚 In This Guide
- What you need
- Instructions
- Tips and common mistakes
- Wrapping up and next steps
What you need
- ● Basil seed pods: 1–2 pods (or 10–15 individual basil seeds if not using pods)
- ● Cold stratification kit or materials: Small plastic bag or container (with breathable mesh or holes)
- ● Moistened peat moss or coco coir (2–3 cups)
- ● Refrigerator (set to 35–40°F for 2–4 weeks)
- ● Growing medium: Seed-starting mix (2–3 cups) or well-draining potting soil
- ○ Optional: Perlite or vermiculite (1 part per 4 parts soil for aeration)
- ● Containers: 4–6-inch pots (or biodegradable peat pots)
- ○ Optional: Seed trays with domes for humidity control
- ● Watering tools: Spray bottle (for gentle moisture)
- ● Watering can with a fine rose (for post-germination care)
- ● Lighting: Grow lights (LED or fluorescent, 12–16 hours/day) or sunny windowsill (south-facing)
- ● Humidity dome or plastic wrap (to retain moisture during germination)
- ● Fertilizer: Balanced liquid fertilizer (5-5-5 or 10-10-10, diluted to half-strength)
- ● Plant labels (to track cold-stratified seeds)
- ● Heating mat (if your home runs cold, speeds up germination)
- ● Pruning shears (for future pod harvesting)
Step-by-Step guide to growing basil seed pods through cold stratification
Cold-stratifying basil flower seed pods unlocks a faster, more reliable harvest than starting from scratch.
🌱 Step 1: Harvest and Prepare Fresh Basil Seed Pods
Pick basil flower pods when they turn from white to a pale green or tan hue—this signals they're mature but not yet dried. Gently twist them from the stem and place them in a paper bag with a few holes for airflow. Store the bag in a cool, dry spot for 2-3 weeks until the pods rattle when shaken, indicating full dryness.
Once dry, open the pods carefully to release the tiny seeds inside. I like to spread them on a clean sheet of paper and use a toothpick to separate any remaining chaff. This ensures you're only working with pure seeds ready for stratification.
💧 Step 2: Stratify Seeds for 6-8 Weeks
Mix the seeds with slightly damp sand or perlite in a sealed container—about 1 part seeds to 3 parts medium. Place the container in a plastic bag and refrigerate at 35-45°F for 6-8 weeks. This cold treatment mimics winter conditions, breaking seed dormancy and ensuring faster germination.
Check the mixture every 2 weeks to ensure it stays evenly moist but not soggy. If it feels dry, mist lightly with water. The goal is consistent moisture without creating anaerobic conditions that could rot the seeds.
☀️ Step 3: Sow Stratified Seeds Indoors
After stratification, fill 2-3 inch deep seed trays with sterile potting mix and scatter the seeds on the surface. Press them lightly into the soil—just enough to ensure contact, but don't bury them. Cover the tray with a clear plastic dome or wrap to retain humidity and warmth.
Place the tray in a warm spot with 70-75°F soil temperature (a seedling heat mat helps). Germination typically occurs within 7-14 days, but be patient—some seeds may take longer. Keep the soil consistently moist but never waterlogged.
🌿 Step 4: Transplant Seedlings for Strong Growth
Once seedlings develop 2-3 true leaves (the second set after the initial cotyledons), transplant them into 4-inch pots filled with well-draining potting mix. Handle the seedlings gently to avoid damaging delicate roots. Place the pots in a sunny window or under grow lights for 14-16 hours of light daily.
Water the seedlings at the soil level to avoid disturbing them, and fertilize lightly with a balanced liquid fertilizer diluted to half strength. You'll see stronger, more vibrant growth within 2-3 weeks if they receive adequate light and nutrients.
⏰ Step 5: Harden Off and Plant Outdoors
When nighttime temperatures stay above 50°F and all frost risk has passed, it's time to harden off the seedlings. Start by placing them outside in a sheltered spot for 1-2 hours the first day, gradually increasing their outdoor time over 7-10 days until they can stay out all day.
Transplant the hardened-off seedlings into the garden or containers with 12-18 inches of spacing between plants. Basil thrives in full sun to partial shade and well-draining soil. With proper care, you'll have mature plants ready to produce seed pods in about 90 days.
Tips & tricks for perfect basil seed pod cultivation
Here's what I've learned from years of growing basil seed pods—these tricks make all the difference when you're working with such delicate seeds.
Pod Selection Matters: In Step 1, don't rush to harvest those pods! Wait until they turn pale green or tan—this ensures maximum seed viability. I've found that pods harvested too early (still white) often produce fewer seeds, while those left too long on the plant may shatter open before you're ready. The "rattle test" is your best friend here—if they don't rattle after 2-3 weeks, give them another week or two.
Stratification Medium Choice: While the instructions mention sand or perlite, I've had excellent results using a mix of both—about 50/50. This combination provides better moisture retention than pure perlite while still offering the drainage benefits of sand. Just make sure whatever you choose is completely sterile to prevent mold growth during those critical 6-8 weeks in the fridge.
Germination Timing Secret: The 7-14 day germination window in Step 3 can feel like forever, but here's my trick: place your seed tray on top of your refrigerator (not inside) during the day. This provides that warm 70-75°F soil temperature while still keeping the fridge's cool air circulating around it. I've seen germination speeds up by 3-5 days using this simple setup—just remove it at night when the fridge cycles off.
Light Source Upgrade: While a sunny windowsill works, I've found that placing a simple LED grow light just 6 inches above your seedlings for 14-16 hours gives them the consistent light they need to thrive. Regular sunlight varies too much, and seedlings can get "leggy" trying to reach it. The grow light creates that perfect vertical growth we want for strong stems.
Pro Tips for Basil Seed Pods
- Here's what I've learned from years of growing basil seed pods—these tricks make all the difference when you're working with such delicate seeds.
- Pod Selection Matters: In Step 1, don't rush to harvest those pods!
- Stratification Medium Choice: While the instructions mention sand or perlite, I've had excellent results using a mix of both—about 50/50.
Frequently asked questions
Got questions about growing and using basil seed pods? You’re not alone! Here are some of the most common queries—plus quick, actionable answers to help you succeed.
How long does it take for basil seed pods to mature after planting?
Basil seed pods typically mature 60–90 days after planting, depending on your climate and growing conditions. If you’re starting from seeds, expect blooms (and pods) in 8–12 weeks under ideal warmth (70–80°F) and sunlight. Cold-stratification can delay flowering slightly, but it ensures stronger, hardier plants!
Do I really need to cold-stratify basil seed pods?
Cold-stratification (chilling seeds for 1–2 weeks) isn’t mandatory, but it breaks dormancy and can improve germination rates, especially in warm climates. Skip it if you’re in a cool zone or sowing in spring—just plant seeds ¼-inch deep in well-draining soil. For best results, try it if your basil seems slow to sprout!
Can I eat the basil seed pods, or are they just for seeds?
Yes! While pods are primarily for seeds, young, tender pods can be eaten like okra—sliced thin in salads or stir-fries for a mild, basil-infused crunch. Wait until pods are 1–2 inches long but still soft. Overripe pods turn woody and bitter, so harvest early for the best flavor!
What should I do if my basil plants flower but don’t produce seed pods?
Lack of pods often means poor pollination or stress. Try these fixes:
- Hand-pollinate flowers with a soft brush or by gently shaking stems.
- Ensure plants get 6+ hours of sunlight daily.
- Water consistently (avoid soggy soil) and fertilize lightly with balanced 10-10-10.
- Prune spent flowers to redirect energy to pod production.
Are there alternatives to growing basil seed pods from scratch?
If you’re short on time or space, try these shortcuts:
- Buy dried basil seeds from garden centers (no stratification needed).
- Harvest pods from store-bought basil plants (check labels for organic/seed-bearing varieties).
- Grow basil microgreens (no pods needed)—just snip leaves 1–2 weeks after germination!
Wrapping up and next steps
Growing basil seed pods is a rewarding journey that brings vibrant blooms and fragrant herbs to your garden in just 90 days—especially with cold stratification! 🌱 Whether you're a seasoned gardener or a curious beginner, these tips will set you up for success.
Now that you’re armed with the right materials and answers to common questions, it’s time to roll up your sleeves and plant those seeds.
Start small, stay patient, and watch your garden transform. Ready to dive in? Grab your seeds, pick a sunny spot, and begin your basil-growing adventure today! 🌿✨