
Lawn
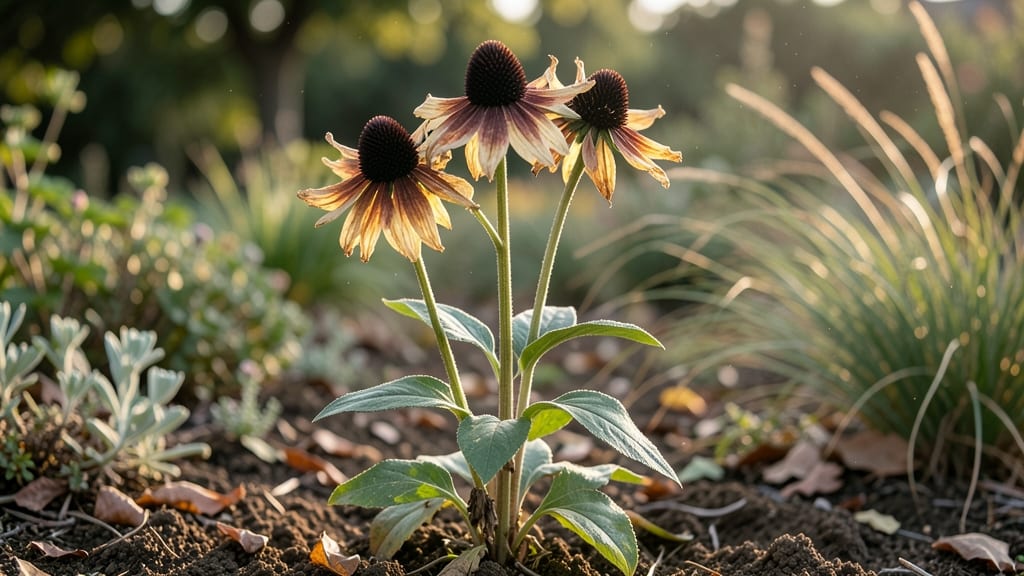
Those dried black-eyed Susan seed heads are nature’s clever way of ensuring next year’s blooms—no fancy tools required. 🌻 I’ve watched them pop open on their own, scattering seeds like tiny golden confetti, and learned to work with this free, built-in propagation system instead of fighting it.
The best time to harvest is late summer or early fall, when the seed heads turn papery brown but haven’t released their seeds yet. Grab a paper bag, shake gently over it, and you’ve got free seeds for next season—plus, you’re giving wildlife a snack while you’re at it.
Leave some on the stems for dried arrangements or bird buffets, but snip others to store in envelopes. These seeds stay viable for years, so you’ll never need to buy them again. The key is patience: let them dry fully before handling.
Pro tip: If you’re short on space, try indoor seed drying on a windowsill—just keep them away from moisture. Whether you’re saving seeds or crafting, these seed heads are the garden’s hidden multitaskers.
📚 In This Guide
- What you need
- Instructions
- Tips and common mistakes
- Wrapping up and next steps
What you need
- ● Mature black-eyed Susan plants – Look for fully browned, papery seed heads (usually late summer to fall).
- ● Pruning shears or sharp scissors – For clean cuts without damaging stems.
- ● Paper bags or breathable mesh bags – 1-2 medium-sized bags (12"x15") to collect seed heads.
- ○ Ruler or measuring tape – For precise cutting (optional but helpful for uniformity).
- ● Permanent marker – To label bags with the plant variety/year (if saving for future planting).
- ● Gloves – Protects hands from prickly stems (lightweight gardening gloves work best).
- ● Drying screen or paper towels – For spreading seed heads to dry indoors (if not drying naturally).
- ● Seed-saving envelope or airtight container – For long-term storage (add silica packets to prevent moisture).
- ● Camera or phone – Snap photos of seed heads before harvesting for reference!
How to collect black Eyed Susan seed heads for natural propagation
Here’s my no-fuss method for harvesting those iconic seed pods—no tools required, just a little patience.
🌿 Step 1: Identify Mature Seed Heads
Wait until the seed heads turn a deep, papery brown and the center cones begin to split open slightly. You’ll see tiny black seeds peeking through the dried petals—this is your cue. The pods should feel crisp to the touch, not at all soft or moist. If you gently squeeze one and it crumbles easily, it’s ready.
I like to harvest on a dry morning after a light dew has evaporated. The seeds stay cleaner when collected this way, and the pods pop open more reliably. Avoid days with high humidity—the seeds can mold inside the pods if they’re damp.
💧 Step 2: Gently Remove and Dry the Heads
Snap the seed heads off the stem with a quick twist or pinch, leaving about an inch of stem attached. This makes handling easier and prevents the pods from splitting too early. Place them in a single layer on a clean, dry surface—like a baking sheet or newspaper—where they can finish drying completely.
Let them sit in a well-ventilated spot for 3-5 days, turning them occasionally. You’ll know they’re fully dry when the seed pods rattle when shaken and the seeds inside look completely black and hard. If you rush this step, the seeds won’t store well and may sprout prematurely.
✂️ Step 3: Break Open the Dried Pods
Once completely dry, hold a seed head over a bowl or paper bag and gently crush it between your palms or with a rolling pin. The pods should split open easily, releasing the seeds inside. I use a clean kitchen towel to catch any stray petals or debris—this keeps the seeds pure for planting.
Don’t worry if a few seeds stick to the dried petals. A quick shake over the bowl usually dislodges them. Store the collected seeds in a labeled envelope or small jar in a cool, dry place. They’ll stay viable for 2-3 years if kept dry.
🌱 Step 4: Plant or Store for Future Use
For immediate planting, scatter the seeds directly onto prepared garden soil in early spring or fall, pressing them lightly into the top ¼ inch of soil. Black Eyed Susans thrive in full sun and well-draining soil, so choose a spot that gets at least 6 hours of sunlight daily. Water gently after planting to settle the soil.
If you’re saving them for later, label your seed envelope with the year and variety (if applicable). These hardy perennials often self-sow, so you might even find new volunteers popping up in your garden next spring—just dig them up and transplant if they’re in an unwanted spot.
Tips & tricks for perfect black Eyed Susan seed collection
Here's what nobody tells you about harvesting those perfect pop-off pods—tricks that'll save you time and frustration.
Timing Secret: Harvest on a dry, sunny morning after dew has evaporated. The seeds stay cleaner and the pods pop open more easily. I've learned this the hard way—after collecting damp pods that molded in storage. The difference between a successful harvest and wasted seeds often comes down to this single timing detail.
Drying Strategy: Those 3-5 days of drying in Step 2 are non-negotiable for seed viability. I've tried rushing this process, and the seeds either won't store properly or sprout prematurely. Place your drying pods in a spot with good airflow—like a mesh laundry bag hung in a breezy area. This prevents moisture buildup while they dry.
Storage Wisdom: After you've collected your seeds, store them in an airtight container with a silica gel packet to absorb any remaining moisture. I label mine with the year and variety, then place them in the freezer for maximum longevity. The cold temperature slows seed aging, keeping them viable for up to 5 years instead of the standard 2-3 years.
Planting Tip: When planting your collected seeds, don't bury them too deeply. The ¼ inch depth mentioned in Step 4 is perfect—any deeper and they may not germinate. Press them gently into the soil rather than covering with mulch, which can prevent sunlight from reaching the seeds.
Pro Tips for Black Eyed Susan Seed Heads
- Here's what nobody tells you about harvesting those perfect pop-off pods—tricks that'll save you time and frustration.
- Timing Secret: Harvest on a dry, sunny morning after dew has evaporated.
- Drying Strategy: Those 3-5 days of drying in Step 2 are non-negotiable for seed viability.
Frequently asked questions
Got questions about harvesting and saving Black Eyed Susan seed heads? You’re not alone! Here are some of the most common queries—plus straightforward answers to keep your gardening game strong.
When is the best time to harvest Black Eyed Susan seed heads?
Harvest seed heads once they’ve fully dried on the plant—usually late summer to early fall (August–October, depending on your climate). Wait until the pods turn brown and start splitting open naturally. Pro tip: A gentle shake should release seeds easily. If they’re still green, give them 1–2 more weeks!
What if my seed heads won’t pop open on their own?
If the pods stay stubbornly closed, try these tricks:
- Dry them indoors: Bundle stems and hang upside down in a paper bag for 1–2 weeks in a warm, dry spot.
- Gently crush: Use a clean cloth or gloved hands to rub the pods—seeds will spill out.
- Freeze them: Place pods in a sealed bag in the freezer overnight to weaken their structure.
How long do Black Eyed Susan seeds stay viable for storage?
Seeds typically stay fresh for 2–3 years if stored properly. Seal them in a paper envelope (not plastic!) and keep in a cool, dark place (like a fridge). Label with the harvest year—freshness = higher germination rates!
Can I use Black Eyed Susan seed heads for anything other than planting?
Beyond seeds, these dried blooms add rustic charm to:
- Winter wreaths or dried flower arrangements.
- Homemade potpourri (mix with cinnamon sticks for a cozy scent).
- Natural birdseed treats—just crush pods and scatter for finches!
What should I do if pests or animals eat my seed heads first?
Squirrels, birds, and insects love these seeds too! To protect your stash:
- Harvest early: Pick pods as soon as they’re dry but before wildlife notices.
- Use netting: Drape fine mesh over seed heads if pests are persistent.
- Store seeds ASAP: Once harvested, keep them in a sealed container until planting.
Wrapping up and next steps
Black Eyed Susan seed heads are nature’s easy, rewarding gift—perfect for gardeners who love low-maintenance beauty and the joy of propagating their own plants. 🌻 With just a little patience and the right timing, you can harvest, dry, and save seeds for next season’s vibrant blooms.
Whether you’re a beginner or a seasoned pro, these pop-off pods make seed saving feel like a breeze.
Now that you’re armed with tips and tricks, give it a try! Grab a pair of scissors, find a sunny spot, and let these cheerful flowers inspire your next gardening adventure. Happy saving—and here’s to a garden bursting with Black Eyed Susans for years to come! 🌱✨