
Lawn
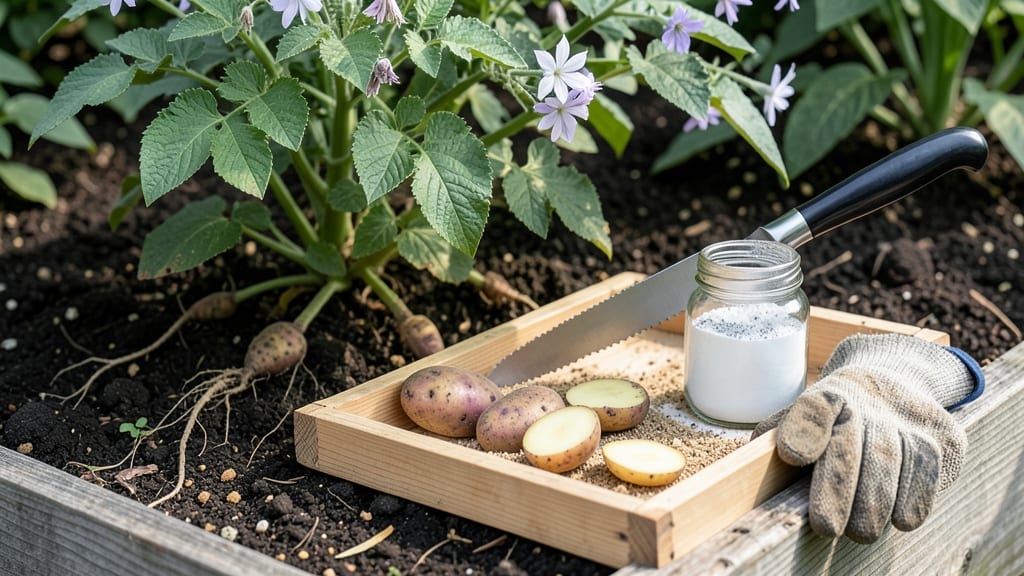
Cutting seed potatoes before planting doubles your harvest—but only if you do it right. 🌱 I’ve turned a single 1-pound potato into six strong plants by mastering the slice-and-heal method, and I’ll show you exactly how to avoid the common mistakes that lead to rot or weak growth.
The secret lies in sharp tools, proper healing time, and strategic cutting—not just hacking potatoes willy-nilly. You’ll need a clean knife, cinnamon powder (to prevent disease), and a sunny spot for the slices to develop calluses before planting.
This method works for both beginners and advanced gardeners, but the details make all the difference.
By the time you’re done, you’ll have uniform, disease-resistant slices ready to plant—each with 2-3 eyes and a sturdy base. The healing process (just 1-2 weeks in a cool, dry place) ensures your potatoes grow roots before hitting the soil, giving you a head start on the season.
Whether you’re working with organic seed potatoes or store-bought spuds, this technique maximizes your yield without extra cost. Let’s get those knives ready—your future harvest depends on it.
📚 In This Guide
- What you need
- Instructions
- Tips and common mistakes
- Wrapping up and next steps
What you need
- ● Seed potatoes: Certified disease-free, medium to large-sized potatoes (about 2–3 inches in diameter). Aim for 5–10 lbs depending on your garden size.
- ● Sharp knife or pruning shears: A clean, sterile knife (like a serrated or utility knife) or pruning shears to make precise cuts.
- ● Cutting board or clean surface: A dedicated cutting board (preferably plastic or wood) to avoid cross-contamination.
- ○ Disinfectant (optional but recommended): Rubbing alcohol (70% isopropyl) or a bleach solution (1 part bleach to 9 parts water) to sterilize tools and surfaces.
- ● Newspaper or paper towels: For drying cut potatoes before planting (1–2 sheets).
- ● Garden gloves: A pair of nitrile or cotton gloves to protect your hands from dirt and potential irritants.
- ● Planting container or garden bed: Well-draining soil (sandy loam is ideal) in either containers (10+ inches deep) or an in-ground plot.
- ● Compost or fertilizer: A balanced, low-nitrogen fertilizer (5-10-10 ratio) or well-aged compost to enrich the soil.
- ● Seed potato cutter: A specialized tool for clean, even slices (great for large batches!).
- ● Hydrogen peroxide (3%) or cinnamon powder: To dust cuts and prevent rot (sprinkle lightly).
- ● Planting markers: Small stakes or labels to track potato varieties if growing multiple types.
- ● Shade cloth or row cover: To protect newly planted cuttings from direct sun or pests for the first 1–2 weeks.
- ● Watering can with a fine rose: For gentle hydration without disturbing soil.
Step-by-Step instructions for cutting seed potatoes before planting
Here’s how I prepare seed potatoes for planting—ensuring each slice has the right size and eyes for vigorous growth.
🌱 Step 1: Select and Cut the Potatoes
Choose firm, disease-free seed potatoes with at least 2-3 eyes each. Using a sharp knife, cut each potato into 1.5- to 2-inch chunks, ensuring each piece has 1-2 eyes. This size ensures strong root development without overcrowding. I like to cut just outside the eye ring—this prevents the eyes from drying out too quickly.
Here’s the thing—don’t use table potatoes. They’re bred for starchy yield, not tuber production, and won’t regrow well. If you’re working with store-bought potatoes, let them sprout in a cool, dark place for 2-3 weeks first. You’ll see tiny shoots emerge, signaling they’re ready for cutting.
💧 Step 2: Let the Cuts Dry and Callus Over
Place the cut pieces in a cool, dry, well-ventilated spot for 24-48 hours to allow the cut surfaces to dry and form a callus. This step is critical—it prevents rot once planted. You’ll know they’re ready when the edges turn slightly leathery and the cut surfaces no longer look fresh.
I keep them on a wire rack or paper towels, away from direct sunlight. If you plant them too soon, the moist cuts invite fungal infections, which can kill your potato starts before they even sprout. Real talk: I’ve lost entire batches skipping this step, so don’t rush it.
☀️ Step 3: Pre-Sprout for Earlier Harvests
After callusing, place the pieces in a bright, cool spot (around 50-60°F) for 2-4 weeks to encourage early sprouting. You’ll see tiny green shoots emerge—this jumpstarts growth and gives you a head start on the season. I use a sunny windowsill or under grow lights set to 12 hours of light daily.
Watch for shoots that are 1-2 inches long before planting. These pre-sprouted pieces establish roots faster and produce stronger plants. If you’re in a warmer climate, you can plant them sooner, but cooler regions benefit from this extra time to harden off the sprouts.
🪴 Step 4: Plant at the Right Depth and Spacing
Plant the cut pieces 2-3 inches deep in loose, well-draining soil, with the eyes facing upward. Space them 12 inches apart in rows 3 feet apart for optimal airflow. I like to mound soil around the base to encourage more tuber formation deeper in the soil.
Water gently after planting to settle the soil but avoid soaking the cuts. Overwatering now can drown the delicate sprouts. Once the plants reach 6 inches tall, add more soil around the stems to bury the lower part—this prevents greening and promotes larger tubers. You’ll see new shoots emerge within 2-3 weeks if conditions are right.
⏰ Step 5: Monitor for Growth and Adjust Care
Keep the soil consistently moist but not soggy—potatoes hate sitting in water. You’ll know moisture is right when the top inch of soil feels damp but not wet. Fertilize lightly with a balanced 10-10-10 mix when flowers appear to support tuber development.
Watch for blossoms—they signal the plant is focusing energy on tubers. If you see flowers, increase water slightly to encourage bulb formation. By mid-season, you’ll see the foliage thicken and the soil mound rise as tubers swell beneath. Harvest when the plants flower and the foliage starts to yellow—usually 3-4 months after planting.
Tips & tricks for perfect seed potato preparation
A few simple adjustments can transform your potato starts from mediocre to thriving. Here's what I've learned after years of trial and error in my garden.
Cutting Precision: When slicing your 1.5- to 2-inch chunks in Step 1, use a clean, sharp knife to make clean cuts. Dull knives crush the potato tissue, which invites rot later. I dip my knife in hot water between cuts to sterilize—this prevents cross-contamination between potatoes. The key is making sure each piece has exactly 1-2 eyes; this balance ensures both root development and tuber production without overcrowding.
Callusing is Non-Negotiable: That 24-48 hour drying period in Step 2 is where most gardeners fail. I've seen entire batches of cut potatoes develop black rot because they were planted too soon. Pro tip: Place your cut pieces on a screen or rack in a well-ventilated area with good airflow. The edges should develop a slightly papery texture—this is your callus forming. If you're in a humid climate, increase ventilation or extend the drying time to 48 hours.
Lighting Matters for Sprouting: For Step 3's pre-sprouting phase, I've found that natural light works best when combined with a temperature between 50-60°F. If you're using artificial grow lights, position them 6-12 inches above the potatoes and set them to 12 hours of light daily. Watch closely for shoots that are 1-2 inches long—these are ready to plant. In my experience, pre-sprouted potatoes establish roots 2-3 weeks faster than unsprouted ones, giving you a significant head start on the growing season.
Soil Prep Secret: Before planting in Step 4, I always loosen the soil to a depth of 12 inches and mix in a handful of compost. This creates ideal conditions for root development. When mounding soil around the stems, I use a ratio of 2 parts soil to 1 part compost—this gives your potatoes both structure and nutrients without overwhelming them. The mound should be about 6 inches high when the plants reach 6 inches tall.
Pro Tips for Cutting Seed Potatoes Before Planting
- A few simple adjustments can transform your potato starts from mediocre to thriving. Here's what I've learned after y...
- Cutting Precision: When slicing your 1.5- to 2-inch chunks in Step 1, use a clean, sharp knife to make clean cuts. Du...
- Callusing is Non-Negotiable: That 24-48 hour drying period in Step 2 is where most gardeners fail. I've seen entire b...
Frequently asked questions
Got questions about cutting seed potatoes? You’re not alone—this technique can feel tricky at first! Here are answers to the most common concerns to help you plant with confidence.
Why should I cut seed potatoes at all?
Cutting seed potatoes into smaller pieces (each with at least one or two eyes) speeds up sprouting and lets you grow more plants in the same space. Smaller slices also establish roots faster, giving you a head start on the growing season. Just avoid cutting too close to the eyes—leave a little extra potato around them for energy!
How long before planting should I cut the potatoes?
Cut your seed potatoes 1–2 weeks before planting (or as soon as you can). This gives the slices time to sprout and develop small roots, but avoid cutting them too early—they’ll shrivel up if left in dry air. Store them in a cool, dark, and well-ventilated spot (like a cardboard box) until planting day.
What’s the best way to cut seed potatoes to avoid rot?
Use a clean, sharp knife (sterilized with rubbing alcohol) to make even cuts. Let the slices dry and callous over for 24–48 hours before planting—this prevents rot by sealing the wound. Avoid cutting through the eyes if possible, as this can slow growth. If you must, leave extra potato around the eye to help it recover.
Can I plant whole seed potatoes instead of cutting them?
If your seed potatoes are small (1–2 inches in diameter) or already sprouted, you can plant them whole. Larger potatoes can be cut, but whole ones reduce waste and may perform just as well. Just space them 12–15 inches apart to give roots room to spread. Whole potatoes also make it easier to monitor for early signs of disease.
What do I do if my cut potatoes rot before planting?
If you notice soft, mushy spots or foul smells, toss the affected slices immediately. To prevent rot, ensure your cutting tool is clean, avoid overcrowding slices in storage, and keep them in a dry, shaded area. If a few slices rot, don’t worry—just replace them with fresh cuts or whole potatoes. Healthy slices should feel firm and slightly dry before planting.
Wrapping up and next steps
Cutting seed potatoes before planting is a simple yet powerful way to maximize your garden’s potential—just remember to size-match your slices and let them cure for a few days! Whether you’re a seasoned gardener or just starting out, this method helps ensure stronger, healthier plants and a bountiful harvest. 🌱
Now that you’re ready to slice and plant, grab those spuds and get growing! For even better results, keep a gardening journal to track which varieties thrive best in your climate. Happy planting—your future harvest will thank you! 🌟