
Lawn
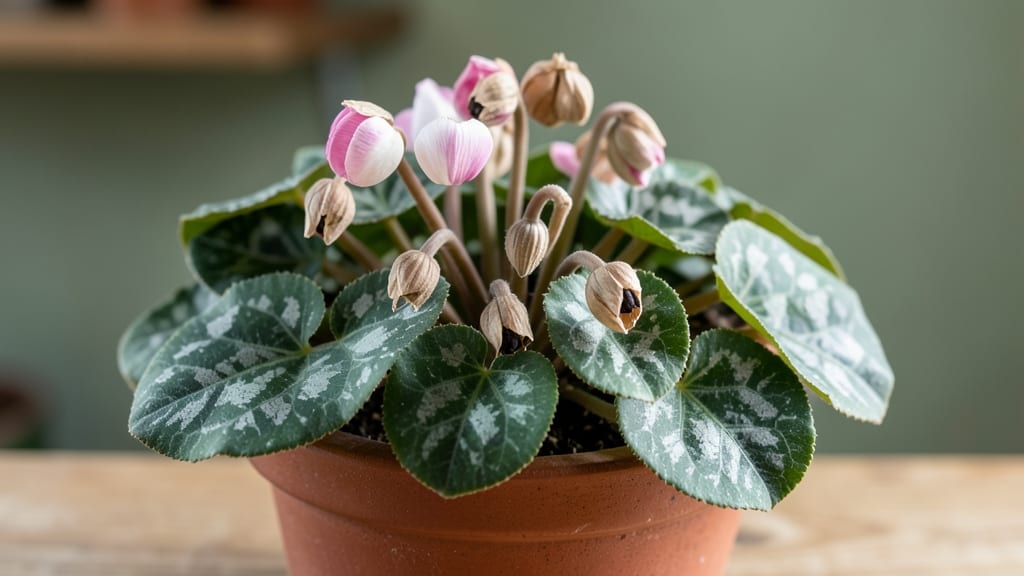
Saving cyclamen seed pods means next spring's blooms could be yours. 🌱 I've learned that these delicate pods hold the key to multiplying your favorite varieties—but only if you handle them right. The secret lies in mimicking nature's cold winter dormancy, which tricks seeds into breaking their stubborn rest period.
You'll need just a few simple supplies: ripe seed pods, paper bags for drying, a small container for stratification, and some patience. The process takes about 8-12 weeks of cold treatment, but it guarantees those first tender leaves that signal success.
Most gardeners skip this step and end up with spotty germination or no seedlings at all. What you'll end up with are sturdy seedlings ready to bloom in their second year.
The scent of fresh cyclamen leaves and the sight of pink or white flowers emerging from your garden will make every cold month worth it. These plants thrive in partial shade, so they're perfect for under trees or along north-facing walls.
The biggest challenge is resisting the urge to plant seeds too early—cyclamen seeds need that cold period to germinate properly. Here's how to do it right without losing your seeds to rot or mold.
📚 In This Guide
- What you need
- Instructions
- Tips and common mistakes
- Wrapping up and next steps
What you need
- ● Fresh cyclamen seed pods: Harvest mature, dry seed pods (light brown, slightly papery) from healthy plants. Aim for 3-5 pods for a small batch.
- ● Small pots or seed trays: Use 2-3 inch diameter pots or trays with drainage holes (e.g., 4-6 cell packs for individual pods).
- ● Well-draining potting mix: A blend of 50% peat or coco coir, 30% perlite or vermiculite, and 20% sand mimics cyclamen’s natural habitat.
- ● Plastic bags or clear lids: For humidity control during stratification (e.g., quart-sized zip-top bags or a humidity dome).
- ● Refrigerator: A standard fridge (set to 35–45°F) for cold stratification (3–4 months).
- ● Spray bottle: With fine mist setting to keep seeds moist without drowning them.
- ● Tweezers or toothpick: For gently handling tiny seeds when sowing.
- ● Grow lights: LED or fluorescent bulbs (5000K–6500K) for 12–14 hours/day once seeds germinate.
- ○ Seedling heat mat: (70–75°F) to speed up germination (optional but handy in cool climates).
- ● Humidity tray: A shallow tray with pebbles and water to maintain moisture levels.
- ● Plant labels: To track seed varieties and planting dates.
- ○ Fungicide (optional): A mild, organic solution (e.g., neem oil) to prevent damping-off.
Step-by-step guide to cold stratifying cyclamen seed pods
Here's how I guarantee reliable germination and next spring's blooms.
🌱 Step 1: Harvest and Prepare Mature Seed Pods
Collect fully mature cyclamen seed pods when they turn brown and begin splitting open naturally. The pods should feel dry and papery to the touch. I like to harvest them in late summer or early fall when they're ready to release seeds. Place the pods in a paper bag and let them dry completely for 3-5 days at room temperature.
Once dry, gently open each pod to reveal the small, dark seeds inside. Cyclamen seeds are tiny—about the size of a pinhead—so I use tweezers to handle them carefully. Spread the seeds on a clean paper towel to prevent moisture buildup, which can cause mold. This step ensures you're starting with healthy, viable seeds ready for stratification.
💧 Step 2: Mix Seeds with Moist Grit or Perlite
Combine the seeds with an equal amount of coarse sand, perlite, or horticultural grit in a small container. The grit helps prevent mold and improves airflow around the tiny seeds. Moisten the mixture lightly with water until it feels like a damp sponge—you shouldn’t see pooling, just even moisture. I use a spray bottle to avoid overwatering.
This mixture should feel cool to the touch but not cold. The grit acts as a buffer to regulate moisture and temperature during stratification. If the mix feels too dry, add a few more spritzes of water; if it’s soggy, let it sit uncovered for an hour to dry slightly. This balance is critical for successful germination.
❄️ Step 3: Stratify in the Refrigerator for 6-8 Weeks
Place the seed-grit mixture in a sealed plastic bag or airtight container, leaving a little room for airflow. Store it in the refrigerator, where temperatures hover around 35-40°F. I use a small, lidded container with a few air holes punched in the lid to prevent condensation buildup, which can suffocate the seeds.
Check the mixture every 2 weeks to ensure it hasn’t dried out or become moldy. If it feels dry, spritz lightly with water; if mold appears, discard the batch and start over. Cold stratification mimics the natural winter period cyclamen seeds need to break dormancy. After 6-8 weeks, the seeds will be ready for planting.
🌿 Step 4: Plant Stratified Seeds in Moist Potting Mix
Fill small seed trays or individual pots with a well-draining peat-based potting mix. Moisten the mix until it’s damp but not soggy—think of a wrung-out sponge. Press the soil down lightly to remove air pockets, then scatter the stratified seeds on the surface. Since cyclamen seeds are tiny, I use a toothpick to space them about ½ inch apart.
Cover the seeds with a thin layer of fine vermiculite or sand, just enough to obscure them from view. This light covering helps retain moisture while allowing light to penetrate. Place the trays in a warm, bright spot where temperatures stay around 65-70°F. Germination can take 4-8 weeks, so patience is key.
☀️ Step 5: Provide Consistent Light and Humidity
Once the seeds germinate, move the trays to a location with bright, indirect light. A south-facing window or a grow light set to 12-14 hours daily works best. Cyclamen seedlings are sensitive to direct sun, which can scorch their delicate leaves. You’ll know the light is right when the seedlings grow upright with dark green leaves.
Keep the soil consistently moist but never waterlogged. I use a spray bottle to mist the seedlings gently, avoiding the leaves to prevent fungal issues. Transplant the seedlings into individual pots once they develop their first true leaves. With proper care, you’ll see blooms in 12-18 months, depending on the variety.
Tips & tricks for perfect cyclamen seed stratification
These little-known adjustments will help you avoid the most common pitfalls and maximize your success rate with cyclamen seed germination.
Harvest Timing is Everything: Real talk—harvesting too early means immature pods that won't release seeds properly. Wait until the pods are completely brown, dry, and starting to crack open naturally. I've ruined batches by harvesting too soon, so don't make my mistake: patience here pays off. If you're unsure, wait another week—you can't over-harvest, but you can harvest too early.
The Right Grit Makes All the Difference: While coarse sand, perlite, or horticultural grit all work, I've found perlite gives the best balance of moisture control and airflow. The key is maintaining that "damp sponge" texture—if your mix feels like a wrung-out dishcloth, you're golden. Too dry? Spritz lightly. Too wet? Let it air out for an hour. This moisture balance is what prevents mold while keeping seeds viable during those critical 6-8 weeks.
Stratification Container Matters More Than You Think: Don't just toss your seed mix in any old container. Use something with a tight lid but with small air holes punched in—like a small mason jar with the lid drilled and covered with mesh. This prevents condensation buildup while allowing airflow. I've seen batches fail because of mold from trapped moisture, so this simple adjustment can make or break your success.
Light After Germination is Non-Negotiable: Once those first tiny sprouts appear, move your trays immediately to bright, indirect light. I can't stress this enough—direct sun will fry those delicate seedlings faster than you can say "failed batch." South-facing windows work, but if you're using artificial light, 12-14 hours daily is perfect. The seedlings will tell you when they're happy: they'll grow upright with dark green leaves. If they stretch or look pale, they need more light.
Pro Tips for Cyclamen Seed Pods
- These little-known adjustments will help you avoid the most common pitfalls and maximize your success rate with cycla...
- Harvest Timing is Everything: Real talk—harvesting too early means immature pods that won't release seeds properly. W...
- The Right Grit Makes All the Difference: While coarse sand, perlite, or horticultural grit all work, I've found perli...
Frequently asked questions
Got questions about cyclamen seed pods?
You’re not alone—growing these delicate plants from seed takes patience and know-how. Here are answers to the most common queries to help you navigate cold stratification and beyond!
How long do cyclamen seed pods need to dry before harvesting?
Let seed pods mature fully on the plant until they turn brown and papery—usually 4–6 weeks after flowering. Harvest them when they’re crispy to the touch but haven’t split open. Store seeds in a cool, dry place (like a paper envelope) until stratification.
What’s the best way to cold-stratify cyclamen seeds?
Mix seeds with moistened potting mix in a sealed bag or container, then refrigerate for 8–12 weeks at 35–40°F (2–4°C). Check monthly to prevent mold—never let it dry out! After stratification, sow seeds 1/8-inch deep in well-draining soil.
Can I skip cold stratification and still get cyclamen to grow?
Technically yes, but germination rates will be low and slow (weeks to months). Stratification mimics winter conditions, breaking seed dormancy for reliable blooms. If you’re impatient, try soaking seeds in lukewarm water for 24 hours first—but stratification is still the gold standard!
How long until cyclamen seeds sprout after stratification?
With proper stratification, expect germination in 4–12 weeks. Keep soil consistently moist (not soggy) and maintain warmth (65–75°F/18–24°C). Patience is key—some seeds may take up to 6 months! Use a humidity dome or plastic wrap to retain moisture.
My cyclamen seeds rotted during stratification—what went wrong?
Overwatering or poor airflow are the top culprits. Use sterilized potting mix and a perforated bag to prevent mold. If seeds smell funky or turn mushy, start over—but next time, check moisture weekly and avoid sealing containers too tightly.
When will my cyclamen plants bloom after sowing?
Young cyclamen grown from seed typically bloom in their second or third year. Provide bright, indirect light and cool nights (50–60°F/10–15°C) to encourage flowering. Patience pays off—your first blooms will be worth the wait!
Wrapping up and next steps
Growing cyclamen from seed pods is a rewarding journey that unlocks vibrant blooms for next spring—but patience and precision are key! 🌱 By mastering cold stratification, you’ve taken the first step toward nurturing these delicate beauties.
Whether you’re a seasoned gardener or a curious beginner, your efforts will soon pay off with stunning, fragrant flowers.
Now that you’re armed with the blueprint, why not expand your garden’s charm? Try experimenting with different stratification methods or share your progress with fellow plant enthusiasts. Happy growing—your future cyclamen blooms are cheering you on! 🌸