
Lawn
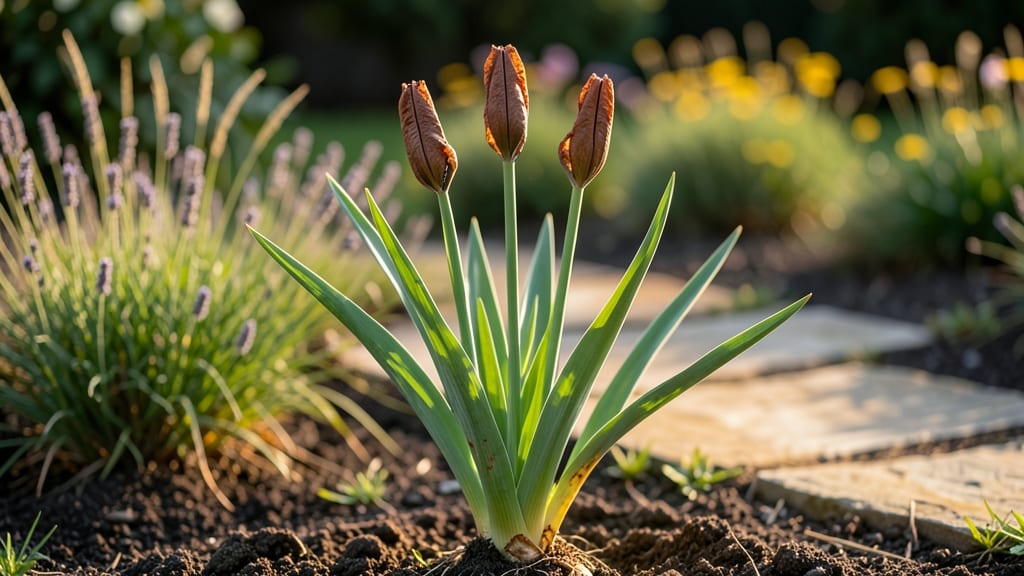
Those dried iris seed pods are nature's way of saying "let's grow more." 🌱 I used to toss them without thinking—until I realized they're packed with potential for new plants, zero cost, and zero waste.
The key is knowing exactly when and how to collect them, because timing makes all the difference with iris seeds.
Harvesting is simpler than you'd expect—just wait until the pods turn completely brown and papery in late summer or early fall. Snip them off the stalk with clean scissors, leaving the roots undisturbed.
Store them in a paper bag in a dry, dark place until they open naturally, which can take a few weeks.
Once opened, you'll find tiny black seeds ready for planting. Iris seeds need cold stratification—simply plant them in fall and let winter handle the dormancy requirement. By spring, you'll see those first delicate shoots pushing through the soil.
This method works for bearded, Siberian, and even Japanese irises. The best part? You're creating new plants without spending a dime, and your garden gets a fresh infusion of genetic diversity. Let's turn those pods into next year's blooms!
📚 In This Guide
- What you need
- Instructions
- Tips and common mistakes
- Wrapping up and next steps
What you need
- ● Mature iris seed pods: Harvest pods after they’ve turned brown and dried naturally on the plant (usually 4–6 weeks post-bloom). Aim for at least 10–15 pods for a good seed yield.
- ● Scissors or pruners: Sharp, clean tools to snip pods from the stem (sterilize with rubbing alcohol if reusing).
- ● Brown paper bags or breathable mesh bags: 1–2 bags (8x10 inches) to store pods while drying. Avoid plastic—it traps moisture!
- ● Labeling tags & permanent marker: Write the iris variety and harvest date on each bag (e.g., "Blue Flag Iris – June 2024").
- ● Drying rack or screen: Elevate pods for airflow (e.g., a wooden frame with chicken wire).
- ● Desiccant packets (silica gel): Place 1–2 in the bag to speed up drying in humid climates.
- ● Glove: Protects hands from scratchy pods (iris leaves can be sharp!).
- ● Seed tray or envelope: For storing seeds post-drying (save for next season!).
- ● Patience! Drying takes 4–6 weeks in ideal conditions (cool, dry, dark space).
- ● Access to a well-ventilated area (avoid attics or basements with high humidity).
- ● Knowledge of your iris variety: Some hybrids (like Iris germanica) produce more viable seeds than others.
Step-by-Step instructions for harvesting iris seed pods
Here's how to collect iris seeds without any fuss—just let nature do the work.
🌿 Step 1: Identify and Wait for Mature Seed Pods
Iris seed pods form after flowering, appearing as long, slender capsules that start green and gradually turn brown as they mature. Wait until they’re completely dry and papery to the touch—this usually takes 6-8 weeks after the blooms fade. If you tap a mature pod gently, you’ll hear seeds rattling inside.
Don’t harvest too early. Green pods won’t release seeds properly, and you’ll end up with shriveled or unusable seeds. I always check pods in late summer when they’ve fully dried in the sun.
✂️ Step 2: Harvest the Dried Pods Carefully
Use clean, sharp scissors or pruners to snip the pods from the stalk, leaving a small stem attached. Cut just above the first leaf node to avoid damaging the plant. Place the pods in a paper bag—this prevents moisture buildup and keeps seeds from scattering.
If pods are still slightly green, leave them on the plant for another week. Overly moist pods can mold, ruining your seeds. I like to harvest on a dry morning when dew has evaporated.
🪴 Step 3: Dry and Store the Pods
Spread the harvested pods in a single layer on a clean, dry surface (like a tray or cardboard) in a warm, dry place for 3-5 days. This extra drying ensures seeds release easily. Stir them occasionally to prevent mold.
Once fully dry, place the pods in a sealed container (like a glass jar) and store them in a cool, dark spot. Seeds remain viable for 1-2 years if kept dry. I label mine with the iris variety and harvest date—trust me, you’ll forget!
🌱 Step 4: Release and Collect the Seeds
When ready to plant, crush the dried pods between your fingers over a clean sheet of paper or directly into seed trays. The pods will split open, releasing tiny black seeds. Iris seeds are tiny—think dust-sized—so work gently to avoid losing them.
Sow seeds immediately or store them in a sealed envelope with silica gel packets to absorb moisture. If planting right away, scatter seeds lightly on the soil surface (they need light to germinate) and press them in gently.
Tips & tricks for perfect iris seed pod harvesting
These simple tricks will help you collect the highest-quality iris seeds with minimal effort.
Timing is Everything: The 6-8 week window after flowering is critical—don't rush it! I've learned the hard way that harvesting too early gives you shriveled seeds. Mark your calendar when irises bloom to track the drying process. A gentle tap test (listening for seeds rattling) is the best way to confirm readiness.
Harvesting Technique: In Step 2, use sterilized scissors to avoid introducing pathogens to your seeds. I place the pods in a paper bag immediately to prevent moisture loss and seed scattering. For large harvests, consider wearing gloves—iris seeds are so tiny they'll stick to everything!
Drying Strategy: The 3-5 day drying period in Step 3 is your insurance against mold. I spread mine on a mesh screen over a baking rack to allow airflow from all sides. Stir pods daily to ensure even drying—this prevents clumping and keeps seeds viable longer.
Storage Wisdom: Once pods are completely dry, store them in an airtight container with silica gel packets to absorb any residual moisture. I've found that labeling containers with the iris variety and harvest date prevents mix-ups when planting later. The seeds will stay viable for up to 2 years if kept completely dry.
Pro Tips for Dried Iris Seed Pods
- These simple tricks will help you collect the highest-quality iris seeds with minimal effort.
- Timing is Everything: The 6-8 week window after flowering is critical—don't rush it! I've learned the hard way that h...
- Harvesting Technique: In Step 2, use sterilized scissors to avoid introducing pathogens to your seeds. I place the po...
Frequently asked questions
Got questions about harvesting and saving dried iris seed pods? You’re not alone—this hands-off method is simple but has a few key quirks! Here are answers to the most common queries, so you can master zero-waste seed saving with confidence.
When are iris seed pods fully dried and ready to harvest?
Iris seed pods are ready for harvest when they turn completely brown and crispy—usually 6–8 weeks after flowering. Gently squeeze a pod; if it rattles with seeds inside and crumbles easily, it’s time! Avoid harvesting too early, or the seeds won’t germinate well.
How long do dried iris seed pods stay viable for storage?
Properly dried and stored iris seeds remain viable for 1–2 years in a cool, dark place (like a sealed envelope or jar with silica gel). For longer storage, refrigerate them in an airtight container. Pro tip: Label your pods with the harvest date to track freshness!
What if my iris seed pods mold or rot before drying?
Mold or rot usually happens due to high humidity or overripe pods. To prevent this, harvest pods as soon as they’re fully brown and place them in a well-ventilated spot (like a mesh bag) away from direct sunlight. If mold appears, discard the pods immediately—don’t risk using them.
Can I use dried iris seed pods for anything other than planting?
Beyond seeds, dried iris pods add rustic texture to floral arrangements, crafts (like wreaths or potpourri), or even homemade paper. Just ensure they’re 100% dry to avoid moisture damage. For planting, crush the pods to release seeds—no tools needed!
What if my iris plants don’t produce seed pods at all?
Seed pods skip a season for a few reasons: young plants (they need 2–3 years to mature), lack of pollinators, or over-fertilizing (which encourages foliage over flowers). Try hand-pollinating with a soft brush, or let nature take its course—patience pays off!
Wrapping up and next steps
Dried iris seed pods offer a simple, zero-waste way to save seeds while adding beauty to your garden. With just a few tools and patience, you can transform these striking pods into a sustainable resource—perfect for gardeners who love efficiency and eco-friendly practices. 🌱
Ready to try it? Start small—harvest a few pods, experiment with drying methods, and soon you’ll be a pro at seed-saving! Share your success with fellow gardeners or even explore creative uses for the pods beyond seeds.