
Lawn
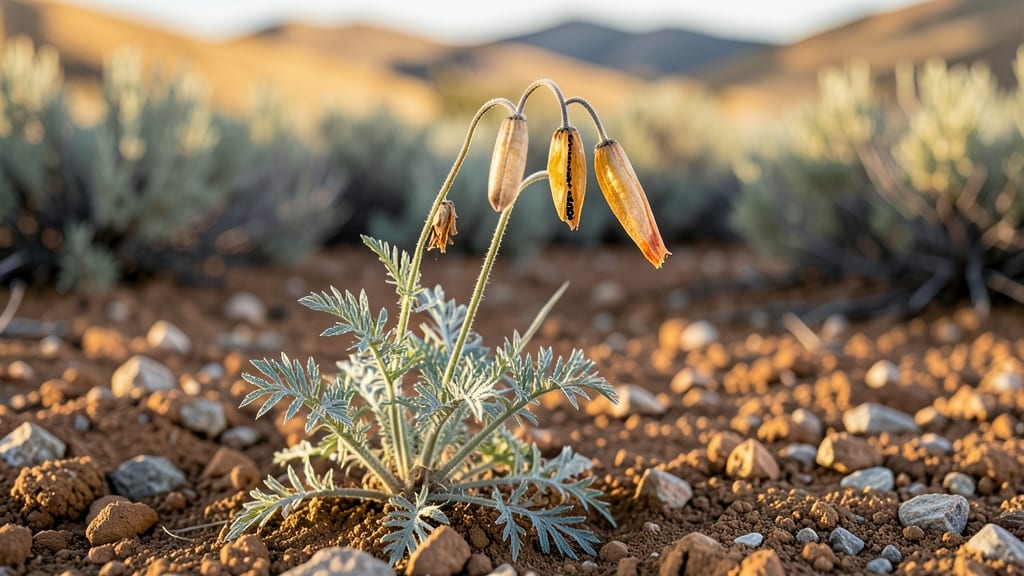
Harvesting dry poppy seed pods turns your garden into a zero-waste treasure trove. 🌸 The moment those papery blooms fade, the real magic begins—those spiky seed heads hold the promise of next year's poppies, plus creative possibilities you’d never expect.
Timing is everything: wait until the pods turn completely brown and crispy, then snip them cleanly with scissors or pruners. A simple paper bag over the stems catches every seed as they rain down when you gently shake the pods. No fancy equipment needed—just your hands and a little patience.
Once dry, you can tuck the seeds into envelopes for next spring’s garden or use the pods themselves for crafts—think dried arrangements, wreaths, or even rustic decor. The California poppy’s delicate papery texture makes it perfect for adding texture to winter bouquets.
Pro tip: Store seeds in a cool, dry place, and label them clearly. These pods aren’t just seed savers—they’re a free, beautiful way to extend your garden’s life long after the blooms fade. Here’s how to make the most of them.
📚 In This Guide
- What you need
- Instructions
- Tips and common mistakes
- Wrapping up and next steps
What you need
- ● Mature poppy plants – At least 3-5 healthy plants with fully dried seed pods (wait until pods turn brown and crack open slightly).
- ● Pruning shears or sharp scissors – For cleanly harvesting stems (avoid tearing pods).
- ● Brown paper bags or breathable fabric sacks – 2-3 medium-sized bags (avoid plastic to prevent moisture buildup).
- ○ Newspaper or cardboard – A large sheet for drying pods indoors (optional but helpful).
- ● Small wooden or glass jars – 2-4 airtight jars (2–4 oz size) with lids for storage.
- ● Fine-mesh sieve or colander – For gently separating seeds from chaff.
- ● Pencil or chopstick – To poke small holes in jar lids for airflow.
- ● Labeling tags & permanent marker – To note seed variety and harvest date.
- ● Desiccant packets – For long-term storage in jars (prevents humidity).
- ● Glove – If you’re sensitive to poppy residue (some folks report mild irritation).
- ● Digital scale – To measure seed yield (fun for tracking success!).
Step-by-step guide for harvesting poppy seed pods
Here’s how to collect seeds effortlessly—no tools, no mess, just nature’s way.
🌱 Step 1: Choose Healthy Poppy Plants for Seed Saving
Wait until the poppy blooms fade and the pods turn a papery brown color—this signals they’re fully mature and ready for seed collection. I always pick pods that are slightly dry but haven’t yet split open, as they’ll release seeds naturally soon. Avoid pods with blackened spots or holes, as these may harbor pests or diseases that could ruin your seeds.
Select 4-6 of the healthiest pods per plant, leaving some behind to reseed naturally if desired. You’ll know they’re ready when the pods rattle slightly when shaken—this means the seeds inside are loose and ready to fall out. If you’re working with multiple plants, focus on the largest, most vibrant pods first.
☀️ Step 2: Create a Seed Collection Station
Place a clean, white paper bag or a shallow tray lined with parchment paper under the poppy plants. I like to use a large, flat surface like a baking sheet or a sturdy piece of cardboard to catch falling seeds. Position it directly beneath the pods you’ve chosen, as seeds can travel surprisingly far when released.
If you’re working in a garden bed, gently shake each pod over the collection surface. For potted plants, simply tilt the pot slightly to encourage seeds to drop. Avoid cutting pods off the plant—this can damage the stem and may cause the remaining seeds to scatter unpredictably. Instead, let nature do the work for you.
🪴 Step 3: Let Seeds Dry and Separate Naturally
Leave the collected pods and seeds in a dry, well-ventilated area for 3-5 days to ensure they’re completely dry. I place mine on a mesh screen or a piece of window screen to allow air to circulate freely around them. This step is crucial—moisture can cause seeds to mold or spoil before you’re ready to store them.
After a few days, gently crush the dried pods between your fingers or with a rolling pin to release any remaining seeds. You’ll notice the seeds are small, dark, and slightly glossy. Sift the mixture through a fine-mesh strainer to separate the seeds from any chaff or debris. Store the clean seeds in a labeled envelope or small jar in a cool, dark place for up to 2 years.
⏰ Step 4: Store Seeds Properly for Long-Term Use
Once your seeds are fully dry and separated, transfer them to an airtight container like a glass jar or a resealable plastic bag. I add a small packet of silica gel or a few grains of rice to absorb any lingering moisture. Label the container with the date and the type of poppy—this helps track freshness and ensures you plant the right variety next season.
Store the container in a cool, dark pantry or refrigerator to maintain seed viability. Check the seeds annually to ensure they remain dry and free of pests. If you notice any signs of mold or mustiness, discard the batch immediately—this prevents contamination of your entire seed stash. With proper storage, your poppy seeds should remain viable for years, ready to grow into next year’s blooms.
Tips & tricks for perfect poppy seed pod harvesting
These simple strategies will help you maximize your seed yield while keeping the process effortless and worry-free.
Selection Tip: The key to a successful harvest is choosing pods that are just right—neither too green nor already split open. Look for that papery brown color and that signature rattle when you shake them. Confession: I skipped this step for years and wondered why my seeds never seemed abundant. That slight rattle means the seeds are loose and ready to fall out naturally, giving you the cleanest harvest with minimal effort.
Equipment Hack: Don't overthink your collection station—any clean, flat surface will work. I've used everything from baking sheets to sturdy cardboard boxes. The important thing is positioning it directly beneath your pods. A pro move: place a second collection surface nearby if you're working with multiple plants, as seeds can travel surprisingly far when released. This prevents messy cleanups and lost seeds.
Drying Wisdom: Those 3-5 days of drying might seem long, but they're absolutely crucial. I learned this the hard way after storing slightly damp seeds that developed mold within weeks. Spread your pods on a mesh screen or window screen in a dry, well-ventilated area. This airflow prevents moisture buildup and ensures your seeds stay fresh for their full 2-year storage life. A small fan on low setting can help speed up the process if you're short on time.
Storage Strategy: Labeling your seed containers is non-negotiable if you're saving multiple varieties. I add a small sticker with the date and poppy type directly to the container lid. This prevents mix-ups and helps you track seed freshness. For extra protection against moisture, place a small packet of silica gel or even a few grains of rice in the container. Trust me on this—it makes all the difference in maintaining viability.
Pro Tips for Dry Poppy Seed Pods
- These simple strategies will help you maximize your seed yield while keeping the process effortless and worry-free.
- Selection Tip: The key to a successful harvest is choosing pods that are just right—neither too green nor already spl...
- Equipment Hack: Don't overthink your collection station—any clean, flat surface will work. I've used everything from ...
Frequently asked questions
Got questions about harvesting dry poppy seed pods? You’re not alone! Here are some of the most common queries—plus clear, no-fuss answers to keep your seed-saving journey smooth.
What’s the best time to harvest poppy seed pods?
Harvest pods when they’re fully dry but before they split open—usually 4–6 weeks after flowering. Check daily: tap a pod gently; if seeds rattle inside, it’s ready. Morning harvests work best since dew can moisten pods overnight.
How do I tell if a pod is ready to harvest?
Look for these signs: dry, papery texture, brown or gray color, and seeds rattling inside. Avoid harvesting if pods are still green or seeds feel damp. Pro tip: Use tweezers to gently pry open a few pods—if seeds pop out easily, they’re ready!
Can I save seeds from poppies grown in my yard?
Yes! As long as your poppies are non-hybrid (like California poppies or opium poppies), their seeds will grow true to type. Just avoid seeds from hybrid varieties (e.g., fancy florist poppies)—they may not reproduce as expected.
What do I do if pods open before I harvest them?
No stress! Scatter seeds on a dry, breathable surface (like a paper towel) and let them dry for 1–2 days. Store them in a paper envelope (not plastic) in a cool, dark place. Most seeds will still germinate—just plant them sooner rather than later!
Are there alternatives to harvesting pods by hand?
Try these low-effort methods:
- Net method: Place a fine mesh bag under pods to catch seeds as they fall naturally.
- Shake method: Gently shake plants over a tray lined with parchment paper.
- Leave them: Let pods dry on the plant, then run a fork through the stems to dislodge seeds onto a tarp.
Wrapping up and next steps
Dry poppy seed pods offer a simple, rewarding way to embrace zero-waste gardening while enjoying nature’s bounty with minimal effort.
Whether you’re a seasoned gardener or just starting out, harvesting these delicate pods connects you to the cycle of growth—and the seeds can even brighten your kitchen with homemade treats! 🌱
Ready to give it a try? Start small: pick a sunny spot in your yard, let the poppies flourish, and soon you’ll be reaping seeds for years to come. Your garden—and the planet—will thank you!