
Lawn
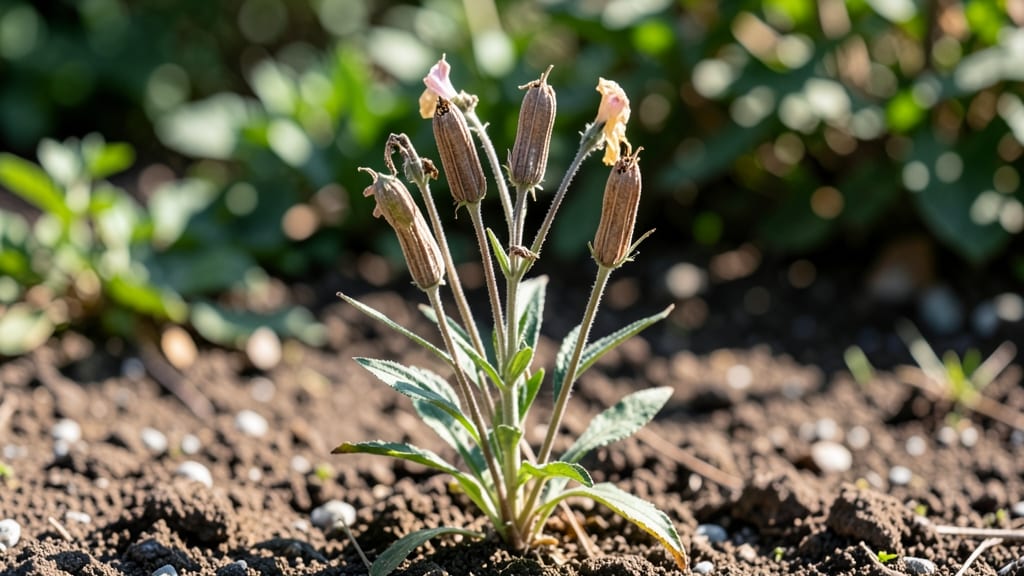
Twisting open snapdragon seed pods without breaking them is the secret to saving seeds that sprout reliably next spring. 🌿 I’ve wrestled with brittle pods that crumble at the touch—until I discovered the right drying and handling techniques that preserve those delicate seed cases.
The difference between viable seeds and dust is all in how you prepare them.
Start by harvesting pods when they turn from green to a papery brown, usually in late summer or early fall. Let them dry on the plant for a few extra days if the weather’s humid—this toughens the pods so they won’t split open prematurely.
Once fully dry, gently twist them open over a clean tray, being careful not to yank too hard or the seeds will scatter.
Store the dried pods in a cool, dark place inside a sealed container with silica gel packets to absorb any lingering moisture. Properly dried seeds stay viable for up to three years, ready to sprout into those beloved snapdragons that add height and color to your garden beds.
The key is patience—rushing the drying process leads to weak, nonviable seeds.
Watch for pests like mice or weevils that might nibble on your stored seeds. A fine mesh bag inside your container adds an extra layer of protection. With these steps, you’ll have a stash of seeds that perform just as well as store-bought—if not better—next planting season.
📚 In This Guide
- What you need
- Instructions
- Tips and common mistakes
- Wrapping up and next steps
What you need
- ● Dried snapdragon seed pods – 10–20 pods (ensure they’re fully dried and crisp for easy seed extraction).
- ● Pair of sharp scissors or pruning shears – for opening pods without damaging them.
- ● Small bowl or paper plate – to collect seeds and debris.
- ● Soft-bristle paintbrush or tweezers – for gently removing seeds from pods.
- ● Ruler or measuring tape – to check pod sizes (if crafting or measuring for projects).
- ● Newspaper or drop cloth – to protect your workspace from seed debris.
- ● Magnifying glass – for inspecting pods or seeds up close.
- ● Small sieve or fine mesh strainer – to separate seeds from chaff.
- ● Air-drying rack or paper towels – if pods need extra drying time.
- ● Labeling tags or small envelopes – for organizing seeds by variety.
- ● Glue or craft adhesive – if using pods for decorative projects (e.g., wreaths or mobiles).
How to harvest snapdragon seeds without twisting the pods
Here's the gentle method I use every year—no frustration, no broken pods, just easy seed collection.
🌱 Step 1: Wait for Pods to Fully Dry and Open Naturally
Leave the seed pods on the plant until they turn a deep brown color and begin to split open on their own. This usually happens 6-8 weeks after flowering, depending on your climate. You'll see the pods develop a papery texture and small cracks along the seams—this is your signal they're ready.
Resist the urge to harvest early. If you pick them too soon, the seeds won't be fully mature and won't germinate well. I always wait until at least 50% of the pods have opened naturally before attempting extraction. This ensures maximum seed viability and makes the process much easier.
🌿 Step 2: Collect Pods and Prepare for Seed Removal
Gently twist the dried stems to remove the pods from the plant. Place them in a clean, dry container lined with a paper towel or parchment paper. I use a small cardboard box or even an old cereal box for this purpose—just make sure it's big enough to hold all the pods without crowding.
Let the pods sit for 24-48 hours in a warm, dry place. This extra drying time prevents moisture from causing the pods to stick together or mold. You'll know they're ready when they feel crisp and light when you shake them—they should rattle with seeds inside.
✂️ Step 3: Extract Seeds Without Twisting the Pods
Here's the trick: instead of twisting, hold the pod firmly between your thumb and forefinger at the base where it attaches. Gently squeeze while rolling your fingers upward—this motion opens the pod without applying the twisting pressure that causes them to break. The seeds will spill out cleanly into your container.
For stubborn pods, I use a small pair of scissors to make a tiny slit at the top. Then I can simply pinch the sides to release the seeds. Never cut into the middle of the pod—this damages the seed compartment and reduces germination rates. You'll need about 10-15 minutes to process all the pods from a single plant.
🪴 Step 4: Clean and Store Seeds Properly
Once all seeds are out, spread them on a clean paper towel to dry completely for 1-2 hours. This final drying step prevents any moisture from causing mold during storage. Use a small funnel to transfer the seeds into labeled envelopes or small glass jars.
Store your seeds in a cool, dark place with low humidity. I keep mine in the refrigerator in sealed envelopes for up to 3 years without any loss of viability. Label each package with the variety name and harvest date—you'll be amazed how quickly you forget which color is which when you're ready to plant again!
⏰ Step 5: Prepare for Next Year's Planting
After storing your seeds, make a note of which varieties performed best in your garden. Snapdragons are biennials, so if you plant them in fall, they'll often self-seed naturally next year. I always save a few extra pods from my favorite varieties to plant as cuttings for a head start on the season.
Here's the thing—once you master this method, you'll never struggle with stubborn snapdragon pods again. The key is patience: waiting for full maturity and using the gentle extraction technique. Your future self will thank you when you're looking at a fresh batch of seeds ready for next year's garden!
Tips & tricks for perfect snapdragon seed extraction
These simple tricks will help you avoid broken pods and maximize seed viability every single time.
Timing Secret: The 6-8 week waiting period in Step 1 is crucial—don't rush it! I've learned the hard way that immature seeds won't germinate well. Look for that papery texture and slight cracking along the seams as your signal. If your climate is particularly damp, extend the waiting time by another week to ensure full dryness. This extra patience pays off with seeds that sprout reliably.
Pod Preparation Hack: For the 24-48 hour drying period in Step 2, place your container in a warm spot near a sunny window or even a gentle heat source. I use a small space heater on low setting—just be careful not to overheat. You'll know they're ready when they feel crisp and rattle like maracas when shaken. This extra drying prevents those frustrating pods that stick together or mold.
Extraction Technique: When you're working through Step 3, here's what I do for stubborn pods: make that tiny slit at the top with your scissors, then place the pod on a clean cutting board. Use the flat side of your knife blade to gently press along the sides—this releases the seeds without damaging the pod structure. It takes about 10-15 minutes for a single plant, but this careful approach prevents seed loss and maintains germination rates.
Storage Wisdom: For the final drying in Step 4, I spread my seeds on a screen or mesh surface rather than just a paper towel. This allows air to circulate on all sides, ensuring complete dryness in that 1-2 hour window. When storing, I add a small packet of silica gel to each envelope—this extra moisture absorber helps maintain viability for those 3 years in the refrigerator.
Pro Tips for Dried Snapdragon Seed Pods
- These simple tricks will help you avoid broken pods and maximize seed viability every single time.
- Timing Secret: The 6-8 week waiting period in Step 1 is crucial—don't rush it!
- Pod Preparation Hack: For the 24-48 hour drying period in Step 2, place your container in a warm spot near a sunny window or even a gentle heat source.
Frequently asked questions
about dried snapdragon seed pods—because even the simplest tasks can raise questions! Here’s what you need to know before diving in.How do I know when snapdragon seed pods are fully dried and ready to harvest?
Snapdragon seed pods are ready when they turn a light brown color and feel crispy to the touch. Gently squeeze one—if it crumbles easily and the seeds rattle inside, they’re perfect for harvesting. Avoid pods that are still green or damp, as they won’t open cleanly.
Can I speed up the drying process for snapdragon seed pods?
Yes! Place pods in a well-ventilated area (like a mesh bag or paper bag with holes) under indirect sunlight or use a dehydrator set to 95°F for 2–4 hours. Just avoid direct heat or moisture, which can cause pods to crack prematurely.
What if my dried seed pods won’t open? Troubleshooting tips?
If pods resist opening, try these fixes:
- Freeze them overnight—cold makes them brittle.
- Use a paper towel to gently rub the seams.
- Store them in a cool, dry place for a few more days.
Are there alternatives to snapdragon seed pods for seed extraction?
Try these twist-resistant options:
- Dill or fennel pods—similar texture, easy to twist.
- Poppy seed pods (though they’re trickier to open).
- Store-bought seed packets (check labels for "easy-open" designs).
How should I store dried snapdragon seed pods long-term?
Keep pods in an airtight container (like a glass jar) with a silica gel packet or rice to absorb moisture. Store in a cool, dark place (like a pantry) for up to 1 year. Label them with the date to track freshness!
Wrapping up and next steps
Dried snapdragon seed pods offer a simple, rewarding way to collect seeds while adding a touch of whimsy to your garden. Their twist-resistant design makes extraction effortless, perfect for both beginners and seasoned gardeners looking to streamline their seed-saving process.
Whether you’re preserving heirloom varieties or just embracing the joy of gardening, these pods are a game-changer!
Ready to give it a try? Grab a pair of pods, follow the steps, and watch your garden thrive with ease. Happy seed-saving! 🌱✨