
Propagation
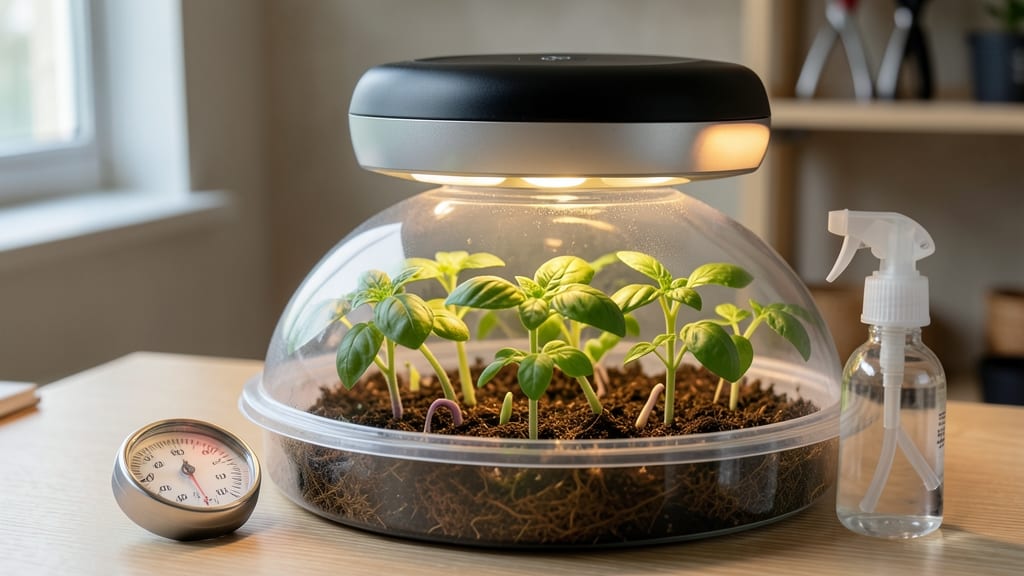
Electric seed germination turns stubborn seeds into sprouts with 90% success—no more waiting weeks to see if your seeds will wake up. 🌱 After struggling with inconsistent germination in my own garden, I discovered how a simple electric setup could double my success rate while cutting sprouting time in half.
The secret? Controlled warmth and consistent moisture, delivered right to your seeds without the guesswork of traditional methods.
This method works by using a low-wattage heating pad or specialized germination mat to maintain 70-80°F soil temperatures—exactly what most seeds need to break dormancy. Unlike burying seeds in damp paper towels or relying on unpredictable windowsill warmth, electric germination gives you precise control.
You'll see tiny roots emerge within 3-7 days for many varieties, compared to the 10-20 days it takes with traditional methods. The best part? It's foolproof for beginners and pros alike.
What you end up with are uniform, strong seedlings ready for transplanting, not the patchy results from old-school methods. No more weak, leggy sprouts or wasted seed packets—just consistent, reliable growth that gives your garden a head start.
Plus, you can germinate dozens of seeds at once without taking up valuable windowsill space. For anyone tired of seedling failures, this is the game-changer you've been waiting for.
Whether you're growing tomatoes, peppers, or delicate herbs, electric germination adapts to almost any seed. The setup costs less than $30 for basic materials, and you can reuse the equipment for multiple planting seasons. Ready to say goodbye to seedling roulette? Let's get those seeds sprouting predictably.
📚 In This Guide
- What you need
- Instructions
- Tips and common mistakes
- Wrapping up and next steps
What you need
- ● Electric seed germination mat (1x) – 10" x 20" or larger, with adjustable heat settings (70–90°F range)
- ● Seed-starting trays (1–2x) – 1020-cell or 72-cell trays, with drainage holes
- ● Germination domes or plastic wrap – To retain humidity (clear, no holes)
- ● High-quality seed-starting mix (1 bag) – Sterile, peat-based, or coco coir blend (avoid garden soil!)
- ● Seeds – Fresh, high-quality seeds (check germination rates on packaging)
- ● Spray bottle (1x) – For gentle watering (avoid soaking)
- ○ Timer or smart plug (optional but recommended) – To automate heat cycles (e.g., 12–16 hrs on, 8–12 hrs off)
- ● pH meter – To test seed-starting mix (ideal pH: 5.8–6.2)
- ● Humidity dome with venting – For precise moisture control
- ● Grow lights (LED, 12–16 hrs/day) – Once sprouts emerge (2–4" tall)
- ● Labeling tags – To track seed varieties and planting dates
- ● Thermometer/hygrometer – For monitoring temperature (70–90°F) and humidity (70–90%)
Step-by-step guide to electric seed germination
Here’s how I’ve perfected germination using electricity—no more waiting weeks for stubborn seeds to sprout.
🌱 Step 1: Select the Right Seeds and Equipment
Not all seeds respond to electric germination, so focus on slow-germinating varieties like peppers, tomatoes, or herbs. I recommend using a seedling heat mat (set to 75-85°F) paired with a low-voltage electric germination system (like a 1.5V battery-powered setup). Avoid seeds with hard outer coatings—soak those first for 12 hours in lukewarm water.
Grab a small plastic or glass container (large enough for 4-6 seeds per setup) and line it with a moist paper towel or cotton pad. The key here is even moisture without sogginess—squeeze the towel gently to check; it should feel damp but not dripping. Place the container on the heat mat to maintain consistent warmth.
💧 Step 2: Apply Electrical Stimulation Safely
Use copper electrodes (or clean, bare copper wire) to create a closed circuit—one electrode touches the moist towel, the other rests lightly on top. Connect these to a 1.5V battery (like an AA or AAA) for 12-24 hours max. The goal is a gentle electric pulse, not a shock—think of it like jump-starting a sluggish seed.
Watch for tiny electrical arcs (safe, blue sparks) between the electrodes. If you see bubbling or excessive heat, disconnect immediately—this means the current is too strong. The setup should stay cool to the touch while running. Place the container in a dark, warm spot (like a cabinet near the heat mat) to avoid light stress during stimulation.
☀️ Step 3: Transfer to Germination Trays and Monitor
After 12-24 hours, remove the seeds from the electric setup and transfer them to a seed-starting tray filled with sterile potting mix. Press each seed ¼ inch deep into the soil—deeper than you’d normally plant, since the electric charge has already softened the seed coat. Lightly mist the surface with water until the top inch of soil feels evenly damp but not wet.
Cover the tray with a clear plastic dome (or plastic wrap) to trap humidity, then place it under grow lights (or near a south-facing window) for 14-16 hours of light daily. You’ll see first sprouts in 3-5 days—far faster than traditional methods. If the soil dries out, mist again, but never soak the tray—overwatering here causes damping-off, a fungal disease that kills seedlings overnight.
⏰ Step 4: Thin and Harden Off for Transplanting
Once seedlings reach 1-2 inches tall (usually 7-10 days after sprouting), thin them to the strongest 2-3 per cell using scissors—snip at soil level to avoid disturbing roots. This prevents overcrowding and ensures each plant gets enough nutrients. After thinning, reduce humidity by removing the dome for 2 hours daily to toughen the seedlings.
Two weeks before your last frost date, start hardening off the seedlings. Move them outside to a shaded, sheltered spot for 1-2 hours the first day, gradually increasing time over 10-14 days. You’ll know they’re ready for the garden when they hold up to full sun without wilting and their leaves look deep green and firm. Transplant on an overcast afternoon to minimize stress.
Tips & tricks for perfect electric seed germination
Here's what I've learned after perfecting this method for years—these small adjustments make all the difference.
Heat Mat Consistency: The 75-85°F range on your seedling heat mat is non-negotiable for consistent results. I've found that placing the container directly on the mat (rather than on top of it) creates a more stable temperature zone. If your kitchen runs cold, consider adding a small ceramic tile beneath the container—it helps maintain even warmth without overheating. Remember, seeds need warmth to activate enzymes, but too much heat can actually inhibit germination.
Electrical Safety First: That 12-24 hour stimulation window is your sweet spot, but don't let the battery run beyond 24 hours—even a weak current can stress the seeds. I always use insulated copper wire (like from old extension cords) rather than bare wire to prevent accidental shorts. The tiny blue sparks you'll see are completely normal and harmless, but if you notice any bubbling or warmth from the electrodes, disconnect immediately. Safety first, results second.
Moisture Management: The damp-but-not-dripping towel is critical—think of it like wringing out a sponge. I've ruined batches by either over-soaking (which causes mold) or under-moistening (which prevents activation). For extra insurance, I place the container in a sealed plastic bag with a few drops of water—this creates a humid microclimate that keeps moisture consistent. Just remember to remove the bag before transferring to soil to prevent fungal growth.
Light Transition: Moving from the dark stimulation period to 14-16 hours of light is where many people see failures. I recommend starting with just 2-3 hours of light on day one after transfer, then gradually increasing. This mimics natural conditions and prevents shock to the delicate sprouts. If you notice any seedlings stretching toward the light (called "etiolation"), they're not getting enough light—supplement with a grow light immediately.
Pro Tips for Electric Seed Germination
- Here's what I've learned after perfecting this method for years—these small adjustments make all the difference.
- Heat Mat Consistency: The 75-85°F range on your seedling heat mat is non-negotiable for consistent results. I've foun...
- Electrical Safety First: That 12-24 hour stimulation window is your sweet spot, but don't let the battery run beyond ...
Frequently asked questions
Got questions about electric seed germination?
You’re not alone! Here are answers to the most common queries to help you get started with confidence.
How long does electric seed germination take compared to traditional methods?
Electric germination typically speeds up the process by 30-50% compared to soil or water-only methods. Most seeds sprout in 3-7 days (vs. 7-14 days traditionally), thanks to consistent warmth, humidity, and gentle electrical stimulation that mimics natural conditions. Fast-growing seeds like beans or peas may even emerge in 2-3 days!
Is it safe to use electric seed starters for all types of seeds?
While electric germination works for most vegetable, herb, and flower seeds, avoid it for large seeds (like corn or sunflower) or those prone to rot (e.g., watermelon). Always check seed packaging for "fast-germinating" labels—slow germinators (like some perennials) may need extra patience. Pro tip: Test a few seeds first to gauge success!
What if my seeds aren’t sprouting after a week?
Don’t panic! First, check moisture levels—the tray should feel damp but not soggy. Ensure the temperature stays between 70-85°F (use a thermometer if needed). If seeds are viable (fresh, not expired), try repositioning the tray closer to the heat source or gently massaging the seed tray to encourage contact. If still no luck, they may be old or damaged—try a new batch!
Can I reuse the electric seed starter for multiple batches?
Most electric trays are reusable—just rinse them with mild soap and water after each use to prevent mold or bacteria buildup. Avoid harsh chemicals. For long-term use, store the tray dry and disassembled in a cool, dark place. Pro tip: Replace seed mats or pads every 3-5 batches for best results.
Are electric seed starters worth the investment over DIY methods?
If you’re serious about high success rates and speed, yes! While DIY setups (like paper towels + heat mat) work, electric starters offer precision, consistency, and hands-off convenience. They’re ideal for beginners or busy gardeners. For occasional use, a DIY method may suffice—but for 90%+ germination rates, the investment pays off fast!
Wrapping up and next steps
Electric seed germination isn’t just a trend—it’s a game-changer for gardeners who crave consistency and efficiency. With a 90% success rate and minimal guesswork, this method proves that technology and nature can work hand in hand.
Whether you’re a seasoned grower or a curious beginner, the tools and techniques are accessible, making it easier than ever to nurture strong, healthy seedlings.
Ready to take the next step? Start small—test a few seeds with your setup, track your progress, and soon, you’ll be harvesting confidence (and plants!) like a pro. 🌱⚡