
Propagation
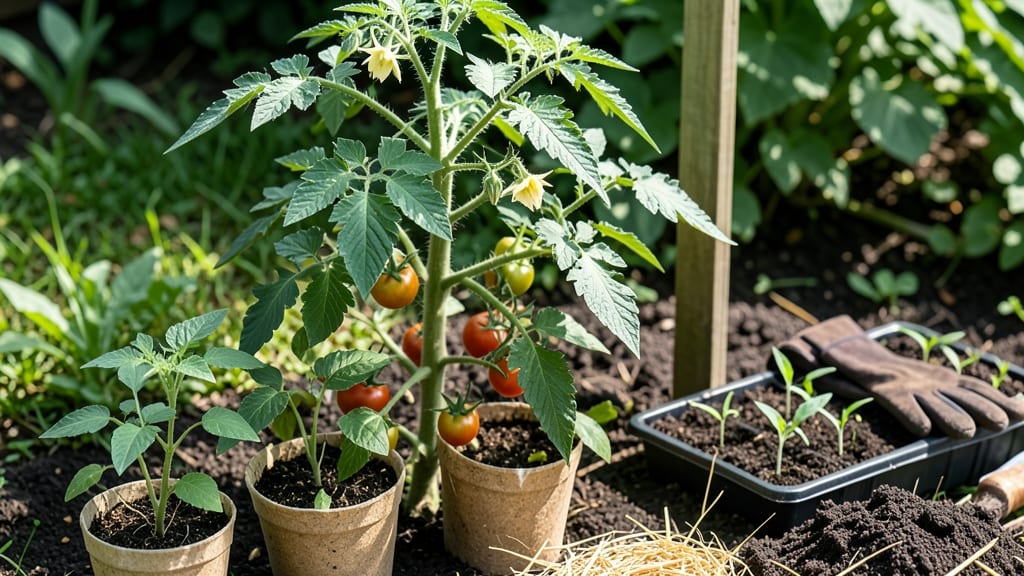
Growing tomatoes from seed outdoors lets you choose heirloom varieties that stores never carry. 🌱 My first attempt last spring ended with leggy seedlings, but I’ve since perfected the timing and soil mix that produces stocky, sun-ready plants by transplant day.
The payoff? Homegrown tomatoes that outperform anything you’ll find in a nursery flat.
Start seeds indoors 6-8 weeks before your last frost date in a seed-starting mix that drains well. Use small pots or a seed tray with just enough depth for 1-inch roots—overcrowding leads to weak seedlings.
Keep them in a warm spot (70-80°F) and under grow lights until soil temperatures hit 60°F outdoors, usually late April or early May in most temperate zones.
When transplanting, bury seedlings deep—up to the first true leaves—to encourage strong root systems. Space them 18-24 inches apart in full sun (6+ hours daily) and water at the base to prevent fungal diseases like damping off.
A mulch layer keeps moisture steady and weeds at bay, while regular pruning ensures energy goes into fruit, not foliage.
By mid-summer, you’ll be harvesting tomatoes that taste like summer itself. The key is patience—seedlings take time, but the rewards are worth every extra week. Whether you’re growing cherry tomatoes for snacking or beefsteaks for sandwiches, this method gives you control over flavor, size, and variety.
📚 In This Guide
- What you need
- Instructions
- Tips and common mistakes
- Wrapping up and next steps
What you need
- ● Tomato seeds: Choose heirloom, hybrid, or organic seeds (1–5 packets, depending on your harvest goals).
- ● Seed-starting mix: A lightweight, sterile potting mix (1–2 bags, 1–2 cubic feet each).
- ● Seed trays or small pots: Biodegradable or plastic trays (1–2 trays, 72–200 cell count) or 2–3 inch pots (10–20 pots).
- ● Grow lights or sunny windowsill: LED grow lights (1–2 bulbs, 1000–2000 lumens) or a south-facing window.
- ● Watering can or spray bottle: With a fine mist nozzle for gentle watering.
- ○ Plastic wrap or humidity dome: To retain moisture (optional but helpful for early growth).
- ● Fertilizer: Balanced organic fertilizer (5-5-5 or 10-10-10, 1–2 lbs) or compost tea.
- ● Garden soil: Well-draining, enriched with compost (1–2 cubic yards for transplanting).
- ● Support structures: Cages, stakes, or trellises (1–2 per plant, depending on variety).
- ● Mulch: Straw or shredded leaves (1–2 bags) to retain moisture and suppress weeds.
- ● Pruning shears: For trimming suckers and shaping plants.
- ● Seedling heat mat (to speed up germination).
- ● pH test kit (to ensure soil is 6.0–6.8).
- ● Epsom salt (for magnesium boost, 1 tbsp per gallon of water).
- ● Row covers (for frost protection in early spring).
Step-by-Step instructions for growing tomatoes from seed outdoors
Here’s how to transform tiny tomato seeds into thriving plants ready for your garden.
🌱 Step 1: Start Seeds Indoors at the Right Time
Begin sowing seeds 6-8 weeks before your last frost date—this gives seedlings enough time to develop strong roots before transplanting. Use biodegradable pots or small cells to avoid disturbing roots later. Fill them with sterile seed-starting mix (not garden soil) and moisten it until damp but not soggy.
Plant 2-3 seeds per pot at a depth of ¼ inch, then cover lightly with more mix. Mist gently with water to settle the seeds. Place the pots in a warm spot (70-80°F)—a seedling heat mat speeds up germination. Keep the soil consistently moist (not wet) until sprouts appear in 7-14 days. Real talk: If seeds don’t sprout within 2 weeks, they’re likely bad—don’t waste time waiting.
☀️ Step 2: Provide Light and Prevent Leggy Growth
Once seedlings emerge, move them to a sunny windowsill or under grow lights for 14-16 hours daily. Without enough light, seedlings stretch toward the window (called "leggy"), and they’ll never recover. You’ll spot leggy growth as thin, pale stems with leaves spaced far apart—this means they need more light immediately.
Keep the lights 2-4 inches above the plants and raise them as seedlings grow. If you notice yellowing leaves, it’s often a sign of too much light—adjust the height or reduce exposure. Harden off seedlings 2 weeks before transplanting by placing them outside in shade for 1-2 hours daily, gradually increasing time and sun exposure.
🪴 Step 3: Transplant Seedlings Outdoors After Frost
Wait until nighttime temperatures stay above 50°F and all frost risk has passed. Choose a sunny spot with at least 6-8 hours of direct sunlight—tomatoes are sun-worshippers. Dig holes twice as wide as the root ball and just as deep, spacing plants 18-24 inches apart (closer for bush varieties). Gently remove seedlings from pots, loosen roots if tangled, and place them in holes.
Fill the holes with soil, firming it lightly around the base. Water deeply to settle the roots—this helps prevent air pockets that can strangle new growth. Mulch around plants with 2-3 inches of organic mulch (like straw or shredded leaves) to retain moisture and suppress weeds. Here’s the thing—water at the base, not overhead, to avoid fungal diseases like early blight.
💧 Step 4: Water and Fertilize for Strong Growth
Water tomatoes deeply 1-2 times per week, aiming for 1-1.5 inches of water per week. Let the top 1-2 inches of soil dry out between waterings—consistent moisture prevents cracking and blossom-end rot. Water in the early morning so foliage dries quickly, reducing disease risk. You’ll know you’re doing it right when leaves stay crisp and vibrant, not wilted or yellow.
Feed seedlings with a balanced fertilizer (10-10-10) when they’re 4-6 inches tall, then switch to a low-nitrogen, high-phosphorus formula (5-10-10) when flowers appear. Side-dress with compost mid-season for a nutrient boost. Prune suckers (the small shoots in the leaf axils) regularly to encourage stronger stems and better air circulation—this prevents fungal issues and directs energy to fruit production.
Tips & tricks for perfect tomato seedlings
Transforming tiny tomato seeds into robust plants takes patience—and a few key tricks to avoid common pitfalls. Here’s how to set yourself up for success from the very first sprout.
Germination Conditions: The 70-80°F warmth you provide during germination isn’t just about speed—it’s about consistency. I’ve found that using a seedling heat mat set to 75°F creates the ideal environment, but even a sunny windowsill above a warm radiator works. The key is maintaining that steady temperature day and night. If your home runs cooler, consider a small greenhouse dome over your pots to trap heat and humidity. This small investment prevents the "damp but cold" soil scenario that leads to moldy seeds.
Lighting Strategy: Those 14-16 hours of daily light in Step 2 are non-negotiable for preventing leggy seedlings. I recommend using a full-spectrum grow light on a timer rather than relying on windowsills—natural light varies wildly by season and time of day. Position the light just 2-3 inches above the seedlings and raise it weekly as they grow. Watch for that telltale sign of insufficient light: stems stretching toward the source with leaves spaced far apart. At that point, it’s too late to save them, so act early.
Transplanting Prep: When it comes time to transplant, focus on root health more than size. Gently squeeze the biodegradable pots to loosen the root ball before removing seedlings—this minimizes root damage. I’ve learned the hard way that forcing seedlings into the ground too tightly can restrict growth. Dig holes twice as wide as the root ball to encourage outward root expansion, which leads to stronger plants. After transplanting, water deeply at the base and avoid overhead watering for the first 48 hours to prevent fungal infections that thrive in damp foliage.
Post-Transplant Care: The 2-3 inches of organic mulch you add isn’t just for weed suppression—it’s a moisture regulator. Straw mulch, in particular, helps maintain even soil temperatures and reduces water evaporation. I’ve noticed that mulched plants handle dry spells better and show fewer signs of blossom-end rot, which is often caused by inconsistent moisture levels. Just be sure to keep the mulch 2-3 inches away from the stem to prevent rot at the base.
Pro Tips for Grow Tomatoes From Seed Outdoors
- Transforming tiny tomato seeds into robust plants takes patience—and a few key tricks to avoid common pitfalls.
- Germination Conditions: The 70-80°F warmth you provide during germination isn’t just about speed—it’s about consistency.
- Lighting Strategy: Those 14-16 hours of daily light in Step 2 are non-negotiable for preventing leggy seedlings.
Frequently asked questions
Got questions about growing tomatoes from seed? You're not alone! Here are some of the most common queries—plus straightforward answers to help you grow confidently.
When is the best time to plant tomato seeds outdoors?
Timing depends on your climate! Start seeds indoors 6–8 weeks before your last frost date (typically March–April in most U.S. zones). Transplant seedlings outdoors only after soil temps hit 50°F+ and nighttime temps stay above 55°F. Use a frost calculator to pinpoint your zone’s ideal window.
What if I miss the ideal planting window?
Don’t stress! If frost is coming, extend the season with row covers or cold frames. For late starts, opt for fast-maturing varieties (like ‘Early Girl’ or ‘Stupice’) or grow in containers to move indoors if needed. Just avoid planting after June—tomatoes need 80+ days of warm weather to ripen.
How do I prevent pests like aphids or hornworms?
Start with healthy plants (strong stems, good airflow) to deter pests. Use neem oil or insecticidal soap for aphids, and handpick hornworms (they’re easy to spot!). Ladybugs and lacewings are natural predators—invite them with dill or marigolds. For severe infestations, try Bt (Bacillus thuringiensis), a organic bacteria-based spray.
Why aren’t my tomato seeds germinating?
Check these fixes:
- Moisture: Keep soil consistently damp (not soggy). Use a spray bottle or humidity dome.
- Temperature: Seeds need 70–85°F to sprout. Use a heat mat if your home is chilly.
- Depth: Plant seeds ¼ inch deep—too deep = slower germination.
- Freshness: Old seeds (<2 years) may fail. Test viability by soaking in water (floats = dead).
Can I grow tomatoes in containers or small spaces?
Choose determinate varieties (like ‘Tiny Tim’ or ‘Patio Princess’) for pots. Use a 5-gallon+ container with drainage, fill with lightweight potting mix, and stake plants for support. Place in full sun (6+ hours/day) and fertilize weekly with balanced liquid fertilizer. Containers dry faster—water deeply 2x/week!
Wrapping up and next steps
Growing tomatoes from seed outdoors is a rewarding journey that turns tiny seeds into vibrant, sun-kissed plants—and yes, you can do it! 🌱 With the right soil, timing, and care, you’ll soon be harvesting juicy, homegrown tomatoes straight from your garden.
Start small, stay patient, and watch your hard work bloom into a bountiful harvest.
Ready to take the next step? Plant those seeds and let the adventure begin! Once your seedlings sprout, explore our guide on transplanting or pruning tips to keep your tomato plants thriving all season long.