
Lawn
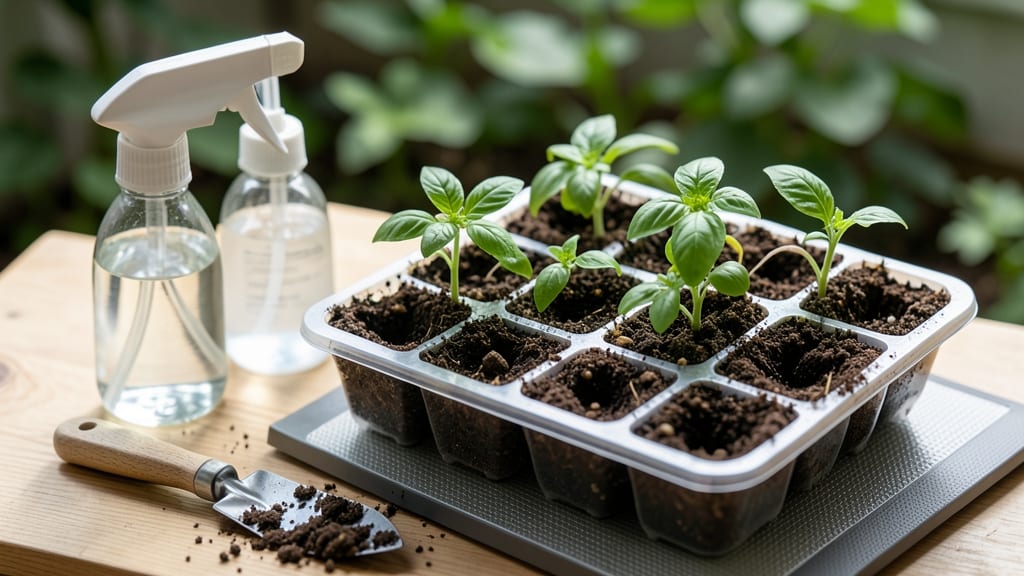
How to use seed starter pods transformed my seed-starting game—no more tangled roots or transplant shock. 🌱 These biodegradable pods hold seeds perfectly in place, so seedlings pop right out of the pot when ready. The secret is their simple design: just fill, plant, and let nature do the rest.
You’ll need the pods themselves, a seed-starting mix, a spray bottle, and a sunny windowsill or grow light. Most pods come in bulk packs, and the mix can be as simple as peat-free potting soil.
The whole process takes less than 10 minutes to set up, and you avoid the mess of traditional seed trays.
By the time you’re ready to transplant, your seedlings will be sturdy and ready to thrive. The pods break down in soil, so you skip the root disturbance that weakens many homegrown plants. I’ve saved hundreds of dollars over the years by starting my own seeds this way.
Works for everything from tomatoes to herbs, and the pods last for multiple seasons. No more guessing about transplant timing—just follow the simple steps, and you’ll have a garden full of homegrown confidence.
📚 In This Guide
- What you need
- Instructions
- Tips and common mistakes
- Wrapping up and next steps
What you need
- ● Seed starter pods (twist-free): 10–20 pods (depending on your project size). Look for biodegradable or eco-friendly options for sustainability.
- ● Potting soil: 1–2 bags of high-quality, seed-starting mix (sterilized and well-draining). Avoid garden soil—it’s too dense for tiny seeds!
- ● Watering can or spray bottle: A gentle sprayer works best to avoid displacing seeds.
- ● Tray or shallow container: A seed tray with drainage holes (or a repurposed plastic container with holes poked in the bottom).
- ● Seeds: Your chosen variety—check the packet for planting depth and spacing tips!
- ● Plant labels: Toilette paper rolls or small sticks + a marker (write seed names and dates!).
- ● Grow lights or sunny windowsill: Seedlings need 12–16 hours of light daily. A simple LED grow light (~$20) works wonders.
- ● Humidity dome or plastic wrap: Keeps moisture in while seeds germinate (remove once sprouts appear!).
- ○ Fertilizer (optional): A diluted, organic seed starter fertilizer (like fish emulsion) for a boost.
- ● Scissors or knife: For trimming pods or cutting plastic wrap.
Step-by-Step instructions for using seed starter pods
Here's how I've mastered these twist-free pods for stress-free seed starting—no mess, no fuss.
🌱 Step 1: Prepare the Pods for Planting
Start by filling each pod with the seed-starting mix until it reaches the top edge. The pods' unique design means you won't need to twist or force anything—just press the mix in gently. I like to use my fingers to create a small depression in the center of each pod, about ¼ inch deep, where the seed will go. This keeps things organized and prevents overcrowding.
Moisten the mix lightly with water until it feels damp but not soggy—think of a wrung-out sponge. You want the soil to hold its shape when squeezed but not crumble apart. This step ensures your seeds won't dry out before they even sprout. If the mix feels too dry, add a few drops of water; if it's too wet, let it sit for a few minutes to dry out slightly.
🌿 Step 2: Plant the Seeds Correctly
Place 1-2 seeds per pod, depending on the seed packet's instructions, into the small depression you created. Cover them lightly with a thin layer of the same mix—just enough to hide the seeds but not bury them too deep. I tap the pod gently on the table to settle the soil without disturbing the seeds. This ensures good seed-to-soil contact, which is critical for germination.
Label each pod with the seed variety and date using a toothpick and a permanent marker. Trust me, after a few weeks, identical green sprouts look the same, and you won't remember which is which. I also group pods by type in my seed tray to keep things organized. Once labeled, place the tray in a warm, bright spot—like a sunny windowsill or under a grow light.
💧 Step 3: Water and Maintain Moisture
Water the pods gently from the bottom by placing the entire tray in an inch of water for about 10-15 minutes. This method ensures even moisture without disturbing the seeds or causing them to wash away. You'll know the pods are ready when the top of the soil feels slightly damp but not wet. Avoid watering from above at this stage—it can dislodge seeds or cause them to rot.
Keep the tray in a warm environment, ideally between 65-75°F, to encourage germination. Most seeds will sprout within 7-14 days, depending on the variety. Watch for the first signs of green—those tiny sprouts are your signal that everything is on track. Once the seeds germinate, reduce the bottom-watering to every 2-3 days or when the top inch of soil feels dry to the touch.
☀️ Step 4: Provide Light and Airflow
As soon as you see the first true leaves (not the initial seed leaves), move the pods to a location with bright, indirect light. If you're using a windowsill, rotate the tray a quarter turn daily to prevent seedlings from leaning toward the light. Leggy seedlings are a sign they need more light—thin, pale stems with leaves spaced far apart mean it's time to supplement with a grow light.
Once the seedlings have 2-3 sets of true leaves, it's time to introduce airflow. Place a small fan on a low setting near the tray to strengthen the stems. This mimics outdoor conditions and helps prevent damping-off disease, which can wipe out seedlings overnight. You'll see the seedlings grow sturdier and more resilient within a few days.
⏰ Step 5: Transplant When Ready
When seedlings have 4-6 true leaves and are about 2-3 inches tall, they're ready to transplant. The pods' twist-free design makes this easy—simply slide the seedling out of the pod by gently squeezing the sides. This minimizes root disturbance, giving your plants a better chance of thriving in their new home.
Plant the seedlings in their final location, whether that's in the garden or a larger container, and water them deeply. The pods will break down naturally over time, so you won't need to remove them. Keep an eye on the soil moisture and adjust watering as needed. With proper care, your seedlings will grow into strong, healthy plants ready for the next stage of their journey.
Tips & tricks for perfect seed starter pods
These game-changing tips will help you maximize your seed starter pods and avoid common pitfalls that can derail your seed starting.
Soil Consistency is Key: The seed-starting mix should feel like a damp sponge—not clumpy or powdery. If it crumbles when squeezed, add a few drops of water; if it sticks together, let it dry slightly. Proper moisture is the foundation for successful germination, especially in those critical first 10-15 minutes of bottom-watering.
Seed Placement Precision: When creating that ¼-inch depression in Step 1, use your finger to make it just deep enough to hold 1-2 seeds without crowding. Too shallow and seeds may dry out; too deep and they won't have enough light to sprout. A gentle tap on the table after planting helps settle the soil without disturbing the seeds—this subtle action makes all the difference in seed-to-soil contact.
Light Rotation Strategy: That daily quarter-turn rotation in Step 4 isn't just about preventing leggy seedlings—it's about creating uniform growth. I've seen seedlings grow at crazy angles when trays aren't rotated. Place your tray on a non-slip mat to prevent accidental shifts during rotation, and always rotate toward the light source, not away from it.
Transplanting Timing: The 4-6 true leaves stage is your golden window for transplanting. Look for the second set of true leaves to be fully unfurled before moving plants—this indicates they've developed strong enough root systems to handle the transition. If you're transplanting into cold soil, wait until nighttime temperatures stay above 50°F to prevent shock.
Pro Tips for Use Seed Starter
- These game-changing tips will help you maximize your seed starter pods and avoid common pitfalls that can derail your...
- Soil Consistency is Key: The seed-starting mix should feel like a damp sponge—not clumpy or powdery. If it crumbles w...
- Seed Placement Precision: When creating that ¼-inch depression in Step 1, use your finger to make it just deep enough...
Frequently asked questions
Got questions about twist-free seed starter pods? We’ve got answers!
Whether you’re a beginner or just looking to troubleshoot, here’s what you need to know to make seed starting a breeze.
What are the best seeds to start in twist-free seed starter pods?
Twist-free seed starter pods work great for most annuals and vegetables, including tomatoes, peppers, herbs (like basil or parsley), lettuce, and flowers (such as marigolds or petunias). Avoid heavy root crops like carrots or potatoes—they need deeper soil. Stick to seeds that thrive in small, controlled spaces!
How long do twist-free seed starter pods take to germinate?
Germination time varies by seed type, but most pods show sprouts in 5–14 days. Check your seed packet for specifics—some fast growers (like radishes) sprout in 3–5 days, while slower ones (like beans) may take 10–20 days. Keep soil moist and warm (70–85°F) for best results!
Do I need to fertilize twist-free seed starter pods?
Not right away! Seed starter pods are pre-fertilized with slow-release nutrients, so hold off on extra fertilizer for 4–6 weeks after germination. Once seedlings develop true leaves, you can use a balanced liquid fertilizer (10-10-10) diluted to half-strength to avoid burning tender roots.
Can I reuse twist-free seed starter pods?
Unfortunately, no—pods are for one-time use. The biodegradable material breaks down after germination, and the mesh structure loses integrity. However, you can repurpose the tray for seedling propagation or compost the pods once empty! For long-term reuse, opt for plastic seed trays with cell inserts.
What if my seeds aren’t germinating in the pods?
Try these fixes:
- Check moisture: Keep soil consistently damp (not soggy). Use a spray bottle to avoid displacing seeds.
- Verify warmth: Place pods on a seedling heat mat (70–85°F) or near a sunny window.
- Test seed viability: Soak a few seeds in water for 24 hours—if they sink, they’re likely good. If not, try fresh seeds!
- Avoid overcrowding: Follow spacing guidelines on the pod to prevent competition.
Wrapping up and next steps
Using twist-free seed starter pods is a game-changer for gardeners who want easy, reliable, and mess-free seed starting! 🌱 These pods eliminate the hassle of transplanting delicate seedlings, ensuring stronger roots and healthier plants from day one.
Whether you're a beginner or a seasoned gardener, this hands-off method saves time and boosts your success rate.
Now that you’re armed with the know-how, give it a try—start small with a few pods, experiment with your favorite plants, and watch your green thumb flourish! Ready for the next step? Expand your garden by learning how to transition these seedlings into your lawn or garden beds effortlessly.