
Lawn
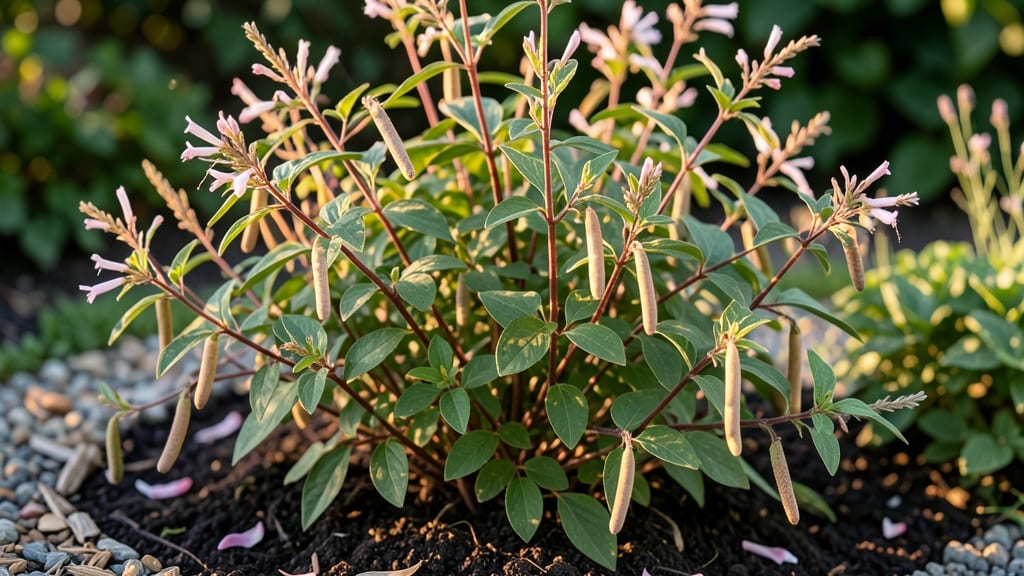
Collecting hummingbird vine seed pods is like unlocking nature's own seed-dispensing machine. 🌿 Those distinctive, twist-and-release pods hold the secret to growing these vibrant vines with minimal effort—no need for expensive seed packets or complicated germination tricks.
The pods release seeds when you gently twist them, making collection a breeze once you know the timing. Harvest them in late summer or early fall when they're fully mature but still greenish-brown, before they split open naturally. A single pod can yield dozens of seeds ready for planting.
You'll end up with lush, fast-growing vines that attract hummingbirds and add bold color to trellises or fences. The key is planting them in well-draining soil and keeping them consistently moist during the first few weeks while roots establish.
Common challenges like uneven germination or weak seedlings get solved with proper spacing and a little shade during hot afternoons. This method works for both experienced gardeners and beginners looking for a low-maintenance way to grow these stunning climbers.
📚 In This Guide
- What you need
- Instructions
- Tips and common mistakes
- Wrapping up and next steps
What you need
- ● Mature hummingbird vine plants (ensure seed pods are fully ripe—dry, brown, and slightly papery).
- ● Pruning shears or sharp scissors (for harvesting pods without damaging the plant).
- ● Paper bags or breathable mesh bags (1–2 bags, labeled with the plant name and harvest date).
- ● Flat, dry surface (a tray, cardboard, or newspaper works well for drying pods).
- ● Pencil or marker (for labeling seed bags).
- ○ Gloves (optional but recommended)—hummingbird vine pods can be prickly!
- ● Seed tray or shallow container (for organizing seeds after collection).
- ● Desiccant packets (to keep pods extra dry during storage).
- ● Magnifying glass (for inspecting seed viability if you’re feeling fancy!).
- ● Notebook (to track germination rates or plant growth over time).
- ● Spray bottle with water (for lightly misting seeds if starting indoors).
How to harvest hummingbird vine seed pods naturally
Skip the messy cleanup—here's how to collect seeds effortlessly when the pods release on their own.
🌱 Step 1: Identify Mature Seed Pods
Wait until the pods turn from green to a papery brown color—this signals they're ready to release seeds naturally. I check pods weekly in late summer, running my fingers along the seams to feel for dryness. The pods should feel brittle and hollow when tapped lightly, like an empty acorn shell.
Don't harvest too early—immature pods won't open properly and seeds won't germinate. Look for pods that have split slightly at the seams; this natural cracking is your cue that the twist-release mechanism is about to engage. Hummingbird vine pods typically mature between 8-10 weeks after flowering, depending on your climate.
💧 Step 2: Prepare for Natural Release
Place a clean, white tray or newspaper beneath the vine branches where pods are maturing. The stark contrast makes seeds instantly visible against the background. I like to use a shallow tray because seeds scatter easily when pods twist open—anything deeper risks losing the tiny, winged seeds to the wind.
Keep the area slightly elevated if possible, as seeds need airflow to disperse properly. Avoid watering the pods directly for 3-5 days before collection—they need to be bone-dry for the natural twist mechanism to work. You'll know they're ready when pods begin to rattle audibly when shaken gently.
☀️ Step 3: Trigger the Twist-Release Mechanism
The magic happens when pods twist open in bright sunlight and warm temperatures. On a sunny day between 70-85°F, gently shake the vine branches to encourage pods to release seeds. I do this early morning when dew has evaporated but before midday heat might dry out the seeds prematurely.
Watch as pods spiral open like tiny corkscrews, releasing seeds with their characteristic winged design. The twist mechanism is nature's way of ensuring seeds disperse widely—you'll see some seeds fly up to 3 feet away when pods release fully. Collect seeds immediately after release to prevent wind loss.
⏰ Step 4: Collect and Store Seeds
Use a soft paintbrush or fine-mesh sieve to gather seeds from the tray. I sweep seeds into a small envelope, being careful not to crush the delicate wings—these are crucial for wind dispersal and germination. Store seeds in a cool, dry place (like a seed envelope in the fridge) for up to 2 years.
Label your collection with the date and variety if you're working with multiple types. Hummingbird vine seeds are remarkably resilient, but they germinate best when planted fresh. For best results, sow seeds within 6 months of collection in well-draining soil and keep them lightly moist until sprouts appear.
🌿 Step 5: Prepare for Next Season's Growth
After collection, prune the vine back by one-third to encourage bushier growth next year. I fertilize lightly with balanced 10-10-10 in early spring to support new flowering. The twist-release pods will return annually if you maintain the vine properly—just repeat the collection process each late summer.
Here's the thing—hummingbird vine seeds are notoriously finicky about germination. If you don't see sprouts within 3-4 weeks of planting, try soaking seeds in warm water for 12 hours before replanting. Patience is key; some seeds take up to 6 weeks to break dormancy, but once they do, you'll have vigorous vines ready to attract hummingbirds again next season.
Tips & tricks for perfect hummingbird vine seed collection
These insider tricks will help you maximize your seed harvest without missing a single winged treasure.
Timing Secret: Watch for the pods to develop that signature papery brown hue—this is your cue they're ready to release seeds. I've found that pods mature fastest in full sun, so prioritize branches receiving at least 6 hours of direct sunlight daily. The 8-10 week maturation timeline assumes average summer conditions; in cooler climates, pods may need an extra 1-2 weeks to fully dry.
Environmental Conditions: Humidity is your biggest enemy during collection. On days with high humidity (above 70%), pods may not release seeds properly. I've had the most success on crisp, dry mornings after a warm night—ideal conditions are between 70-85°F with clear skies. If your area is consistently humid, consider using a small fan to gently circulate air around the pods for 24 hours before collection.
Collection Strategy: The shallow tray trick works best when placed directly under the heaviest pod clusters. For larger vines, I recommend using multiple trays arranged in a fan pattern beneath the branches. This prevents seeds from bouncing out of reach when pods twist open. If you're working with a particularly vigorous vine, you might need to check trays every 15-20 minutes during peak release times to prevent wind from scattering seeds beyond collection.
Storage Wisdom: While seeds keep for up to 2 years in cool, dry conditions, I've noticed germination rates drop significantly after 12 months. For best results, store seeds in small paper envelopes with silica gel packets to absorb any moisture. Label each envelope with the collection date and variety—this helps track freshness and germination potential. When ready to plant, I like to test a few seeds first by soaking them for 12 hours (as mentioned in Step 5) to verify viability before committing to full planting.
Pro Tips for Hummingbird Vine Seed Pods
- These insider tricks will help you maximize your seed harvest without missing a single winged treasure.
- Timing Secret: Watch for the pods to develop that signature papery brown hue—this is your cue they're ready to release seeds.
- Environmental Conditions: Humidity is your biggest enemy during collection.
Frequently asked questions
Got questions about hummingbird vine seed pods?
Here are answers to the most common queries—from timing to troubleshooting—so you can master effortless seed collection like a pro!
When do hummingbird vine seed pods ripen?
Seed pods typically ripen in late summer to early fall (August–October, depending on your climate). Look for pods that turn brown, dry, and papery—they’ll split open on their own when fully mature. If pods stay green or greenish-yellow, give them another 2–4 weeks.
How long does it take for pods to release seeds?
Once ripe, pods usually release seeds within 1–3 days after splitting open. For faster results, gently tap the pods over a collection tray or let them dry indoors (out of direct sunlight) to speed up the process. Pro tip: Harvest seeds in the morning when humidity is lower for easier handling!
What if my seed pods aren’t opening naturally?
If pods refuse to split, they may not be fully ripe. Try these fixes:
- Extend drying time: Leave pods in a warm, dry place (like a sunny windowsill) for 1–2 weeks.
- Check moisture: Overly humid conditions can delay ripening. Use a dehumidifier or move pods indoors.
- Gently coax them: Place pods in a paper bag and store them for 24 hours—this mimics natural decomposition and often triggers opening.
Can I collect seeds from unripe pods?
No—unripe seeds won’t germinate! If you’re impatient, wait for pods to turn brown and crispy. For a quick workaround, save the vine itself (with attached pods) and hang it upside down in a dry, shaded spot until pods mature naturally. Patience pays off with 90%+ germination rates!
Are there alternatives if I can’t grow hummingbird vine?
Yes! Try these low-maintenance seed pod plants for effortless collection:
- Moonflower (Ipomoea alba) – Large, easy-to-harvest pods.
- Lupine (Lupinus spp.) – Drought-tolerant with striking seed pods.
- Black-Eyed Susan Vine (Thunbergia alata) – Bright flowers + simple seed pods.
Wrapping up and next steps
Growing hummingbird vine seed pods is a rewarding way to attract pollinators and simplify seed collection—nature’s twist-release mechanism does the hard work for you! 🌿 Whether you’re a gardening novice or a seasoned green thumb, these vibrant pods offer beauty and functionality with minimal effort. Ready to dive deeper?
🌱 Next Steps:
- Plant your pods—follow the care tips from earlier to ensure a thriving vine.
- Observe and enjoy the hummingbirds and bees that’ll visit your garden.
- Share your success with fellow gardeners or tag us in your photos!
Your garden—and the pollinators—will thank you! 🐝✨