
Propagation
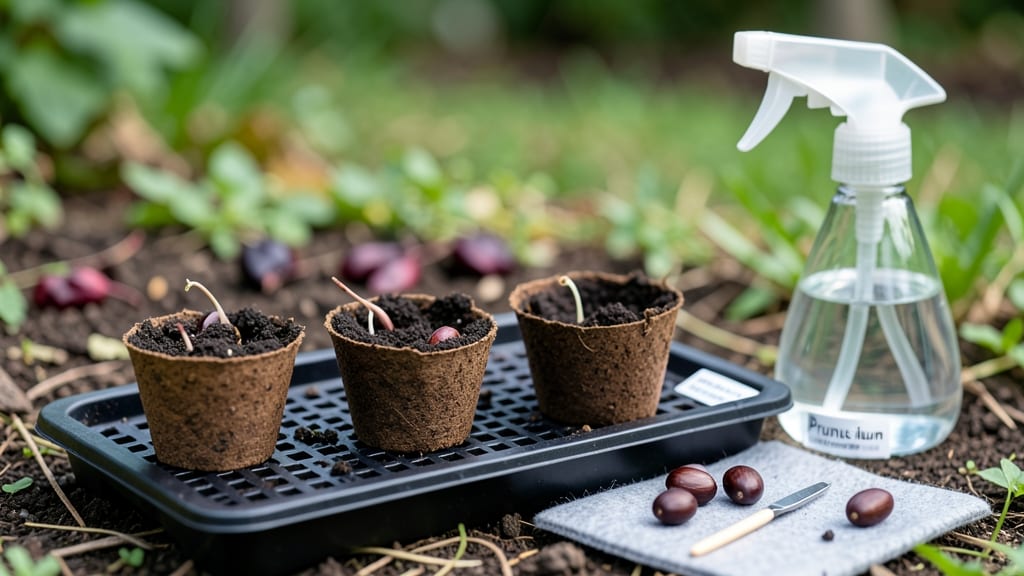
Cherry seed germination unlocks a free, zero-waste way to grow fruit trees—if you embrace the patience required. 🌱 The twist-release pods from cherries contain seeds that need a little coaxing before they sprout, but once you crack the code, you’ll be growing trees from scraps instead of buying them. My first batch took three months to crack the soil, but the thrill of watching those first green leaves push through was worth every week of waiting.
Start by extracting the seeds from fully ripe cherries, then give them a cold treatment to mimic winter’s natural dormancy. Soak them in water for 24 hours to soften the outer shell, then place them between damp paper towels in a sealed bag for 6-8 weeks in the fridge.
This stratification trick helps break dormancy, turning stubborn seeds into eager sprouts. Most gardeners skip this step and end up with mold instead of seedlings—don’t be one of them.
When you’re ready to plant, use a well-draining mix of potting soil and perlite to prevent rot. Sow seeds ½ inch deep in small pots and keep them in a warm, bright spot (around 70°F) while they germinate.
Within 4-8 weeks, you’ll see tiny shoots—just be patient, as cherry seeds are notoriously slow starters. The seedlings you grow won’t look like the parent tree at first, but with proper care, they’ll develop into sturdy saplings in just a few years.
Here’s the catch: trees grown from seed take 5-10 years to bear fruit, and it won’t match the parent’s variety. But the adventure—and the satisfaction of growing something from nothing—makes it worth it.
If you’re up for the long game, this is how you turn cherry pits into a future orchard without spending a dime.
📚 In This Guide
- What you need
- Instructions
- Tips and common mistakes
- Wrapping up and next steps
What you need
- ● Fresh cherry seeds: 5–10 viable seeds (harvested from sweet cherries—avoid tart varieties like sour cherries).
- ○ Small pots or seed trays: 3–4 (3–4 inches deep) with drainage holes. Optional: Biodegradable peat pots for easy transplanting.
- ● Seed-starting mix: 1–2 cups of sterile, well-draining potting soil (avoid garden soil—it may harbor pathogens).
- ● Spray bottle: 8–16 oz with a fine mist nozzle for gentle watering.
- ● Plastic wrap or humidity dome: To create a mini greenhouse effect.
- ○ Heat mat (optional but helpful): A small 70–80°F (21–27°C) mat to speed up germination.
- ● Light source: Grow lights or a sunny windowsill (south-facing preferred).
- ● Tweezers or toothpick: For gently placing seeds without damaging them.
- ○ Fine-mesh screen or paper towels: For pre-soaking seeds (optional but recommended).
- ● Labels & markers: To track planting dates and varieties.
- ● Fertilizer (after germination): A balanced, water-soluble fertilizer (e.g., 10-10-10) diluted to half-strength.
- ● Patience & joy! 🌟 Germination can take 4–8 weeks—cherry seeds are slow but worth it!
Step-by-step instructions for germinating cherry seeds naturally
Here's how to coax those tiny pits into sprouts without store-bought shortcuts.
🌱 Step 1: Harvest and Prepare the Seeds
Pick fully ripe cherries from your tree or grocery store—look for deep color and soft flesh. The seeds must be fresh for best results. I like to work with 4-6 seeds at a time, so I can track their progress easily. Remove the seeds by squeezing the cherries gently between your fingers and rinsing them clean with cool water.
Place the seeds on a paper towel to dry overnight. This prevents mold from forming during stratification. The next morning, you'll see they've lost their glossy sheen—that's your signal they're ready for the next step. Real talk: Don't skip this drying step. Damp seeds left too long will rot before they sprout.
🌿 Step 2: Stratify for 3 Months in Moist Sand
Fill a small container with a mix of moistened sand and peat moss (equal parts). I use a shallow tray about 4 inches deep because cherry seeds need room to spread their roots. Plant the seeds 1 inch deep, spacing them 2 inches apart so they don't crowd as they grow.
Cover the container with plastic wrap and poke small holes for airflow. Place it in a cool spot—35-45°F is ideal, like a refrigerator's crisper drawer. Check the moisture weekly; the mix should stay damp but not soggy. You won't see anything happening yet, but after 3 months, the seeds will have broken their dormancy and be ready to sprout.
☀️ Step 3: Pot Up and Provide Warmth
After stratification, transfer the seeds to small pots filled with well-draining potting mix. Plant each seed ½ inch deep and water gently until the soil is moist but not wet. Place the pots in a warm spot—70-75°F—like on top of your fridge or near a sunny window.
Germination can take 2-4 weeks, so patience is key. You'll know it's working when you see the first tiny green shoot poking through the soil. This is the moment that matters: once sprouted, keep the soil consistently moist but never waterlogged. Too much water now causes damping-off, which kills seedlings overnight.
🪴 Step 4: Transplant and Care for Seedlings
When seedlings reach 4-6 inches tall and have 2-3 sets of true leaves, it's time to transplant them into individual 5-inch pots. Use a mix of potting soil and compost to give them a nutrient boost. Handle the seedlings carefully—they're delicate at this stage.
Place the pots in bright, indirect light for the first week to help them adjust. Gradually introduce them to full sun over the next two weeks. Water when the top inch of soil feels dry, and fertilize lightly with a balanced liquid fertilizer every 4 weeks. You'll see strong, healthy growth as they mature into young cherry trees.
Tips & tricks for germinating cherry seeds naturally
Between us, cherry seeds are stubborn little things—they need just the right conditions to break dormancy. These small tweaks will help you coax those tiny pits into sprouts without the frustration.
Seed Selection Matters: Choose seeds from fully ripe cherries that are deep in color and soft to the touch. The fresher the seed, the better your chances of success. I've found that seeds from organic cherries often germinate more reliably than store-bought varieties, possibly because they haven't been treated with preservatives that might interfere with the natural process. If you're using grocery store cherries, look for ones that feel plump and have a rich hue—those are your best bets.
Stratification Setup: The 3-month stratification period is non-negotiable for cherry seeds, but how you set it up makes all the difference. Use a mix of moistened sand and peat moss because this combination provides both aeration and moisture retention. I've learned the hard way that skipping the peat moss can lead to mold growth—it's worth the extra step. When checking moisture levels, squeeze a handful of the mix: it should feel like a damp sponge, not a dripping wet rag. This balance is crucial for preventing both rot and dehydration during the long cold period.
Germination Environment: Once you've transferred the stratified seeds to pots, maintaining that 70-75°F warm spot is critical. I've had the best success placing pots on top of my refrigerator, which maintains a consistent temperature without needing extra equipment. If you don't have that option, a seedling heat mat set to low can work wonders. The key is consistency—fluctuating temperatures can confuse the seeds and delay germination. And remember, those first few weeks after potting are when damping-off is most likely to strike, so resist the urge to overwater.
Transplanting Timing: When your seedlings reach 4-6 inches and develop 2-3 sets of true leaves, they're ready for their next home. This is where many beginners rush the process. I've seen seedlings collapse when transplanted too early because their root systems aren't strong enough to support the move. Take your time with this step—gentle is the word. Use a small trowel to loosen the soil around the roots before transferring to prevent damaging the delicate stems. This careful approach gives your young trees the best chance to thrive in their new pots.
Pro Tips for Cherry Seed Germination
- Between us, cherry seeds are stubborn little things—they need just the right conditions to break dormancy.
- Seed Selection Matters: Choose seeds from fully ripe cherries that are deep in color and soft to the touch.
- Stratification Setup: The 3-month stratification period is non-negotiable for cherry seeds, but how you set it up makes all the difference.
Frequently asked questions
Got questions about germinating cherry seeds?
You’re not alone—this process can feel tricky! Below, we’ve tackled the most common queries to help you grow your own cherry tree with confidence.
How long does it take for cherry seeds to germinate?
Cherry seeds can take anywhere from 4 to 12 weeks to sprout, depending on the variety and conditions. Sweet cherries often germinate faster (4-8 weeks), while sour cherries may take longer. Patience is key—consistent moisture and warmth (around 70°F) speed up the process.
Can I speed up germination?
Yes! Try stratification—mimicking winter’s cold-to-warm cycle. Place seeds in a damp paper towel, seal in a plastic bag, and refrigerate for 4-6 weeks before planting. This breaks dormancy and can cut germination time in half. For extra boost, soak seeds in warm water for 24 hours before stratifying.
What’s the best way to plant cherry seeds?
Start with fresh, pitted seeds (avoid dried or old seeds). Plant them ½-inch deep in well-draining soil, keeping it moist but not soggy. Use a small pot or seed tray with a heat mat (or sunny windowsill) to encourage sprouting. Transplant seedlings outdoors only after the last frost and when they’re 3-4 inches tall.
Why aren’t my cherry seeds sprouting?
Common culprits: old seeds (use fresh ones), too much water (root rot risk), or poor drainage. Check for mold or wrinkled seeds—discard those. If seeds are viable but slow, try light exposure (some need it to germinate) or adjust temperatures. If all else fails, sour cherry seeds may need longer stratification (up to 3 months).
Will a cherry seed grow into a fruit-bearing tree?
Most likely, yes—but with patience! Seed-grown cherries take 5-10 years to bear fruit, and the tree may not match the parent’s traits (e.g., color, size). For faster, predictable results, graft a known variety onto your seedling later. If you’re growing for ornamental value or shade, seed-grown trees are a fun, zero-waste project!
Pro Tip:
Label your seeds! Cherry seedlings grow slowly, and it’s easy to forget which variety you’re nurturing. A simple popsicle stick with the date and type helps track progress—and keeps you motivated.
Wrapping up and next steps
Germinating cherry seeds is a rewarding way to grow your own zero-waste fruit trees—and you don’t need fancy tools to get started! With patience, the right technique, and a little care, you can nurture those tiny seeds into thriving saplings.
Whether you’re drawn to the sweet-tart charm of sour cherries or the rich, velvety allure of tart varieties, this process connects you to nature’s cycle in the most organic way.
Ready to take the next step? Plant your germinated seeds in pots or directly in the ground (if your climate permits) and watch them grow into a lush, fruitful tree. Happy gardening—your future harvest awaits! 🌱✨