
Lawn
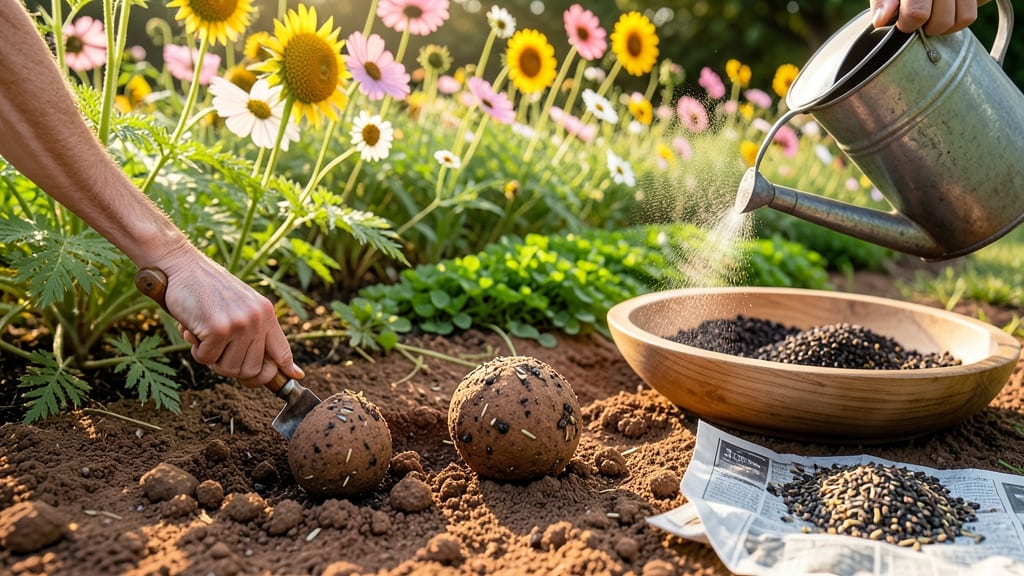
Creating paper seed bombs transforms forgotten spaces into vibrant wildflower meadows with just one throw. 🌸 These eco-friendly, compostable seed carriers pack soil, seeds, and paper into a simple ball that blooms when tossed into bare earth—no digging required.
I’ve used them to turn cracked concrete patches into pollinator havens and even brighten up urban alleyways with a burst of color.
The beauty of seed bombs lies in their versatility. You can craft them for guerrilla gardening in public spaces, as artistic installations for events, or even as gifts for fellow gardeners.
The recipe is straightforward: blend clay or soil with wildflower seeds, mold into paper-wrapped balls, and let them dry. No special tools needed—just a little creativity and a handful of seeds.
What you end up with is a low-maintenance way to introduce wildflowers to any outdoor space. Once planted, they require minimal care beyond occasional watering, and within weeks, you’ll see delicate blooms attracting bees and butterflies.
Perfect for urban gardeners, community projects, or anyone eager to add a touch of nature to overlooked corners.
Whether you’re reviving a neglected patch of land or adding whimsy to a rooftop garden, seed bombs offer a quick, satisfying way to make an impact. The key is choosing the right seeds for your climate and ensuring proper moisture during germination. Let’s get started on your first batch!
📚 In This Guide
- What you need
- Instructions
- Tips and common mistakes
- Wrapping up and next steps
What you need
- ● Native wildflower seeds (1–2 tbsp per bomb; choose fast-growing varieties like clover, cosmos, or black-eyed Susans for best results).
- ● Compost or potting soil (½ cup per bomb; use organic, seed-safe soil with no synthetic fertilizers).
- ● Water (just enough to dampen the mix—think "slightly damp sponge" consistency).
- ● Newspaper or junk mail (1–2 sheets; avoid glossy paper—it won’t break down easily).
- ● Scissors or a paper cutter (for clean cuts; a ruler helps too!).
- ○ Optional binder (1 tbsp flour + 1 tbsp water per bomb or 1 tsp cornstarch as a natural glue).
- ● Mixing bowl (small, for combining ingredients).
- ● Measuring spoons (for precise seed/soil ratios).
- ● Spray bottle (to mist bombs before drying—keeps them from crumbling).
- ● Plastic wrap or aluminum foil (to cover bowls while mixing).
- ● Label tags & marker (write seed types/dates if making multiple bombs).
- ○ Gloves (optional, for messy hands—soil and seeds can be finicky!).
Step-by-step instructions for crafting paper seed bombs
Here's the method I rely on to create wildflower seed bombs that bloom reliably year after year.
🌱 Step 1: Gather and Mix the Core Components
Start by combining 1 cup wildflower seeds with 2 cups clay in a large bowl. The clay acts as the binding agent that holds everything together when moistened. I like to use native wildflower seed mixes—they're adapted to your local climate and require less maintenance once established.
Add 1 cup compost to the mix, which provides essential nutrients for the seeds to germinate. The compost should be well-aged and crumbly, not lumpy. If you're using a pre-mixed wildflower seed bomb kit, follow the included ratio—some blends already contain clay and compost in specific proportions.
💧 Step 2: Add Water and Knead the Mixture
Gradually add ½ cup water to the bowl while stirring with a spoon. You want the mixture to hold together when pressed but not be overly wet—it should resemble thick, moldable clay. If it crumbles apart, add a splash more water. If it sticks to your hands, let it sit for 5 minutes to dry out slightly.
Once the texture is right, transfer the mixture to a clean surface and knead it for 3-5 minutes until smooth and uniform. This step ensures even distribution of seeds and nutrients, which prevents clumping in the finished bombs. If the mixture feels too sticky, add a pinch of dried sand to improve texture.
🪴 Step 3: Shape the Seed Bombs
Divide the mixture into 4 equal portions (since this recipe makes 4 bombs). Roll each portion into a ball, then flatten it slightly to create a 2-inch diameter disc. Press the center of each disc to form a shallow depression—this helps the bomb stay intact when thrown.
Place the discs on a tray lined with parchment paper and let them dry in a shady, well-ventilated area for 24-48 hours. Avoid direct sunlight, which can cause the bombs to dry too quickly and crack. Once fully dry, they should feel firm to the touch and hold their shape when gently squeezed.
☀️ Step 4: Store and Deploy Your Seed Bombs
Store the dried seed bombs in a cool, dry place until ready to use. They can last 6-12 months if kept in an airtight container, though germination rates may decrease over time. When deploying, aim for bare soil or disturbed ground—seed bombs work best in areas where competition from existing vegetation is minimal.
Throw the bombs from a distance of 10-15 feet to ensure even distribution. Water the area lightly after deployment to help the bombs break apart and settle into the soil. Avoid throwing them in heavy rain or wind, as the impact can damage the structure and reduce seed viability.
🌿 Step 5: Maintain the Wildflower Meadow
Once planted, water the area once a week for the first 4-6 weeks to encourage germination. Avoid overwatering—wildflowers thrive in moderate to dry conditions and can rot if kept too wet. Mulch lightly with straw or wood chips to retain moisture and suppress weeds without smothering the new growth.
Within 3-4 weeks, you should see the first signs of sprouts. Let the wildflowers grow undisturbed for their first season—they’ll establish deeper roots and produce more vibrant blooms in subsequent years. If invasive weeds appear, pull them by hand before they compete with the wildflowers for nutrients.
Tips & tricks for perfect paper seed bombs
Here's what nobody tells you about crafting seed bombs that actually grow—these little details make all the difference.
Clay Consistency: The 2 cups of clay should be the right texture—too sandy and your bombs will crumble when thrown, too sticky and they'll never dry properly. I test consistency by rolling a small ball between my palms: if it holds together but doesn't stick to my fingers, you're golden. For extra durability, mix in a teaspoon of cornstarch (optional) to help bind the mixture better during the 24-48 hour drying period.
Seed Distribution: When kneading for those 3-5 minutes in Step 2, pay special attention to the wildflower seeds—make sure they're evenly dispersed throughout the clay mixture. I like to break apart any seed clusters with my fingers during kneading. Uneven distribution means some bombs will have concentrated seeds while others barely sprout, and that defeats the whole purpose of our 2-inch discs.
Drying Strategy: The 24-48 hour drying window is crucial—too fast and they'll crack, too slow and they'll grow mold. Place your drying tray on a mesh screen or cooling rack in a shaded spot with good airflow (like a covered porch). If your climate is particularly humid, you might need to extend drying to 48 hours. Once dry, they should feel solid enough to toss without breaking apart.
Storage Wisdom: For maximum longevity, store your completed seed bombs in a sealed container with a small packet of silica gel or uncooked rice. This prevents moisture buildup that can reduce germination rates over the 6-12 month storage period. I also label each batch with the date—this helps track freshness since older bombs may need slightly more watering after deployment.
Pro Tips for Paper Seed Bombs
- Here's what nobody tells you about crafting seed bombs that actually grow—these little details make all the difference.
- Clay Consistency: The 2 cups of clay should be the right texture—too sandy and your bombs will crumble when thrown, t...
- Seed Distribution: When kneading for those 3-5 minutes in Step 2, pay special attention to the wildflower seeds—make ...
Frequently asked questions
Got questions about making and using paper seed bombs? You’re not alone! Here are answers to the most common ones to help you grow a thriving wildflower meadow with ease.
How long does it take for seed bombs to sprout?
Most seed bombs sprout within 7–21 days, depending on weather, soil, and seed type. Wildflowers often take a little longer—up to 4 weeks—so be patient! Water them lightly every few days until germination. If you don’t see sprouts after 3 weeks, check for moisture and sunlight.
When is the best time to throw seed bombs?
The ideal window is early spring or fall, when temperatures are mild (50–75°F) and rain is frequent. Avoid extreme heat or frost, as seeds may dry out or freeze. For summer planting, water them daily for the first 2 weeks to help them establish.
Can I use seed bombs in containers or pots?
Seed bombs work great in pots, raised beds, or even vertical gardens. Just press them gently into soil and water well. For containers, mix wildflower seeds with potting soil instead of clay for easier control. Avoid overcrowding—space bombs 6–12 inches apart for optimal growth.
What if my seed bombs crumble or fall apart?
Don’t worry—it’s normal! If they break before planting, just repack the seeds with a little water and clay (or soil) and toss them again. For extra durability, add a touch of flour paste to the mixture before drying. Store unused bombs in a cool, dry place until ready to use.
Are there eco-friendly alternatives to clay?
Yes! Swap clay for compost, coconut coir, or even shredded newspaper mixed with water. For a no-waste option, use spent coffee grounds or crushed eggshells (sterilized) as a binder. Just ensure the mix holds shape when dry—test with a small batch first!
Wrapping up and next steps
Paper seed bombs are a fun, eco-friendly way to transform bare patches into vibrant wildflower meadows—no green thumb required! 🌸 With just a few simple ingredients and a little creativity, you can spread beauty and support local pollinators in minutes.
Whether you're a gardening newbie or a seasoned pro, these seed-filled paper orbs make reclaiming outdoor spaces effortless and rewarding.
Ready to take the next step? Grab your supplies, pick your favorite wildflower mix, and start tossing! Share your blooming results with the community—your garden (and the bees!) will thank you. 🐝✨