
Lawn
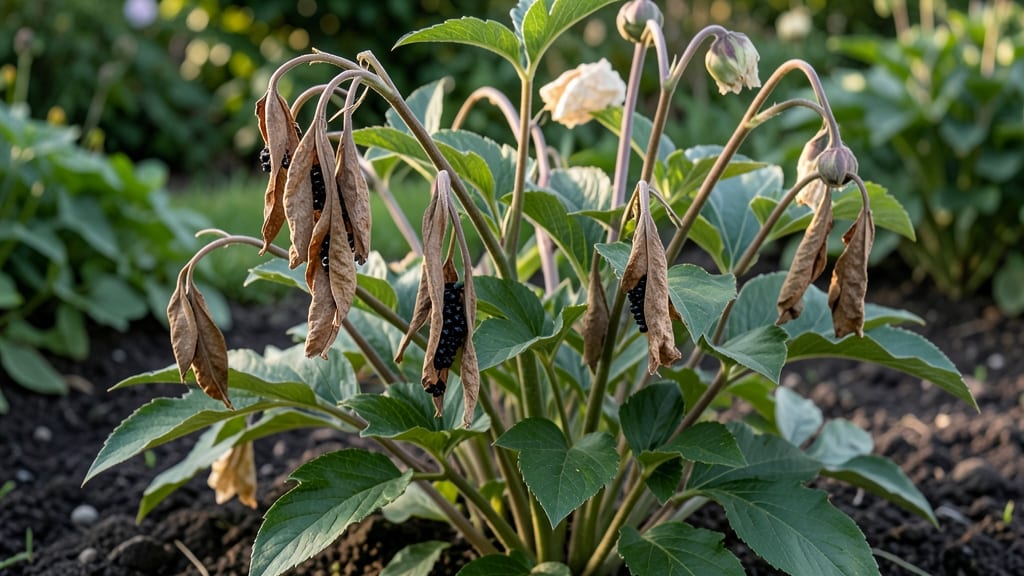
Peony seed pods mean free plants for next spring—but only if you collect them at the right moment. 🌸 I’ve spent years watching these fuzzy green pods twist and turn, and I finally cracked the code on when (and how) to harvest them for reliable germination.
The key? Timing, patience, and knowing which pods to pick.
Ripe peony pods are the size of a walnut and turn from green to a papery brown when ready. Harvest them in late fall before the first hard frost cracks them open—then let them dry completely indoors for 2-3 weeks.
The seeds inside are tiny and wrinkled, but they’re packed with potential for next year’s blooms. Just don’t rush this step; damp seeds rot faster than they sprout.
Germination is the real test—peony seeds take 6-12 months to break dormancy naturally, but you can speed it up with cold stratification (mix seeds with damp sand, refrigerate for 3 months).
Plant them shallowly in pots with well-draining soil, and keep them barely moist until sprouts appear. It’s slow, but the payoff? Disease-free peonies that thrive for decades.
Compared to digging up peony roots (which is easier but limits variety), seeds let you grow heirlooms or rare types. Just brace for the wait—some seeds need two years before blooming. Trust the process, and you’ll have peony patches that outshine store-bought plants.
📚 In This Guide
- What you need
- Instructions
- Tips and common mistakes
- Wrapping up and next steps
What you need
- ● Peony seed pods: Mature, dried pods (typically found in late summer/fall). Aim for 5–10 healthy pods per plant for best results.
- ● Pruning shears or sharp scissors: Clean, sterilized tools to snip pods without damaging the plant.
- ● Paper bags or breathable mesh sacks: 3–5 bags (1 per pod or a few pods per bag) to allow airflow and prevent moisture buildup.
- ● Permanent marker or labels: To tag pods with the variety name and harvest date.
- ○ Gloves (optional but recommended): Protect your hands from thorns and potential skin irritation.
- ● Damp paper towels or seed-starting mix: For storing pods until planting (if not sowing immediately).
- ● Seed tray or small pots: For germinating seeds indoors (if starting early).
- ● Plastic wrap or humidity dome: To create a mini greenhouse effect for faster germination.
- ● Fine-mesh screen or sieve: For separating seeds from chaff if pods are overly fibrous.
- ● Garden journal: To track pod collection dates, varieties, and germination progress.
How to harvest and save peony seed pods for future gardens
Peonies reward patience with stunning blooms—and their seed pods hold the promise of next year’s surprises.
🌱 Step 1: Identify and Wait for Seed Pods to Mature
After peony flowers fade, watch for seed pods to form along the stems. These pods start green and firm but must fully mature to brown and papery dry before harvesting. I always wait until late fall when frost has touched the foliage—this ensures seeds are fully developed and viable.
Don’t harvest too early. Immature pods won’t contain developed seeds, and forcing them risks damaging the plant. Instead, leave pods on the plant until they split open naturally or turn a deep, dry brown. This usually happens 8-12 weeks after flowering, depending on your climate.
✂️ Step 2: Harvest Pods with Care to Avoid Twisting
Use clean, sharp pruners to snip pods from the stem, leaving a ½-inch stem attachment to prevent seed loss. Twisting pods off can crush seeds inside or tear the plant’s delicate tissues. I cut pods when they’re completely dry but before they split open on their own—this is the golden window for collection.
Place harvested pods in a paper bag (not plastic) to allow airflow. Store them in a cool, dry place (like a garage or basement) until you’re ready to process them. Avoid damp areas—moisture will cause pods to mold before seeds ripen.
🌿 Step 3: Extract Seeds and Prepare for Storage
Once pods are fully dry, gently squeeze them over a clean white surface to release seeds. Peony seeds are small and flat, often with a wrinkled texture. Discard any seeds that look shriveled or discolored—these won’t germinate. I use a fine-mesh sieve to catch seeds that might fall through cracks in my work surface.
Store viable seeds in an airtight container with a desiccant packet (like silica gel) to absorb moisture. Label the container with the variety name and harvest date. Peony seeds can remain dormant for years, so proper storage ensures you’re ready when the time comes to plant.
⏰ Step 4: Stratify Seeds for Successful Germination
Peony seeds require cold stratification to break dormancy. Place seeds in a sealed plastic bag with a moistened paper towel, then refrigerate for 4-6 months at 35-40°F. Check monthly to ensure the towel stays damp but not soggy—rotting seeds won’t sprout.
After stratification, sow seeds ¼ inch deep in a light, well-draining mix (like 50% perlite, 50% potting soil). Keep the soil consistently moist but never waterlogged. Germination can take 2-4 weeks, and seedlings may be slow to emerge—patience is key here.
☀️ Step 5: Transplant Seedlings for Long-Term Growth
Once seedlings develop 2-3 true leaves, transplant them to individual pots with well-draining soil. Peonies hate root disturbance, so use biodegradable pots or gently tease roots apart if clumping occurs. Place pots in a bright, indirect light area (like a north-facing window) until they’re strong enough for the garden.
Peony seedlings grow slowly—don’t expect blooms for 2-3 years. But the wait is worth it: homegrown peonies often outperform nursery plants, with larger, more vibrant flowers and deeper root systems. Mark their location well—they’ll reward you for years to come.
Tips & tricks for perfect peony seed pod collection
These garden-tested strategies will help you preserve peony seeds with precision and avoid common pitfalls that waste your harvest.
Timing Secret: The 8-12 week window after flowering is your critical period—mark your calendar when peonies bloom to track this precisely. I set a reminder for 2 months later to check pods, as this timing varies by climate. Watch for the pods to develop a papery texture and turn deep brown; this indicates they're ready for harvest. If you're in a cooler climate, pods may take the full 12 weeks, while warmer regions might see them mature in as little as 8 weeks.
Harvest Technique: When using pruners in Step 2, position the blade at a 45-degree angle just above the stem attachment point. This creates a clean cut that minimizes damage to the plant's vascular system. I've found that leaving the ½-inch stem attachment is crucial—it acts as a natural seal to prevent seeds from spilling out during storage. If you're harvesting multiple pods, place them immediately in a paper bag to maintain their dry state.
Storage Wisdom: For long-term seed viability, I recommend adding a second desiccant packet to your airtight container if you're storing seeds for more than a year. The 35-40°F temperature during stratification is critical—never use a freezer, as the extreme cold can damage seed membranes. I've had success storing containers in unheated basements where temperatures naturally hover around 40°F during winter months, eliminating the need for refrigeration equipment.
Seed Selection Tip: When examining seeds in Step 3, look for a slight sheen on the seed coat—this indicates good moisture content and higher viability. I use a magnifying glass to inspect seeds, as peony seeds are so small that visual defects can be easily missed with the naked eye. Discard any seeds that have developed cracks or dark spots, as these are signs of internal damage that will prevent germination.
Pro Tips for Peony Seed Pods
- These garden-tested strategies will help you preserve peony seeds with precision and avoid common pitfalls that waste...
- Timing Secret: The 8-12 week window after flowering is your critical period—mark your calendar when peonies bloom to ...
- Harvest Technique: When using pruners in Step 2, position the blade at a 45-degree angle just above the stem attachme...
Frequently asked questions
Got questions about peony seed pods? You’re not alone! Here are some of the most common inquiries—plus straightforward answers to help you master the process.
When do peony seed pods appear after blooming?
Peony seed pods typically form 4–6 weeks after the flowers fade, depending on your climate. If you’re in a cooler zone, they may take longer. Look for swollen, green seed heads (called follicles) replacing the blooms—this is your cue to start planning for collection!
How long do I wait before harvesting the pods?
Wait until the pods turn brown and papery (usually late summer to early fall) before harvesting. If you pick them too early, the seeds won’t mature. Pro tip: A gentle tap should release dry seeds—if they’re still green inside, hold off for another week or two!
Can I reuse last year’s peony seed pods for planting?
Nope! Peony seed pods are for collecting seeds—not replanting. The pods themselves are hollow and dry out. To propagate peonies, you’ll need to extract the seeds and plant them fresh (or divide mature peony roots in early spring).
What should I do if squirrels or birds eat my seed pods?
Nature’s snack thieves can be a problem! Protect pods with fine mesh netting or bird netting while they’re still green. Once they’re dry and brown, the risk drops—but act fast if you spot critters munching. Bonus: Scatter a few pods far from your garden to distract them!
Are peony seed pods edible or useful for anything else?
While the seeds themselves aren’t typically eaten, the dried pods can be used for crafts (like wreaths or potpourri) or as natural mulch once fully decomposed. Just avoid inhaling the dust—they’re not as harmless as dried flowers! For culinary uses, stick to peony roots or petals (used sparingly in teas).
Wrapping up and next steps
Peony seed pods may seem tricky, but with the right tools and techniques, you can harvest them effortlessly—ensuring vibrant blooms for seasons to come! 🌸 Whether you’re a gardening newbie or a seasoned pro, patience and a little know-how go a long way.
Now that you’re equipped with answers to common questions, it’s time to roll up your sleeves and try it yourself.
Start small—pick a few pods this fall, experiment with preservation methods, and watch your garden thrive. Happy gardening! 🌱