
Lawn
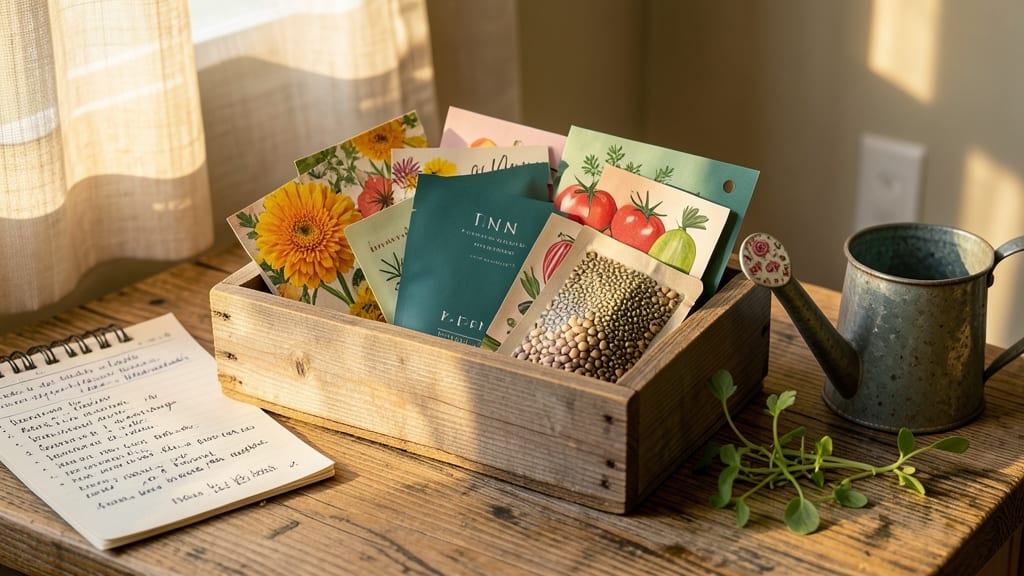
Those pretty seed packets aren’t just functional—they’re the quiet beauty of gardening. 🌸 I’ve collected vintage-style seed envelopes for years, and they’ve become my favorite way to elevate garden aesthetics while keeping seeds organized. Their illustrations and typography spark joy long before planting season even begins.
The best part? They double as garden decor. Hang them from a twine mobile in the greenhouse, tuck them into a seed-starting journal, or arrange them on a windowsill for a charming display.
Some even come with self-detaching pods—just pull to release seeds—adding a playful, hands-on element to your garden prep.
You’ll find packets that match everything from cottage-core pastels to bold botanical prints. Pair them with your garden’s color scheme—think lavender packets for a purple-themed bed or sunflower motifs for a bright, cheerful space.
The designs often inspire plant pairings too, like pairing a dahlia packet with actual dahlias in your border.
For a creative twist, repurpose empty packets into seed markers, mini terrariums, or even framed art. Their delicate charm turns seed saving into a decorative ritual. Start collecting this season—they’re as practical as they are pretty.
📚 In This Guide
- What you need
- Instructions
- Tips and common mistakes
- Wrapping up and next steps
What you need
- ● Seed packets – Choose 10-20 empty, clean seed envelopes (or repurpose old ones!)
- ● Decorative paper – 1-2 sheets of kraft paper, vellum, or patterned paper (8.5" x 11" or larger)
- ● Twine or thin ribbon – 1 yard (natural jute or cotton for a rustic look)
- ● Seed-saving tags – 10-20 small wooden or cardstock tags (or cut your own)
- ● Glue or double-sided tape – 1 small bottle (acid-free for longevity)
- ● Scissors or a craft knife – For precise cutting
- ● Ruler or measuring tape – To ensure uniform sizes
- ● Pencil or fine-tip marker – For marking and writing
- ● Hole punch – To create twine holes (or use a needle)
- ● Washi tape or decorative borders – For extra flair
- ● Stickers or stamps – To label seeds creatively
- ● Dried flowers or pressed leaves – For a nature-inspired touch
- ● Clear sealant spray – To protect paper from moisture
- ● Embossing folder or stamps – For textured designs
How to grow and harvest self-detaching seed pods for effortless collection
Transform your garden into a self-sustaining seed source with these elegant, low-maintenance pods.
🌱 Step 1: Choose and Plant Self-Detaching Seed Varieties
Select seed varieties known for their natural seed dispersal mechanisms, like lupines, poppies, or cosmos. These plants develop pods that dry and release seeds effortlessly when mature. I always opt for heirloom varieties—they're not only beautiful but also more likely to produce true-to-type seeds.
Plant seeds in well-draining soil with full sun exposure (6+ hours daily). For best results, sow directly in the garden after the last frost date. Press seeds ¼ inch deep—deeper planting can delay germination. Water gently after planting to settle the soil without disturbing the seeds.
💧 Step 2: Maintain Consistent Moisture and Fertility
Keep the soil consistently moist but not soggy during the first 4-6 weeks of growth. Overwatering can lead to fungal issues, while underwatering causes stress that weakens pod development. I like to water deeply every 2-3 days until the plants establish strong root systems.
Add a balanced, organic fertilizer (like 5-5-5) when plants reach 6 inches tall to encourage robust growth. Avoid high-nitrogen fertilizers—they promote leafy growth at the expense of seed production. Watch for first true leaves (not the initial seed leaves) to confirm healthy establishment.
☀️ Step 3: Monitor Pod Development and Timing
As flowers bloom, gently remove spent blooms to redirect the plant’s energy toward pod formation. This prevents overcrowding and ensures stronger seed pods. You’ll notice pods forming 4-6 weeks after flowering, starting as small, green bulges that gradually harden and turn brown.
Harvest pods when they’re dry and papery but before they split open naturally. For most varieties, this happens in late summer to early fall. I like to harvest on a dry morning—wet pods stick to gloves and tools, making collection messy. Place harvested pods in a paper bag to dry completely indoors.
✂️ Step 4: Collect and Store Seeds for Next Season
Once pods are fully dry, gently rub them between your hands or tap them lightly over a clean sheet of paper to release seeds. Store seeds in airtight envelopes labeled with the plant name and harvest date. Keep them in a cool, dark place until planting time—properly stored seeds retain viability for 2-5 years.
For varieties like poppies, where seeds disperse easily, I place the dried pods in a mesh bag and hang it upside down. The wind does the work for me, collecting seeds in a tray below. This method mimics nature while ensuring I don’t lose a single seed to squirrels or rain.
Tips & tricks for perfect self-detaching seed pods
Here's what nobody tells you about growing these self-sustaining beauties—trust me, these little details make all the difference.
Variety Selection Matters: While lupines, poppies, and cosmos are reliable starters, don't overlook native wildflowers like black-eyed Susans or coneflowers—they often have even more dramatic self-detaching mechanisms. I've found that heirloom varieties consistently produce stronger pods because they've been selected over generations for both beauty and seed viability. Look for descriptions mentioning "self-seeding" or "easy dispersal" in seed catalogs.
Timing Secret for Germination: The ¼-inch planting depth in Step 1 is critical—any deeper and you'll delay germination by weeks. I've learned to use my smallest finger joint as a guide (about ¼ inch) when pressing seeds into soil. For faster results, especially in cooler climates, consider a short warm-up period: cover newly planted seeds with clear plastic wrap for 24 hours to create a mini greenhouse effect before removing it.
Pod Development Watch: Those 4-6 weeks after flowering are make-or-break for pod strength. I've noticed that removing spent blooms (Step 3) works best if done in the morning—this gives the plant's energy a full day to redirect toward pod formation. Watch for the pods to develop a slight sheen when dry; that's your cue they're nearly ready for harvest. A magnifying glass helps spot this subtle change early.
Storage Wisdom: The 2-5 year viability window for stored seeds can be extended to 7 years if you take extra precautions. After collecting seeds (Step 4), place them in sealed envelopes with a small packet of silica gel to absorb moisture. Store in the refrigerator's crisper drawer where temperatures stay consistently cool (around 35-40°F). This mimics natural winter stratification and preserves germination rates.
Pro Tips for Pretty Seed Packets
- Here's what nobody tells you about growing these self-sustaining beauties—trust me, these little details make all the difference.
- Variety Selection Matters: While lupines, poppies, and cosmos are reliable starters, don't overlook native wildflowers like black-eyed Susans or coneflowers—they often have even more dramatic self-detaching mechanisms.
- Timing Secret for Germination: The ¼-inch planting depth in Step 1 is critical—any deeper and you'll delay germination by weeks.
Frequently asked questions
Got questions about pretty seed packets and their self-detaching pods? You’re not alone!
Here are answers to the most common queries to help you get the most out of your seed collection experience.
How do self-detaching seed pods work?
Self-detaching pods are designed to open naturally when mature, releasing seeds effortlessly. As the pod dries, it splits along pre-set seams—no cutting or handling required! This feature makes collecting seeds super easy and reduces the risk of damaging the seeds during harvest.
When is the best time to collect seeds from these pods?
Timing is key! Wait until the pods turn brown and begin to crack open on their own—usually late summer or early fall. If you harvest too early, the seeds may not be fully mature. A gentle tug should release them if the pod is ready.
Can I reuse the pretty seed packets for multiple seasons?
Many seed packets are made from durable, biodegradable materials like paper or fabric. Store them in a cool, dry place (like a seed catalog or envelope) to preserve them for next year’s planting. Just avoid moisture to prevent mold.
What if my pods aren’t detaching on their own?
If pods stay closed, they may need a little help. Try placing them in a paper bag for a few days to dry out further, then give them a soft shake. If they’re still stubborn, gently pry them open with your fingers—just be careful not to crush the seeds inside!
Are pretty seed packets eco-friendly?
Yes! Most are made from recycled or compostable materials, and the self-detaching design reduces waste by eliminating the need for plastic seed packets. Plus, you’re supporting sustainable gardening by saving and replanting seeds instead of buying new ones every year.
Still curious? Drop your question in the comments—we’re happy to help!
Wrapping up and next steps
Pretty seed packets aren’t just a gardener’s dream—they’re a game-changer for effortless seed collection! 🌱 By embracing self-detaching pods, you’ll save time, reduce waste, and even add a touch of charm to your garden.
Whether you’re a seasoned green thumb or just starting out, these pods make seed-saving simple and satisfying.
Ready to give it a try? Start small—pick one or two plants to experiment with, and soon you’ll be reaping the rewards of your own homegrown seeds. Happy gardening! 🌿