
Shrubs
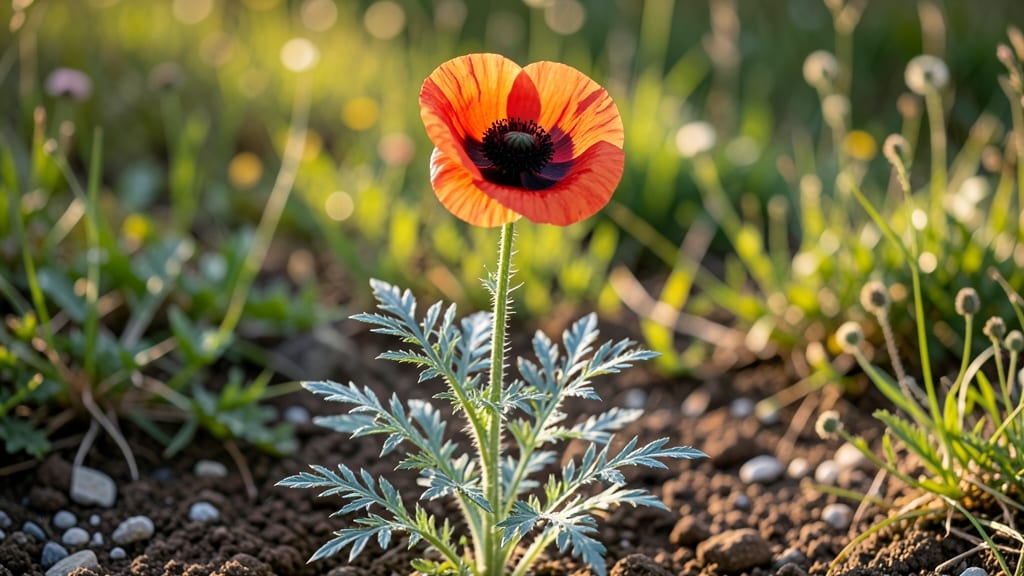
Growing red breadseed poppies means harvesting seeds without the frustrating twisty pods. 🌸 These cheerful blooms are easier to save than you’d think, and I’ve mastered the trick after years of trial—and a few seedless seasons.
Start with well-draining soil and full sun, then sow seeds directly in spring or fall. The key is patience: germination takes 10-14 days, and plants bolt quickly, so don’t rush them. Once established, they’ll self-seed reliably, creating a cottage-garden staple.
You’ll end up with bright scarlet blooms that attract pollinators and pods that split open naturally. No twisting required—just collect the seeds when the pods turn papery brown. Perfect for cut flowers, seed saving, or letting nature take over. Works in borders, meadows, or containers.
Here’s how to avoid the common pitfalls that sabotage seed harvests.
📚 In This Guide
- What you need
- Instructions
- Tips and common mistakes
- Wrapping up and next steps
What you need
- ● Red breadseed poppy seeds – 1 packet (approx. 500–1,000 seeds, depending on desired coverage). Opt for organic, untreated seeds for best results.
- ● Well-draining soil mix – A blend of 50% garden soil, 30% compost, and 20% coarse sand or perlite (to prevent waterlogging).
- ● Growing containers or garden bed – Containers: 6–12-inch deep pots (with drainage holes) for seedlings, or 1–2 gallon pots for mature plants.
- ● Garden bed: Full sun exposure (6+ hours daily) and loose, fertile soil.
- ● Watering can or hose with a gentle spray nozzle – Poppies hate soggy roots!
- ● Plant labels or markers – To track varieties (especially if growing multiple types).
- ● Hand trowel or small spade – For transplanting seedlings.
- ○ Gloves (optional but recommended) – Poppy stems can be prickly!
- ● Pruning shears – For deadheading spent blooms (encourages more flowers).
- ● Seed-saving envelopes or paper bags – To collect and dry pods for future planting.
- ● Patience! Red breadseed poppies grow fast but need 4–6 weeks from seed to bloom.
- ● Knowledge of your frost dates – Start seeds indoors 6–8 weeks before the last frost or direct-sow after frost risk passes.
- ● Space for pods to mature – Avoid harvesting too early (pods should be dry and papery).
Step-by-step instructions for cultivating red breadseed poppies
Here's how I grow these striking poppies—with a focus on keeping those seed pods twist-free for easy harvesting.
🌱 Step 1: Select and Prepare the Planting Site
Choose a location with full sun exposure—at least 6-8 hours daily—and well-draining soil. Red breadseed poppies despise soggy roots, so amend heavy clay with 2-3 inches of compost or sand to improve drainage. I like to test soil pH first; these poppies thrive in slightly alkaline conditions (6.5-7.5).
Loosen the soil to a depth of 12 inches with a garden fork, breaking up any compacted layers. Scatter a handful of bone meal fertilizer (about 1 tablespoon per square foot) into the top 2 inches of soil—this gives them a phosphorus boost for strong root development. Poppies are light feeders, so don't overdo it.
🌱 Step 2: Sow Seeds at the Right Time and Depth
Direct-sow seeds outdoors in early spring (2-4 weeks before last frost) or late summer for fall blooms. Scatter seeds ¼ inch deep—they need light to germinate, so don't bury them. Space seeds 12-18 inches apart in rows 18-24 inches apart for mature plants. I tap the seed packet gently to release seeds one at a time—planting too many in one spot leads to overcrowding and weak stems.
Lightly cover seeds with a thin layer of soil or compost, then water gently with a fine mist. The soil should be moist but not saturated—poppy seeds rot if kept too wet. Place a small rock or marker at each row to avoid disturbing them during germination. You'll see sprouts in 10-21 days, depending on temperature.
☀️ Step 3: Provide Minimal Care for Healthy Growth
Once seedlings emerge, water deeply once a week—poppies are drought-tolerant but appreciate consistent moisture during their first season. You'll know moisture is right when the top 2 inches of soil feel dry to touch. Avoid overhead watering after germination to prevent fungal diseases like damping-off, which causes seedlings to collapse.
Thin seedlings to 12 inches apart when they reach 3-4 inches tall, using clean scissors to snip at soil level. This prevents competition and ensures strong, twist-free stems. Poppies don't need fertilizing after planting—too much nitrogen produces lush foliage but weak stems that can't support seed pods.
✂️ Step 4: Support Pods and Harvest Seeds Properly
When seed pods form, they'll naturally twist as they dry—but this doesn't mean they're failing. To prevent excessive twisting (which can cause pods to split open prematurely), I tie soft twine or raffia loosely around clusters of pods. This keeps them upright without restricting airflow. Harvest pods when they're dry and papery, typically 6-8 weeks after flowering.
To collect seeds, hold the pod over a paper bag and gently squeeze—seeds will spill out easily. Store seeds in a cool, dry place for up to 2 years. If pods twist excessively, it's usually due to overcrowding or poor drainage. Next season, space plants farther apart and improve soil drainage to reduce this issue.
Tips & tricks for perfect red breadseed poppy cultivation
These simple yet game-changing strategies will help you grow robust red breadseed poppies with twist-free seed pods every season.
Soil Preparation Secret: I can't stress enough how critical that 12-inch soil depth is for root development. Use a garden fork to break up compacted layers thoroughly—poppies hate soggy roots, and this step prevents future drainage issues. For heavy clay soils, mix in 2-3 inches of compost or coarse sand to create that perfect crumbly texture. The 1 tablespoon per square foot of bone meal in the top 2 inches gives them just enough phosphorus without overfeeding, which is key since these plants are light feeders.
Timing and Spacing Technique: The 2-4 weeks before last frost window is ideal for spring planting, but I've found that late summer sowing often yields stronger fall blooms in my Zone 7 garden. When spacing seeds 12-18 inches apart in rows 18-24 inches apart, think of it as giving each plant elbow room to grow without competing for nutrients. Overcrowding is the #1 reason for weak stems that can't support those beautiful seed pods later on. I mark each row with small rocks to avoid disturbing the delicate seedlings during germination.
Pod Support Strategy: That 6-8 week flowering to harvest window gives you plenty of time to implement the soft twine support system. I use 100% cotton twine because it's breathable and won't restrict airflow to the pods. The trick is to tie it loosely—just enough to keep pods upright without squeezing them. This simple step prevents the excessive twisting that makes seed collection frustrating. Harvest when pods are dry and papery, which usually means they've lost most of their green color and develop a papery texture when you gently squeeze them.
Watering Wisdom: The once-weekly deep watering rule works perfectly when you check that top 2 inches of soil—it should feel dry to the touch. I've learned the hard way that overhead watering after germination can lead to damping-off disease. Instead, I use a soaker hose or water at the base of plants. This consistent moisture without wetting the foliage keeps your poppies healthy and strong throughout their growth cycle.
Pro Tips for Red Breadseed Poppy
- These simple yet game-changing strategies will help you grow robust red breadseed poppies with twist-free seed pods e...
- Soil Preparation Secret: I can't stress enough how critical that 12-inch soil depth is for root development. Use a ga...
- Timing and Spacing Technique: The 2-4 weeks before last frost window is ideal for spring planting, but I've found tha...
Frequently asked questions
Got questions about growing red breadseed poppies? You’re not alone! Here are some common concerns—and their answers—to help you cultivate twist-free pods with confidence.
When is the best time to plant red breadseed poppy seeds?
Plant seeds in early spring (after the last frost) or late summer for a fall-blooming crop. They thrive in cool weather and may struggle in scorching heat. For a continuous display, stagger plantings every 2–3 weeks.
How long does it take for red breadseed poppies to mature?
From seed to full bloom, expect 8–12 weeks. Pods form after flowering (another 4–6 weeks), so plan ahead if you’re saving seeds. Patience pays off—these poppies reward you with vibrant, twist-free pods!
Why are my poppy pods twisting or cracking?
Twisting pods often signal overcrowding or drought stress. Thin seedlings to 12–18 inches apart and water consistently (but avoid soggy soil). If pods crack, harvest seeds immediately—they’re ready when they turn brown and papery.
Can I grow red breadseed poppies in containers?
Use 5–6 inch deep pots with drainage holes. They’re lightweight and adaptable, but ensure they get full sun (6+ hours/day). Containers also make seed saving easier—just pluck pods before they split open.
Are there alternatives to red breadseed poppies for twist-free pods?
Yes! Try California poppies (Eschscholzia) or corn poppies (Papaver rhoeas). Both produce straight pods and are low-maintenance. However, red breadseed poppies stand out for their bold color and culinary uses—worth the effort!
Wrapping up and next steps
Growing red breadseed poppy is a rewarding journey that brings beauty and practicality to your garden! These twist-free pods make seed saving a breeze, ensuring you’ll always have fresh seeds for future blooms.
Whether you’re a seasoned gardener or just starting, their hardy nature and stunning crimson flowers make them a must-try.
Ready to dive in? Start by gathering your supplies, choosing the perfect spot, and planting with confidence. Watch your garden transform into a vibrant haven—one poppy at a time! 🌸✨