
Lawn
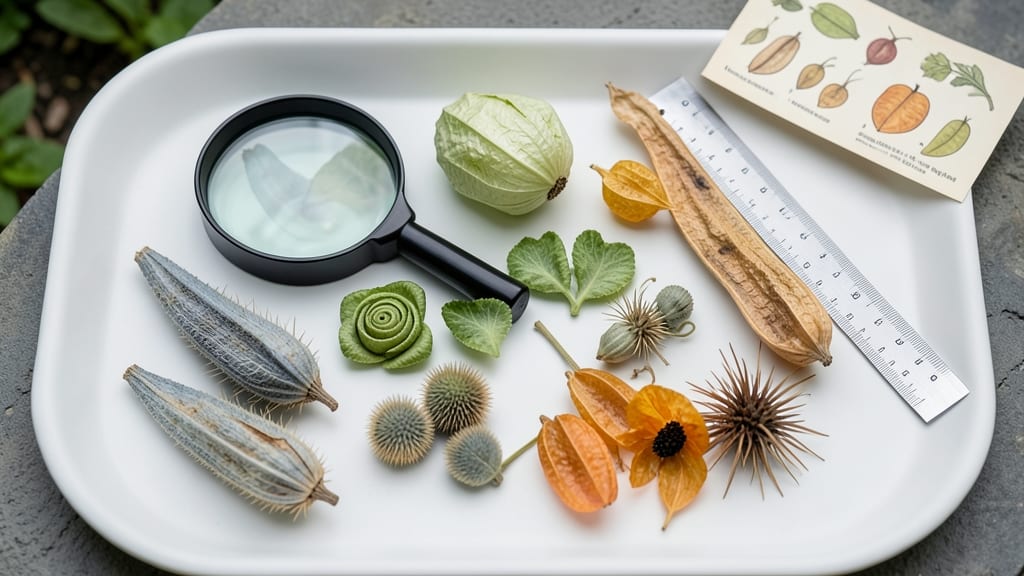
Seed pod identification reveals your garden’s secret life—each one holds the potential for next year’s bounty. 🌱 I’ve spent years watching milkweed fluff float away and tomato pods crack open, learning how to spot these clues before they disappear. The right identification means you’ll harvest seeds at peak freshness, store them properly, or even propagate rare plants you’d never find in stores.
Start with the basics: shape matters most. Pea pods are flat and papery, tomato pods turn yellow and split open, while milkweed forms fluffy seed heads that catch the wind. Each type tells you when to collect seeds—before they scatter or dry out—and which plants they’ll grow into.
My first mistake? Waiting too long with okra pods, only to find the seeds inside had already sprouted.
Once you recognize them, the magic begins: saving heirloom tomato seeds, growing new milkweed for monarchs, or even propagating wildflowers from your yard. You’ll end up with a seed stash that’s more diverse and resilient than anything you can buy.
The best part? These pods are free, abundant, and full of surprises if you know what to look for.
Works for any garden—urban, rural, or container—because seed pods appear everywhere. Whether you’re a beginner or a seasoned gardener, this skill will change how you see your plants. Let’s start identifying them today!
📚 In This Guide
- What you need
- Instructions
- Tips and common mistakes
- Wrapping up and next steps
What you need
- ● Seed Pod Samples: Collect 3–5 fresh or dried seed pods from your garden (or nearby plants). Ensure they’re intact for accurate identification.
- ● Magnifying Glass: A 10x magnification handheld loupe (or a smartphone with a macro lens app) to examine fine details like texture, color, and structure.
- ● Notebook & Pen: A small, waterproof notebook to jot down observations (or use a digital note-taking app on your phone).
- ● Ruler or Measuring Tape: A 6-inch metal ruler or a flexible tape measure to record pod size (length, width, and depth).
- ● Field Guide or Plant ID App: Printed Guide: A regional wildflower or plant identification book (e.g., The Audubon Society Field Guide to North American Wildflowers).
- ● Digital Tool: Apps like iNaturalist, PlantNet, or Google Lens for quick visual matching.
- ○ Camera (Optional but Helpful): A smartphone with a high-resolution camera (12MP or higher) to capture close-up images for later reference.
- ● Plastic Bags or Envelopes: Small, resealable bags to store samples until you can analyze them.
- ● Dissecting Tools: Tiny tweezers or a miniature scalpel for carefully opening pods to inspect seeds.
- ● Drying Rack: A small mesh screen or paper towels to air-dry moist pods before handling.
- ● Reference Library: Books on botany, seed biology, or regional flora for deeper dives into plant families (e.g., Fabaceae, Brassicaceae).
- ● Gloves: Lightweight nitrile gloves if handling prickly or unknown plants to protect your skin.
How to identify seed pods and decode your garden's natural harvest
Mastering seed pod ID transforms your garden from a mystery to a treasure trove of free plants.
🌱 Step 1: Observe the Plant's Growth Stage
Start by identifying when seed pods begin forming. Most plants develop pods after flowering—look for wilted petals or drooping stems as your first clue. I always check the plant's life cycle (annuals vs. perennials) because biennials like carrots form pods only in their second year.
Run your fingers gently along stems to feel for small, hard bumps where pods will emerge. Early detection prevents seed loss to pests or weather. Note whether pods grow upright or hang downward—this helps narrow down the plant family (Legumes like peas hang, while Mustards stand erect).
🔍 Step 2: Examine Pod Shape, Size, and Texture
Grab a magnifying glass (or use your phone's camera) to inspect pod characteristics. Measure length with your thumb—pea pods are typically 2-4 inches, while tomato berries (technically fruit) stay 1-2 inches. Feel the surface: smooth pods (like okra) vs. fuzzy ones (like lamb's quarters).
Open a mature pod carefully with a knife or your fingers. Count the number of seeds inside—this reveals the plant's reproductive strategy. Single-seeded pods (like poppies) are easier to collect than multi-seeded ones (like milkweed). I always photograph the opened pod against a white background for future reference.
📝 Step 3: Compare with Field Guides or Apps
Use a plant ID app (like iNaturalist or PictureThis) to scan pod images. Input your location and upload photos of both the pod and the parent plant. Apps often show seed dispersal methods (explosive pods, wind-blown, animal-transported)—critical info if you're saving seeds for next year.
For tricky cases, consult a regional field guide focused on seed pods. I keep The Seed Garden Handbook handy for troubleshooting. Pay attention to pod color changes—many turn from green to brown or black when fully mature, signaling harvest time.
⏰ Step 4: Determine Harvest Readiness
Most seed pods are ready when they turn crispy and brown and easily open when touched. Test by gently squeezing—if seeds rattle inside, they're mature. I harvest dill and cilantro pods when they're still slightly green to prevent shattering, while tomato seeds need full ripeness for germination.
Collect pods on a dry day and lay them out on paper towels to finish drying. Store in paper envelopes (not plastic) in a cool, dark place. Label each with the plant name, date, and location—next year's garden depends on this organization.
🌿 Step 5: Verify Seed Viability Before Planting
Test seed viability by placing 10 seeds in a damp paper towel, sealing in a bag, and checking for sprouts in 7-14 days. If fewer than 80% sprout, store pods in the fridge for another year. I've had snapdragon seeds stay viable for 3 years this way—far longer than their labeled shelf life.
When planting saved seeds, note any size or color changes from the parent plant. Some plants (like tomatoes) produce hybrids that won't breed true, while others (like beans) remain consistent. This is where keeping detailed records pays off—you'll spot patterns across seasons.
Tips & tricks for mastering seed pod identification
Here's what nobody tells you about turning seed pods into your garden's secret weapon.
Life Cycle Clues: Biennials like carrots and parsnips are sneaky—they only produce pods in their second year. If you're new to seed saving, mark these plants when they flower the first year. I've missed entire harvests because I didn't realize they needed two growing seasons!
The Texture Test: When examining pods, pay attention to surface texture beyond just shape. Fuzzy pods (like those from lamb's quarters) often belong to the same plant family, while smooth, waxy pods (like okra) are completely different. Run your thumb along the pod—rough textures usually indicate wind-dispersed seeds, while smooth ones often attract animals.
Photography Hack: Always photograph seed pods against a white background using natural light. This creates consistent images for your records. I use my phone's macro mode to capture details like vein patterns or seed arrangement inside pods. These details become crucial when comparing with field guides later.
Color Change Caution: Don't assume all pods turn brown when mature—some stay green or develop striking patterns. Milkweed pods, for example, turn from green to tan with visible seed fluff. I keep a color chart of mature pods from my region to avoid missing harvest windows.
Pro Tips for Seed Pod Identification
- Here's what nobody tells you about turning seed pods into your garden's secret weapon.
- Life Cycle Clues: Biennials like carrots and parsnips are sneaky—they only produce pods in their second year.
- The Texture Test: When examining pods, pay attention to surface texture beyond just shape.
Frequently asked questions
Got questions about seed pod identification? You’re not alone! Here are some of the most common queries gardeners have—plus quick, actionable answers to help you navigate this fascinating world of plant reproduction.
What’s the easiest way to identify seed pods in my garden?
Start by observing their shape, size, and texture—smooth, spiky, or fuzzy? Check if they split open (like milkweed) or stay closed (like poppies). Use a field guide or app (like iNaturalist) to compare photos. If unsure, note the plant’s leaves or flowers nearby for clues!
When is the best time to collect seed pods?
Timing is key! Harvest pods when they’re dry and brown but before they shatter (usually late summer to fall). For tropical plants, pods may ripen year-round. Morning collections work best—dew can make them stickier. Store them in a paper bag in a cool, dry place to prevent mold.
Are all seed pods safe to handle? What about toxic ones?
Some pods are harmless (like sunflower seeds), while others—like castor bean or deadly nightshade—can be toxic if ingested or even touched. When in doubt, avoid touching and research the plant family. Wear gloves if handling unknown pods, and never consume seeds without verification.
Can I grow plants from seed pods I find in my yard?
Many common weeds (like dandelions or clover) produce viable seeds. Clean pods thoroughly, let them dry, and plant them in well-draining soil. For wildflowers or native plants, this is a great way to boost biodiversity. Just avoid invasive species—check local guidelines first!
Why won’t my seed pods open or release seeds?
Several factors can block seed release: overly moist conditions, immature pods, or even pests (like weevils). Try gently tapping dried pods over paper or placing them in a brown paper bag for a few days. If pods stay closed, the plant may need more sunlight or better drainage.
Wrapping up and next steps
Mastering seed pod identification is your gateway to transforming your garden into a thriving ecosystem! 🌱 By recognizing these hidden clues, you’ll unlock the secrets of plant reproduction, troubleshoot issues, and even propagate new plants—all while adding beauty and biodiversity to your outdoor space.
Start small: grab a magnifying glass, snap a few photos, and compare what you find to trusted guides. Every expert gardener began with a single curious glance—now it’s your turn to dig deeper!
🌟 Your Next Step: Take Action!
- Document your findings in a journal or app (like iNaturalist or PictureThis) to track changes over time.
- Experiment by collecting and planting viable seeds—you might discover a new favorite!
- Share your discoveries with local gardening groups or social media to inspire others.