
Lawn
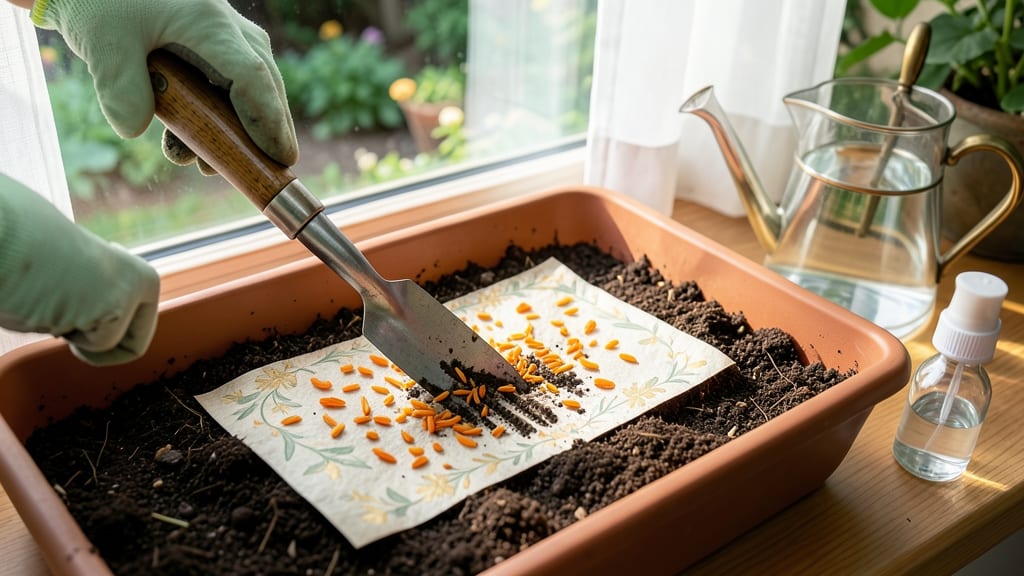
Transforming bare patches into lush gardens with just a sheet of seeds sounds almost magical. 🌱 A seed sheet garden is your secret weapon for precision planting—no more scattering seeds or guessing spacing.
These biodegradable sheets hold seeds perfectly aligned, so you plant exactly what you want, where you want it, with zero waste. The beauty lies in simplicity: just lay the sheet on prepared soil, cover lightly, and water. No digging, no mess, and no need for expensive seed-starting setups.
I’ve used them to revive tired lawn edges, fill container gaps, and even create instant pollinator patches—all with 80% less seed waste than traditional methods. What you’ll end up with is a neat, organized planting that germinates faster and thrives with minimal fuss.
The sheets dissolve into the soil, leaving no trace behind—just vibrant new growth where you placed them. Perfect for beginners or anyone tired of seedling chaos.
Start with a clear, level patch of soil—no need for fancy prep, just remove weeds and loosen the top inch. Choose seed sheets for your climate and plants (herbs, flowers, and some veggies work best).
Lay the sheet seeds-side down, press lightly to secure, and water gently to avoid displacing them. Think of it like planting with a built-in guide.
Keep the soil consistently moist (not soggy) for the first 10-14 days—that’s when most seeds sprout. Once seedlings appear, thin or transplant as needed, and let nature take over. The sheets break down completely, so you won’t find remnants once plants establish. It’s gardening at its most efficient.
Works for lawn edges, container gardens, or even small flower beds. No special tools required—just patience and a little water. Here’s how to make it work for your space!
📚 In This Guide
- What you need
- Instructions
- Tips and common mistakes
- Wrapping up and next steps
What you need
- ● Seed sheets: Choose 3–5 varieties (e.g., clover, microgreens, or wildflowers). Opt for organic, non-GMO seeds for best results.
- ● Water-soluble glue (e.g., flour paste or commercial seed tape glue): 1 small bottle or homemade mix (1 cup flour + 2 cups water).
- ● Cardstock or thick paper (80–120 lb test weight): 1–2 sheets, cut to fit your lawn patches (e.g., 4"x6" or custom shapes).
- ● Water misting bottle or spray bottle: 1 (for activating seeds).
- ○ Compost or soil activator (optional but helpful): A handful to boost germination.
- ● Paintbrush or old toothbrush: 1 (for applying glue/seeds).
- ● Ruler or measuring tape: 1 (for precise seed placement).
- ● Scissors or craft knife: 1 (for cutting seed sheets to size).
- ○ Twine or string (optional): For securing sheets in windy areas.
- ○ Markers or chalk (optional): To label seed varieties.
- ● A sunny patch of lawn (6+ hours of sunlight daily).
- ● Moist soil (water the area 1–2 days before planting).
- ● Patience! Germination takes 7–14 days (varies by seed type).
Step-by-Step instructions for creating a seed sheet garden
Here's how to transform bare spots into lush, pollinator-friendly gardens using just seeds and paper.
🌱 Step 1: Gather and Prepare Your Seed Sheets
Start with 100% recycled paper cut into 4-inch squares—this size works perfectly for small lawn repairs. Use a water-soluble glue (like flour paste) to affix a pinch of seeds to each sheet. I like to mix wildflower seeds with clover for nitrogen-fixing benefits. Let the glue dry completely before handling.
This method ensures seeds stay in place during planting and won't blow away. The paper will break down naturally as the plants grow, eliminating plastic waste. For best results, use native wildflower seeds—local nurseries often sell them in bulk for this exact purpose.
💧 Step 2: Prepare the Lawn Area
Mark your planting area with a garden hose to create a 12-inch square for each seed sheet. Use a sharp spade to cut out a small section of turf, removing just the top layer of grass (1/4 inch deep). Keep the grass plug intact—you'll reuse it as mulch later. Water the exposed soil until it's damp but not soggy.
Don't worry about perfect edges—seed sheets are forgiving. If your lawn has thatch buildup, lightly rake the area to improve seed contact with soil. The goal is to create a small, loose bed where seeds can establish quickly without competition.
✂️ Step 3: Plant and Secure the Seed Sheets
Place each seed sheet directly onto the prepared soil, seeds facing down. Gently press the edges with your fingers to ensure good contact. For extra security in windy areas, use small garden staples to pin the corners—just enough to hold them until germination. Water immediately with a gentle spray until the paper is damp through.
Here's the thing—don't overwater now. You'll see the paper darken slightly as it absorbs moisture, but it shouldn't become waterlogged. Check daily and water again only when the paper feels dry to the touch. This keeps seeds from washing away while preventing rot.
☀️ Step 4: Maintain Through Germination
Keep the area shaded with a lightweight row cover or old window screen for the first 2-3 weeks until seedlings emerge. This protects tender sprouts from birds and heavy rain. Most wildflower seeds germinate within 10-21 days—watch for the first tiny green shoots pushing through the paper.
Once germination begins, remove the protective covering and water only when the top inch of soil feels dry. You'll notice the paper starts breaking down naturally after about 4-6 weeks, but by then the plants should have established roots. Avoid walking on the area until plants reach 3-4 inches tall.
🌿 Step 5: Transition to Full Lawn Integration
After 6-8 weeks, when your seed sheets have established a dense mat of foliage, carefully trim the grass plug you saved earlier into 1-inch strips. Weave these strips between your new plants to create a natural transition zone. This prevents a harsh edge while giving your wildflowers room to spread.
From this point, maintain like your regular lawn—mow when plants reach 6 inches tall and water deeply once a week. You'll be amazed how quickly these small patches transform into vibrant, pollinator-friendly meadows that blend seamlessly with your lawn.
Tips & tricks for perfect seed sheet gardens
Transforming bare lawn patches into thriving gardens doesn't have to be tricky—these little-known strategies make all the difference.
Paper Selection Matters: While any recycled paper works, opt for thicker cardstock (around 80 lb weight) for windy areas—it holds up better against rain and stays put during planting. I've found that brown kraft paper breaks down slightly slower, giving seeds extra time to establish. Avoid glossy or coated papers, as they resist water absorption and can suffocate seeds.
Seed Placement Technique: In Step 1, arrange seeds in a small cross pattern on each 4-inch square rather than scattering randomly. This creates a more uniform germination pattern and prevents seed clustering that can lead to overcrowding. For extra security, lightly mist the glue before applying seeds—it creates a slightly tacky surface that holds them better during the drying process.
Soil Prep Shortcut: If your lawn has dense thatch, skip the rake in Step 2 and instead use a broadfork to loosen the soil without disturbing the grass roots. This aerates the area perfectly while preserving the grass plug for later. For compacted soil, add a thin layer of compost (about 1/4 inch) before planting—it improves moisture retention and seed contact.
Germination Timeline: Most wildflower seeds need light to reach the soil, so avoid burying them completely. In Step 4, when you see those first green shoots after 10-21 days, gently brush away any remaining paper fragments that might block sunlight. The paper will naturally disintegrate, but removing obstacles helps seedlings grow faster and stronger.
Pro Tips for Seed Sheet Garden
- Transforming bare lawn patches into thriving gardens doesn't have to be tricky—these little-known strategies make all the difference.
- Paper Selection Matters: While any recycled paper works, opt for thicker cardstock (around 80 lb weight) for windy areas—it holds up better against rain and stays put during planting.
- Seed Placement Technique: In Step 1, arrange seeds in a small cross pattern on each 4-inch square rather than scattering randomly.
Frequently asked questions
How long does it take for seed sheets to grow into a lawn?
Seed sheets typically take 4-8 weeks to establish a full lawn, depending on climate, sunlight, and soil conditions. You’ll see sprouts in 7-14 days, but consistent watering (especially in the first 2 weeks) is key. For faster results, opt for fast-growing grass blends like annual ryegrass.
Do I need to water seed sheets differently than regular grass seed?
Yes! Seed sheets have a biodegradable mat that retains moisture, so you’ll need to keep it damp (not soggy) for the first 2 weeks. Water lightly 2-3 times daily until germination, then taper to 1-2 times daily. Avoid overhead sprinklers—use a gentle spray or soaker hose to prevent washing away the seeds.
Can I reuse or compost seed sheet waste after planting?
The biodegradable mat and paper dissolve naturally into the soil, enriching it with organic matter. Just lightly scratch the soil surface to bury any remaining fragments. No waste—just zero-waste gardening! For extra nutrients, mix in a compost top dressing after planting.
What’s the best time of year to plant seed sheets?
For most regions, early spring (March–May) or early fall (August–October) are ideal—when soil is warm but not scorching. Avoid extreme heat or frost, as seeds need consistent moisture and temps between 60–75°F (15–24°C) to germinate. Check your grass type’s USDA planting zone for precision timing.
Why aren’t my seed sheets sprouting? Troubleshooting tips.
Check these common issues:
Too dry? Increase watering frequency—seed sheets dry out faster than soil.
Too hot/cold? Move to partial shade if temps exceed 85°F (29°C) or below 50°F (10°C).
Poor soil contact? Gently press the sheet into the ground to ensure seed-to-soil contact.
Pests? Birds or insects may snack on seeds—cover with lightweight netting temporarily.
If problems persist, test soil moisture and pH (ideal: 6.0–7.0).Wrapping up and next steps
Transforming your lawn into a thriving, zero-waste seed sheet garden isn’t just eco-friendly—it’s empowering! 🌱 By repurposing scraps and saving seeds, you’re reducing waste and growing fresh, vibrant greens year after year. Whether you’re a beginner or a seasoned gardener, this method proves that sustainability starts right in your backyard.
Ready to take the next step? Start small—pick one seed sheet to grow this season, then expand as you gain confidence. Share your progress with fellow gardeners, swap seeds, and watch your lawn (and community!) flourish together. Happy growing! 🌿