
Lawn
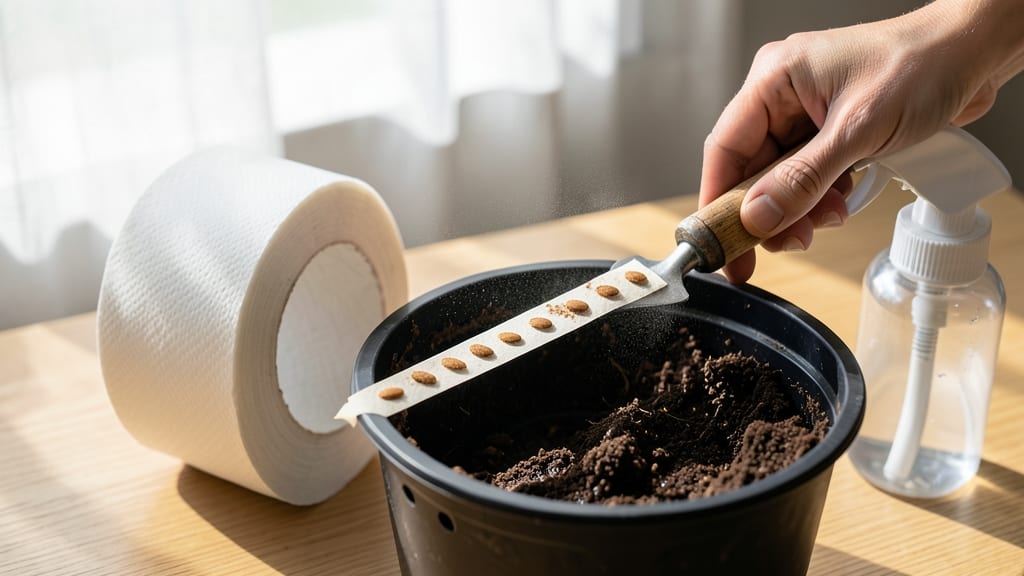
Toilet paper rolls can become your gardening secret weapon. 🌱 This no-waste method transforms everyday household items into perfect seed tape for tiny seeds like carrots or lettuce—no more uneven spacing or wasted seeds.
I used this trick last spring and planted an entire row of radishes in just 10 minutes, with zero mess. The beauty lies in simplicity: you’ll need toilet paper, flour or water, seeds, and a little patience. Unlike traditional seed planting, this method keeps seeds evenly spaced and prevents overcrowding.
Perfect for small spaces, beginners, or anyone tired of buying expensive seed tape. Once planted, you’ll see faster germination and easier maintenance. The toilet paper breaks down naturally, so there’s no need to remove it later. My radishes emerged in just 4 days—shockingly quick compared to loose seeds.
This works for any small seed and scales from a single pot to an entire garden bed. Here’s how to make your first strip in minutes!
📚 In This Guide
- What you need
- Instructions
- Tips and common mistakes
- Wrapping up and next steps
What you need
- ● Toilet paper rolls: 2–5 rolls (unbleached, 100% recycled preferred—no dyes or chemicals!)
- ● Seeds: Small seeds (e.g., basil, lettuce, marigolds, or sunflowers): ~1–2 seeds per inch of roll length.
- ● Medium seeds (e.g., beans, peas, or carrots): Space seeds ~1 inch apart.
- ● Water: A spray bottle or small cup for dampening.
- ○ Flour or cornstarch: 1–2 tablespoons (acts as a natural glue—optional but helpful for sticky seeds!).
- ● Scissors or craft knife: For trimming rolls to size.
- ● Ruler or measuring tape: To ensure even seed spacing.
- ● Pencil or toothpick: For gently pressing seeds into the tape.
- ○ Plastic wrap or damp paper towels: To keep seed tapes moist while drying (optional but recommended).
- ○ Marker or label tags: For marking seed types (optional but handy).
- ● 🌱 Choose fast-sprouting seeds: They’ll adhere better to damp toilet paper.
- ● 💧 Test seed adhesion: Mix flour with water (1:1 ratio) for extra stickiness if seeds keep slipping.
- ● 🌿 Pre-sprout seeds: Soak seeds overnight for quicker germination (great for beans or peas).
Step-by-Step instructions for making seed tape from toilet paper
Here's how to create your own seed tape in minutes—no special tools needed!
🌱 Step 1: Gather Your Materials and Prep the Seeds
You'll need toilet paper (the thinner kind works best), biodegradable glue (like flour paste or a commercial seed tape adhesive), a small bowl, a paintbrush, and your seeds. Spread a thin layer of glue on a flat surface—about ¼ inch wide—and place your seeds every 1-2 inches along the strip. I like to use a toothpick to space them evenly.
Let the glue dry slightly so the seeds stick but don’t dissolve. This prevents them from shifting when you roll the tape. If using flour paste, let it sit for 5-10 minutes until tacky but not wet. Too much moisture will clump the seeds together.
💧 Step 2: Apply the Toilet Paper and Seal the Seeds
Unroll a 4-inch-wide strip of toilet paper and press it gently over the glued seeds. The paper should cover them completely but not overlap too much—leave about ½ inch of clean paper on either side. This keeps the seeds protected while allowing roots to emerge.
Run a second thin layer of glue over the toilet paper to seal the seeds in place. Let it dry for 10-15 minutes before handling. If you’re in a hurry, a hairdryer on low heat speeds up drying without damaging the seeds. Just watch for 1-2 minutes max—you don’t want to overheat them.
✂️ Step 3: Cut and Test for Planting Readiness
Once dry, cut the toilet paper into 4-inch sections, each containing 1-2 seeds. Store them in a cool, dry place until ready to plant. I keep mine in a sealed plastic bag with a damp paper towel to maintain humidity. This prevents the tape from drying out completely before use.
Before planting, do a quick check: press a section gently between your fingers. If it holds its shape but feels slightly flexible, it’s ready. If it crumbles, add a drop of water to the soil before laying the tape down. The goal is for the paper to dissolve naturally as the seeds germinate—no digging required!
☀️ Step 4: Plant Directly in Soil or Water
Lay the seed tape directly into the soil, seeds facing up, and cover lightly with ¼ inch of soil. Water gently to settle the tape and keep the soil moist but not soggy. You’ll see sprouts in 7-14 days, depending on the seed type. The toilet paper breaks down without disturbing young roots.
For faster germination, soak the tape in lukewarm water for 10-15 minutes before planting. This mimics natural rainfall and helps seeds absorb moisture quickly. Just be sure to plant immediately after soaking—don’t let the tape sit wet for long, or it may mold.
Tips & tricks for perfect seed tape from toilet paper
These simple tricks will help you create sturdy, effective seed tapes that actually work every time.
Glue Consistency is Key: The 5-10 minute drying time for flour paste is crucial—it should be tacky but not wet. Test by pressing a finger gently: if it leaves a clean imprint without sticking, it's ready. Too much moisture will make your seeds clump together, and too little won't hold the toilet paper properly. For commercial adhesives, follow package directions exactly since formulations vary.
Toothpick Precision: In Step 1, using a toothpick to space seeds every 1-2 inches creates perfect planting intervals. I've found that marking the glue strip with pencil lines first helps maintain consistency, especially when working with multiple seed types. This spacing prevents overcrowding and makes thinning unnecessary later.
Drying Time Matters: The 10-15 minute drying period after sealing with toilet paper is non-negotiable. For faster drying, use a hairdryer on low heat for just 1-2 minutes—any longer risks overheating the seeds. Test by gently lifting a corner: if it peels up cleanly, it's ready. Over-drying makes the tape brittle, while under-drying causes seeds to shift during storage.
Storage Hack: Store your finished 4-inch sections in a sealed plastic bag with a damp paper towel. This maintains humidity without making the tape soggy. I've kept seed tapes viable for up to 3 months this way, though faster-growing seeds like lettuce should be planted within 2 weeks for best results. The damp towel prevents the toilet paper from drying out completely before planting.
Pro Tips for Seed Tape Toilet Paper
- These simple tricks will help you create sturdy, effective seed tapes that actually work every time.
- Glue Consistency is Key: The 5-10 minute drying time for flour paste is crucial—it should be tacky but not wet. Test ...
- Toothpick Precision: In Step 1, using a toothpick to space seeds every 1-2 inches creates perfect planting intervals....
Frequently asked questions
Got questions about turning toilet paper rolls into seed tape? You’re not alone!
Here are the answers to the most common queries—so you can start planting with confidence and zero waste.
1. How long does it take to make seed tape from toilet paper?
Most DIY seed tape projects take 10–20 minutes for a small batch, depending on your speed and the number of seeds. If you’re a beginner, plan for 30 minutes to account for drying time (let the tape sit for 1–2 hours before planting). Pro tip: Use a hairdryer on low heat to speed up drying!
2. Can I use any type of toilet paper for seed tape?
Yes, but not all rolls are equal. Opt for 100% recycled, unbleached toilet paper—it breaks down faster in soil and avoids harsh chemicals. Avoid thick or quilted rolls, as they’re harder to tear evenly. Bonus: Save rolls from eco-friendly brands like Seventh Generation or Who Gives A Crap!
3. How long does seed tape last before planting?
Store-bought seed tape can last 1–2 years in a cool, dry place, but homemade versions are best planted within 3–6 months. If the tape feels brittle or the seeds lose moisture, plant it ASAP. Pro move: Label your rolls with the seed type and date to track freshness!
4. What’s the best way to plant seed tape?
Simply lay the tape directly on prepared soil (no need to bury it!) and gently press it in. For rows, use a stick or your fingers to create furrows. Water lightly afterward—avoid overwatering, as excess moisture can cause the tape to disintegrate too quickly. Perfect for: Vegetable gardens, flower beds, or even hanging planters!
5. What if my seed tape falls apart in the soil?
Don’t panic! If the tape dissolves too fast, the seeds will still sprout—just plant them a little deeper (¼ inch) for extra support. For stubborn rolls, try soaking the tape in water for 10 minutes before planting to soften it. Troubleshooting tip: Use a thinner toilet paper roll or add a drop of flour paste to strengthen the adhesive.
6. Are there alternatives to toilet paper for seed tape?
Try coffee filters, paper towels, or even brown paper bags (cut into strips). For a zero-waste upgrade, use seed paper made from recycled paper pulp—it’s biodegradable and often sold in bulk. Fun fact: Some gardeners use old book pages for a rustic touch!
Wrapping up and next steps
Transforming old toilet paper into seed tape isn’t just creative—it’s a game-changer for eco-friendly gardening! 🌱 With minimal effort and zero waste, you’ve got a ready-to-plant strip that saves time, reduces clutter, and gives your plants a head start.
Whether you’re a seasoned gardener or just starting out, this simple hack proves that sustainability and convenience can go hand in hand.
Ready to grow your green thumb further? Try experimenting with different seeds or even DIY seed bombs next—your garden (and the planet) will thank you!