
Propagation
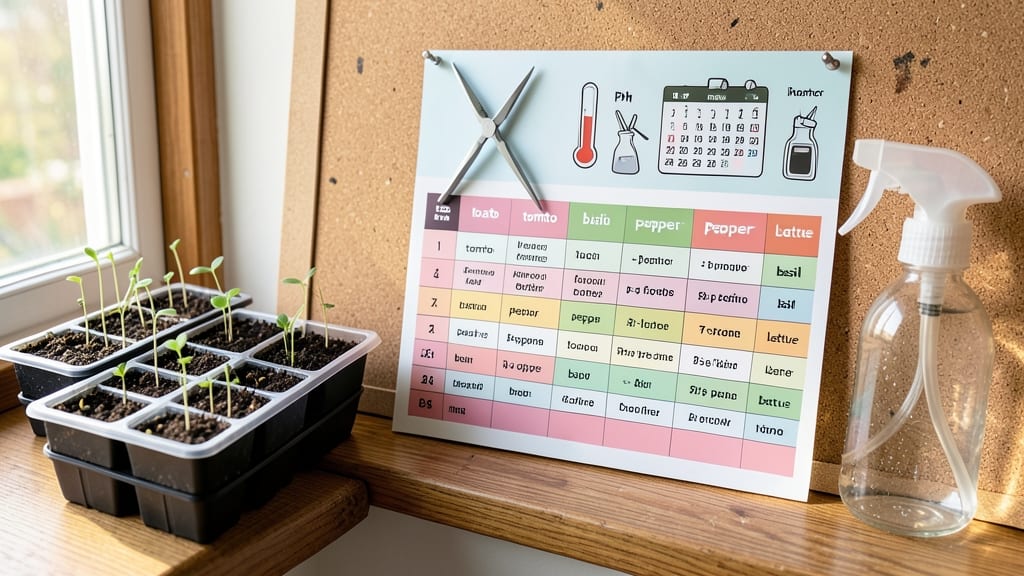
Your seed-starting chart isn’t just a schedule—it’s the secret to avoiding leggy seedlings and bolting greens before harvest. 🌱 I’ve used mine for years to time everything from tomatoes to marigolds perfectly, and the difference in germination success is night-and-day.
The chart works by counting backward from your last frost date, factoring in each plant’s days-to-maturity, so you never rush or delay planting again.
Most charts include key dates like first frost, transplant windows, and ideal indoor starting times for common crops. You’ll need your local frost dates (find them via the USDA zone map), a simple calculator, and a list of your target plants’ maturity timelines.
For example, tomatoes need 60-85 days to fruit, so if your last frost is May 15, you’d start them indoors by March 1—give or take a week for your zone.
What you’ll get is a foolproof system that eliminates guesswork. No more sad, etiolated seedlings or bolting herbs—just strong, healthy starts ready to hit the garden at the perfect moment.
The chart even accounts for regional tweaks, so whether you’re in Zone 3 or Zone 10, you’ll adapt it without stress.
Best part? Once you’ve got your chart, you’ll reuse it every year, adjusting only for frost shifts. Grab a free template in the guide, and let’s turn your seed-starting season from chaotic to shockingly productive.
📚 In This Guide
- What you need
- Instructions
- Tips and common mistakes
- Wrapping up and next steps
What you need
- ● Seeds: Choose high-quality, fresh seeds (check the packet for the days to germination and hardiness zone compatibility). Start with 1–2 packets per variety.
- ● Seed Starting Mix: 10–20 lbs of sterile, lightweight potting mix (avoid garden soil—it’s too dense!). Look for labels like "seed starting" or "organic potting mix."
- ● Containers: Seed trays with cells (50–100 cells) or small pots (2–4 inches in diameter). Aim for 1–2 containers per seed type.
- ○ Optional: Biodegradable pots or peat pellets for easy transplanting.
- ● Grow Lights or Sunny Window: A full-spectrum LED grow light (12–16 inches above seedlings) or a south-facing window with 6+ hours of sunlight daily.
- ● Watering Can or Spray Bottle: A gentle watering tool to avoid disturbing seeds. A spray bottle works great for fine misting!
- ○ Heat Mat (Optional but Helpful): For slow-germinating seeds (e.g., peppers, tomatoes), a heat mat (70–85°F range) speeds up the process.
- ● Plant Labels: Small tags or a label maker to track seed varieties and planting dates.
- ● Trowel or Spatula: A small hand trowel for mixing soil and transplanting.
- ● Misting Bottle: Keeps seeds moist without overwatering.
- ● Thermometer: A soil or air thermometer to monitor temperature (ideal range: 65–75°F for most seeds).
- ● Humidity Dome or Plastic Wrap: Creates a mini greenhouse to retain moisture while seeds germinate.
- ● Seedling Heat Mat: Boosts germination for cool-season crops.
- ● Fertilizer (Low-Dose): A balanced, water-soluble fertilizer (5–10–5 or 10–10–10) for when seedlings sprout.
- ● Grow Tent or Greenhouse: For climate control and protection from pests.
- ● pH Test Kit: Ensures your soil mix is in the ideal range (6.0–7.0 for most seeds).
Instructions: how to use a seed starting chart for perfect timing
Here's how I use a seed-starting chart to plan ahead and avoid the common mistakes that kill seedlings.
📅 Step 1: Determine Your Last Frost Date
Find your local last frost date—this is your anchor point. I always check the USDA Plant Hardiness Zone Map and cross-reference with my local weather station records. For example, in Zone 7, the last frost typically falls around March 15, while Zone 5 waits until May 1. Write this date in your gardening journal or mark it on your chart.
If you're unsure, ask your local extension office or check seed packet instructions—they often include regional planting windows. This date tells you when seedlings can safely move outdoors, and working backward from it ensures you start seeds at the perfect time. I like to add a 2-3 week buffer to account for unpredictable spring weather.
🌱 Step 2: Calculate Backward from Transplant Time
Most seedlings need 4-8 weeks indoors before transplanting, depending on the plant. Cool-season crops like lettuce or spinach can handle 3-4 weeks, while warm-season plants like tomatoes or peppers need 6-8 weeks. Use your chart to subtract these weeks from your last frost date—this gives you the ideal starting window.
For example, if your last frost is April 15 and you're growing tomatoes (which need 8 weeks), start them around February 15. I always highlight this window in yellow on my chart so I don’t miss it. Pro tip: Add a 1-2 week range to your starting window—this accounts for germination delays if your home runs cooler or if you’re using slower-starting organic seeds.
☀️ Step 3: Adjust for Light and Heat Requirements
Not all seeds germinate the same way. Some, like basil or parsley, thrive in 65-75°F soil and sprout in 5-10 days, while others, like snapdragons, need 70-80°F and take 14-21 days. Your chart should include these specifics—use them to fine-tune your timing.
If you’re using a seedling heat mat, you can push starting dates earlier by 5-7 days since it maintains optimal soil temps. But if your home stays cool, delay starting by 1-2 weeks or use a grow light to compensate. Watch for the first true leaves (not the initial seed leaves) to appear—this confirms germination success and helps you track progress against your chart.
⏰ Step 4: Plan for Seasonal Light Changes
Daylight hours shrink in winter and expand in spring. If you’re starting seeds in short-day winter months, you’ll need a grow light to provide 14-16 hours of light daily. Use your chart to note when natural light increases—once days hit 12+ hours, you can rely more on sunlight.
Leggy seedlings are a red flag—they’re stretching for light. If you see this, move your trays closer to the light source or adjust your grow light height to 2-4 inches above the plants. I mark my chart with light adjustments so I don’t forget to tweak setups as seasons shift.
🌿 Step 5: Harden Off and Transplant on Schedule
Two weeks before your target transplant date, begin hardening off seedlings. Gradually increase their outdoor time from 1 hour to full sun exposure over 10-14 days. Your chart should include a hardening-off schedule aligned with your last frost date.
Transplant on a cool, overcast day to reduce shock. Water deeply at the base to encourage root establishment. If you’ve followed your chart, your seedlings will be 3-4 inches tall with 3-4 true leaves—perfect for the garden. I always circle the transplant date on my chart and add notes about weather conditions that day for future reference.
Tips & tricks for perfect seed starting timing
A seed starting chart isn't just a schedule—it's your secret weapon for avoiding the most common gardening pitfalls. Here's what I've learned from years of trial and error.
Visual Cues Matter: In Step 1, when determining your last frost date, don't rely solely on averages. Check your local weather station's 10-year records for actual frost dates in your area. I always cross-reference with my neighbors' experiences too—some microclimates can have frost weeks earlier or later than official records. Mark your chart with both the average and the earliest recorded frost date for your zone.
Flexible Timing is Key: The 4-8 week range in Step 2 is your safety net. For example, if you're growing peppers (which need 8 weeks), start your first batch 2 weeks early as a backup. That way, if your first batch struggles with damping off or slow germination, you still have healthy seedlings ready. I keep a second tray of seeds in reserve for exactly this reason.
Light Adjustments: When planning for seasonal light changes in Step 4, remember that grow lights don't need to run continuously. For most seedlings, 14-16 hours of light is sufficient, but you can actually reduce this to 12 hours once seedlings are established (after the first true leaves appear). This gives you more flexibility with your schedule while still preventing leggy growth.
Harden Off Strategically: In Step 5, when hardening off seedlings, I've found that starting with just 1 hour of outdoor exposure is perfect—but only if your seedlings are healthy and strong. If they're weak from poor light or disease, begin with just 30 minutes and gradually increase. Also, harden off in the morning when temperatures are cooler and UV levels are lower to reduce stress.
Pro Tips for Seed Starting Chart
- A seed starting chart isn't just a schedule—it's your secret weapon for avoiding the most common gardening pitfalls.
- Visual Cues Matter: In Step 1, when determining your last frost date, don't rely solely on averages.
- Flexible Timing is Key: The 4-8 week range in Step 2 is your safety net.
Frequently asked questions
about seed starting charts can help clarify timing, techniques, and troubleshooting. Here are some common queries to guide your journey to a thriving garden!What’s the best time to start seeds indoors vs. outdoors?
Indoor starting depends on your last frost date—check your seed starting chart for specific varieties (e.g., tomatoes 6–8 weeks before frost). Outdoors, sow cold-hardy seeds (like peas or spinach) 2–4 weeks before the last frost, while tender plants (e.g., basil) wait until soil warms to 60°F+.
How do I adjust for my specific climate zone?
Use a seed starting chart tailored to your USDA zone (e.g., Zone 5 vs. Zone 10). For cooler zones, start seeds earlier indoors; in warmer zones, extend outdoor sowing or use shade cloth. Local nurseries or extension offices offer zone-specific guidance.
What if I miss the ideal starting window?
Don’t panic! Slow growers (like broccoli) can handle a later start, while fast growers (radishes) may need to be direct-sown. For missed deadlines, try succession planting, transplanting larger seedlings, or opting for bolt-resistant varieties.
Can I use a seed starting chart for heirloom or rare seeds?
Yes! While charts focus on common varieties, heirloom seeds often follow similar timing. Check seed packets for days-to-maturity (e.g., 60–90 days) and adjust your chart accordingly. Rare seeds may need extra warmth or light—monitor closely!
My seeds aren’t germinating—what’s wrong?
First, verify moisture, temperature, and light (most seeds need warmth + indirect light). Damaged or old seeds may fail—test a few in damp paper towels. If using a chart, double-check soil depth (too deep = no sprouts) and species-specific needs (e.g., lettuce prefers surface sowing).
Wrapping up and next steps
Mastering your seed starting chart is the first step to a thriving garden—one that rewards you with vibrant blooms and bountiful harvests! 🌱 By aligning your planting dates with seasonal cues, you’ll boost germination rates and set your seedlings up for success.
Now that you’re armed with the right timing, it’s time to roll up your sleeves and get growing—whether you’re a seasoned gardener or just starting out.
Your next logical step? Grab your seeds, tools, and a calendar—then dive into planting! Track your progress with your newfound chart, and soon, you’ll be watching tiny sprouts transform into lush, healthy plants. Happy gardening! 🌿