
Propagation
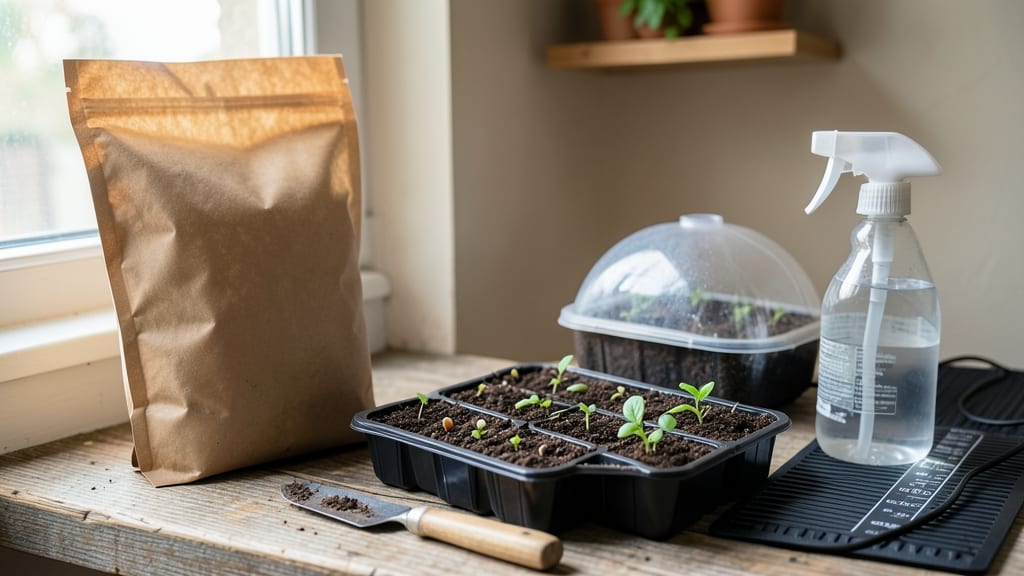
Sun Gro seed starting mix turns my seed-starting failures into foolproof success every time. 🌱 The lightweight loam creates the perfect environment for seeds to germinate quickly and seedlings to grow strong roots without the risk of damping-off.
I start by filling seed trays or small pots with the mix—no need to amend it—then water it until it’s damp like a wrung-out sponge. The mix stays fluffy enough to avoid compacting while holding moisture where seeds need it most.
For larger seeds like beans or peas, I mix in a little perlite for extra aeration. Within 5-7 days, you’ll see those first green shoots pushing through, and the seedlings grow with bold, sturdy stems instead of leggy, weak ones.
The mix even helps prevent the dreaded fungal issues that kill so many early starts. When it’s time to transplant, the mix breaks down easily, so seedlings slide out intact. I’ve used this for tomatoes, peppers, and even delicate herbs—it’s the secret to my consistently strong starts every season.
📚 In This Guide
- What you need
- Instructions
- Tips and common mistakes
- Wrapping up and next steps
What you need
- ● Sun Gro Seed Starting Mix – 1-2 cubic feet (or enough to fill your seed trays). Opt for the lightweight, peat-based blend for optimal drainage and aeration.
- ● Seed trays or containers – 4-6" deep, with drainage holes (plastic, biodegradable pots, or seedling flats).
- ● Seeds – Choose high-quality, fresh seeds for best germination rates.
- ● Watering can or spray bottle – A fine mist setting prevents compacting the mix.
- ● Trowel or scoop – For evenly distributing the mix into trays.
- ● Labeling tags & marker – Keep track of seed varieties and planting dates!
- ● Heat mat – Speeds up germination for slow starters (like peppers or tomatoes).
- ● Grow lights or sunny windowsill – Ensures seedlings get 12-16 hours of light daily.
- ● Humidity dome or plastic wrap – Retains moisture for delicate seeds.
- ● Fertilizer (balanced, water-soluble) – Diluted to half-strength after seedlings sprout.
- ● Perlite or vermiculite – Mix in for extra aeration if your mix feels too dense.
How to use Sun Gro seed starting mix for fast germination
This is the lightweight loam that professional growers trust for quick, healthy starts—here's how to use it right.
🌱 Step 1: Prepare Your Containers and Mix
Fill your seed-starting containers with the Sun Gro mix—it's pre-sterilized and designed to drain perfectly without compacting. I like to use 4-inch cell trays for most seeds because they give roots enough room while keeping the mix moist. Tap the tray gently on the table to settle the mix evenly, but don't pack it down. The goal is a fluffy texture that holds moisture but lets air circulate.
Sun Gro's lightweight formula means it won't stay clumpy like garden soil. If you notice any lumps after filling, run a small fork through the mix to break them up. This ensures seeds get consistent contact with moisture and warmth, which is critical for fast germination. I always pre-moisten the mix until it feels like a wrung-out sponge—damp but not dripping.
💧 Step 2: Sow Seeds at the Right Depth
Most seeds germinate best when planted at a depth equal to 2-3 times their diameter. For tiny seeds like lettuce or petunias, a light press into the surface works. For larger seeds like beans or peas, aim for about ½ inch deep. I use a toothpick to create small holes—it's more precise than just dropping seeds on top.
Cover the seeds lightly with additional mix, then mist the surface with water until it looks evenly damp. Don't soak it—you'll see the top layer darken slightly, but it shouldn't form puddles. Sun Gro's formula holds moisture well, so you won't need to water again until you see the top ¼ inch feel dry to the touch. This prevents the common mistake of overwatering, which can drown seeds before they sprout.
☀️ Step 3: Provide Warmth and Light for Speed
Place your trays in a warm spot—70-75°F is ideal for most seeds. I use a seedling heat mat under my trays, which keeps the soil consistently warm and speeds germination by 30-50%. You'll notice the first sprouts appear faster than with regular soil because Sun Gro's lightweight structure lets roots establish quickly.
Once seeds sprout, move them to bright light immediately—a south-facing window or grow light within 2-3 inches of the seedlings. Without enough light, seedlings stretch toward the source (called "legginess"), and they'll never recover. You'll know they're getting enough light when the leaves are dark green and compact, not pale and spaced far apart.
🌿 Step 4: Maintain Moisture Without Overwatering
Sun Gro's formula stays moist longer than other mixes, but it's not waterproof. Check the top ¼ inch daily—if it feels dry, water gently from the bottom by placing the tray in ½ inch of water for 10 minutes. This method keeps the soil evenly damp without disturbing the seedlings. Avoid overhead watering after germination, as wet leaves invite fungal diseases.
When seedlings develop their first true leaves (not the initial seed leaves), it's time to thin if needed. Sun Gro's lightweight nature makes transplanting easier—just slide seedlings out without breaking the root ball. This is where the mix really shines: roots stay intact, and the seedlings bounce back faster than in heavier soils.
Tips & tricks for perfect seed starting with Sun Gro mix
These little tweaks will help you get the fastest, healthiest starts every time with Sun Gro's lightweight loam.
Mix Texture Matters: In Step 1, when you're filling your 4-inch cell trays, resist the urge to pack the mix down—Sun Gro's lightweight formula needs to stay fluffy for proper aeration. I find using a small hand fork to gently break up any lumps creates the perfect environment. The mix should feel like a damp sponge, not mud. This texture ensures roots can breathe while holding just enough moisture for quick germination.
Precision Planting: For Step 2, when sowing seeds at 2-3 times their diameter, I swear by using a toothpick to create precise planting holes. This is especially helpful for tiny seeds like lettuce or petunias. The toothpick creates just enough space without disturbing the delicate mix structure. After planting, I like to use a spray bottle for misting—it gives me better control than pouring water directly on the seeds.
Light Monitoring: In Step 3, when you move your sprouted seedlings to bright light, place a small ruler or measuring tape next to your trays. This helps you maintain that crucial 2-3 inch distance from grow lights. I notice the seedlings grow most compactly when they're this close—any farther and they'll stretch toward the light. Check the leaf color daily: dark green and compact means you're nailing the light balance.
Watering Wisdom: For Step 4's moisture maintenance, I've found the bottom-watering method works best with Sun Gro's formula. Place your tray in ½ inch of water for exactly 10 minutes—no more, no less. This prevents the top ¼ inch from staying soggy while ensuring even moisture throughout. I set a timer on my phone to avoid overwatering, which is the #1 cause of seedling failure with this mix.
Pro Tips for Sun Gro Seed Starting Mix
- These little tweaks will help you get the fastest, healthiest starts every time with Sun Gro's lightweight loam.
- Mix Texture Matters: In Step 1, when you're filling your 4-inch cell trays, resist the urge to pack the mix down—Sun ...
- Precision Planting: For Step 2, when sowing seeds at 2-3 times their diameter, I swear by using a toothpick to create...
Frequently asked questions
What’s the best time to start seeds in Sun Gro Seed Starting Mix?
The ideal time depends on your climate and plant type! For most vegetables, start 6–8 weeks before the last frost. Check your seed packet for specific guidelines—Sun Gro’s lightweight mix works well for early starts, even indoors under grow lights.
Can I reuse Sun Gro Seed Starting Mix after germination?
Not recommended! This mix is designed for short-term use (until seedlings sprout). After germination, transplant seedlings into a more nutrient-rich soil blend. Reusing it risks compaction, poor drainage, and fungal growth.
How do I troubleshoot slow or no germination?
Slow germination often stems from moisture, warmth, or light issues. Check:
- Keep soil consistently moist (not soggy).
- Use a heat mat (70–85°F) for slower germinators.
- Ensure proper light (grow lights or sunny window).
- Verify seed viability—test with a damp paper towel.
Is Sun Gro Seed Starting Mix better than regular potting soil?
Sun Gro’s formula is lighter, faster-draining, and sterile, promoting quick root growth. Regular potting soil can be too dense, retain excess moisture, and harbor pathogens. It’s the gold standard for seed starting—ideal for delicate seedlings!
What’s a good alternative if I can’t find Sun Gro?
Look for seed-starting mixes with similar traits: peat/coir-based, perlite, and vermiculite. Brands like FoxFarm Seedling Mix or Black Gold Seedling Mix are solid backups. Avoid garden soil—it’s too heavy and may contain weeds/seeds!
Wrapping up and next steps
Starting seeds with Sun Gro Seed Starting Mix is your ticket to a thriving garden—fast germination, strong seedlings, and minimal fuss! 🌱 This lightweight, nutrient-rich blend makes the process easier than ever, whether you're a beginner or a seasoned green thumb.
With the right setup and care, you’ll be ready to transplant confidently in no time.
Now that you’re armed with the know-how, grab your mix and start sowing! Keep track of your progress, adjust conditions as needed, and soon you’ll be reaping the rewards of your hard work. Happy growing! 🌿