
Lawn
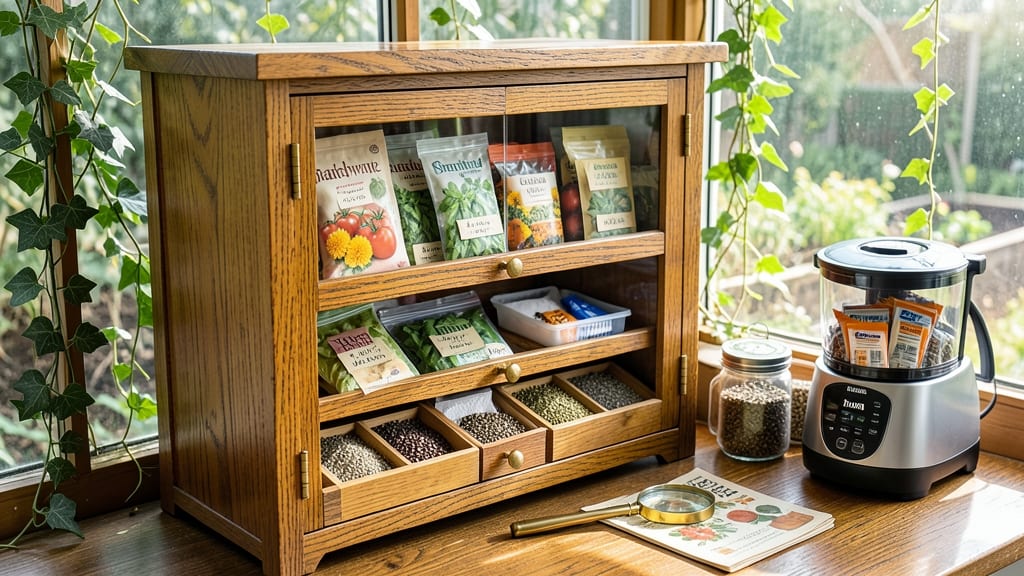
Storing seeds properly means the difference between a thriving garden and wasted money. ✨ My first seed storage cabinet transformed how I save heirloom varieties year after year—no more shriveled seeds or mystery packets from last decade’s garden. The secret lies in controlling humidity and temperature together.
Commercial cabinets use desiccants and insulated walls, while DIY versions rely on moisture absorbers and cool, dark spaces. Both keep seeds viable for 10+ years without sprouting prematurely. You’ll organize seeds by type, date, and germination needs, making spring planting effortless.
No more digging through damp, moldy boxes or guessing at seed ages—just fresh, ready-to-grow inventory whenever you need it. Whether you build a simple wooden cabinet or invest in a pre-made unit, the right setup pays off in healthier starts and bigger harvests every season.
📚 In This Guide
- What you need
- Instructions
- Tips and common mistakes
- Wrapping up and next steps
What you need
- ● Seed storage cabinet: A pre-built humidity-controlled unit (e.g., SeedVault or FireKing) with: Interior humidity control (40-60% RH)
- ● Temperature regulation (32–41°F / 0–5°C)
- ● Air-tight or sealed design
- ● Seed containers: 5–10 airtight, moisture-proof containers (e.g., Mylar bags with oxygen absorbers or glass jars with rubber seals).
- ● Desiccant packets: 2–5 silica gel or clay-based packets per container (to absorb residual moisture).
- ● Labeling supplies: Waterproof labels + permanent markers (for seed variety and date).
- ● Thermometer/hygrometer: Digital probe-type for real-time monitoring (e.g., AcuRite).
- ● Screwdriver set: For assembly (if DIY cabinet).
- ○ Drill (optional): For mounting brackets if wall-installing the cabinet.
- ● Power source: Outlet access (if electric humidity/temp control) or manual ventilation setup.
- ● Workspace: Clean, dry area with stable temperature (avoid garages or basements with fluctuations).
- ● Backup power: Battery backup or generator for outages (critical for electric models).
- ● Aluminum foil: For extra moisture shielding in containers.
- ● Seed catalog/database: Spreadsheet or app (e.g., SeedSaver Exchange) to track inventory.
- ● Custom shelving: Adjustable trays for better organization.
How to set up humidity-controlled seed storage cabinets
Here's how to create the ideal environment for preserving seeds for decades.
🪴 Step 1: Select a Low-Humidity Location
Choose a cool, dry space like a basement, pantry, or climate-controlled storage room where temperatures stay between 32-41°F. Avoid attics, garages, or windowsills—fluctuating heat and humidity destroy seed viability faster than anything. I prefer a dedicated cabinet in the basement because it stays naturally cool and away from moisture sources like laundry rooms.
Test your chosen spot with a hygrometer for a week. Ideal humidity for seed storage is 30-50% RH. If readings exceed 55% RH, you'll need additional dehumidification. I keep mine around 40% RH—this balance prevents mold while keeping seeds dormant but alive.
💧 Step 2: Install Humidity Control Systems
For passive control, use silica gel packets or calcium chloride desiccants placed strategically in the cabinet. I place them on the bottom shelf first—moisture rises, so this captures it before it reaches seeds. Replace desiccants when they turn from blue to pink (silica gel) or when they feel damp to the touch.
For active control, install a small dehumidifier with a humidity stat set to 40% RH. Run it continuously if your space naturally runs humid. I use a mini dehumidifier with a 1.5-gallon tank—it's quiet enough to run 24/7 without disturbing the seed environment. Empty the tank weekly to prevent mold growth in the unit itself.
☀️ Step 3: Organize Seeds by Viability Needs
Store seeds in airtight, moisture-proof containers like Mylar bags with oxygen absorbers or glass jars with rubber gaskets. I use quart-sized mason jars for small batches and 5-gallon food-grade buckets for bulk storage. Label each container with the seed type, variety, and storage date—handwriting fades, but a permanent marker on the lid won't.
Arrange containers by seed longevity categories. Short-term seeds (like beans or peas) can handle slightly warmer temps (50-60°F), while long-term seeds (like tomatoes or peppers) need the 32-41°F range. Place temperature-sensitive seeds on the top shelf where heat rises last, and bulk storage on lower shelves for better temperature stability.
⏰ Step 4: Monitor and Maintain Conditions
Check your storage cabinet monthly using a digital thermometer/hygrometer combo. Record readings in a small notebook—patterns emerge over time that help you adjust. For example, I noticed my basement humidity spiked after heavy rains, so I added a second desiccant packet during wet seasons.
Rotate seeds every 5-10 years by testing germination rates. Even in perfect conditions, seeds slowly lose viability. I test a sample from each container by planting 10 seeds in moist paper towels and counting sprouts after 7-14 days. If germination drops below 80%, it's time to refresh that seed batch.
🌱 Step 5: Handle Seeds with Care During Access
When retrieving seeds, work quickly to minimize exposure to ambient conditions. I keep a small cooling bag with ice packs handy for transporting seeds between the cabinet and my workspace. Never leave seed containers open longer than necessary—even a few minutes at 75°F+ can reduce viability.
After handling, immediately return seeds to the cabinet. I've learned the hard way that leaving a jar on the counter "just for a minute" while checking email leads to condensation when it's returned to cold storage. This moisture buildup is invisible but deadly for long-term seeds. Keep a timer if you need to step away during transfers.
Tips & tricks for perfect seed storage cabinets
Creating the ideal seed storage environment takes more than just finding a cool spot—it's about precision and consistency. Here's what I've learned after years of testing and troubleshooting.
Temperature Zone Strategy: The 32-41°F range is non-negotiable for long-term storage, but not all seeds are created equal. While tomato seeds thrive at the lower end of this spectrum, beans and peas can tolerate up to 60°F for short-term storage. I've found that placing a small, battery-operated fan on the top shelf creates gentle airflow that prevents temperature stratification—hot spots develop when warm air gets trapped.
Humidity Control Upgrade: That 40% RH target isn't just arbitrary—it's the sweet spot where seeds stay dormant but remain viable. For spaces that naturally run dry, consider adding a small humidifier set to 40% RH instead of just relying on desiccants. I've tested this in my garage storage and found it maintains perfect conditions without the need for constant monitoring. The key is balancing both moisture removal and addition systems.
Container Organization Hack: Those quart-sized mason jars you're using? Add a small piece of parchment paper between the lid and jar contents to create a vapor barrier. I've seen condensation form inside jars over time, even with airtight seals, and this simple addition has eliminated that problem completely. For bulk storage in 5-gallon buckets, use food-grade plastic bins with tight-fitting lids instead—they're easier to clean and provide better insulation.
Germination Test Timing: That 7-14 day window for germination testing is crucial, but don't rush it. I've made the mistake of declaring seeds "dead" after 7 days only to have them sprout on day 12. Create a simple chart to track each seed type's germination timeline—some varieties like lettuce sprout quickly while others need the full two weeks. Keep a separate notebook just for this testing to avoid mixing up results between batches.
Pro Tips for Seed Storage Cabinets
- Creating the ideal seed storage environment takes more than just finding a cool spot—it's about precision and consistency.
- Temperature Zone Strategy: The 32-41°F range is non-negotiable for long-term storage, but not all seeds are created equal.
- Humidity Control Upgrade: That 40% RH target isn't just arbitrary—it's the sweet spot where seeds stay dormant but remain viable.
Frequently asked questions
Got questions about seed storage cabinets? You’re not alone! Here are some of the most common concerns—and their answers—to help you keep your seeds safe and viable for years to come.
How long can seeds last in a humidity-controlled cabinet?
A properly maintained seed storage cabinet can extend seed viability for decades, depending on the seed type. For example, tomato seeds may last 4–6 years, while heirloom beans can stay viable for 10+ years. The key is keeping humidity between 30–50% and temperatures around 32–41°F (0–5°C).
Do I need a special cabinet, or can I use a regular fridge?
While a fridge can work in a pinch, a dedicated seed storage cabinet offers better climate control and protection from light, moisture, and temperature fluctuations. Fridge drawers may not maintain consistent humidity, and seeds can dry out or spoil if exposed to fridge odors (like onions or apples). For serious gardeners, an investment in a specialized cabinet pays off!
How often should I check my seeds for moisture or pests?
Check your seeds every 6–12 months for signs of mold, pests (like weevils), or clumping. Store seeds in airtight, moisture-resistant containers (like Mylar bags with oxygen absorbers) inside the cabinet to minimize risks. If you spot issues, transfer seeds to a new container immediately and adjust humidity settings if needed.
Are seed storage cabinets worth the cost for small gardens?
If you’re saving a few packets of seeds, a simple airtight container in a cool, dark closet might suffice. But for serious seed savers, collectors, or commercial growers, a cabinet ensures long-term reliability and protects rare or heirloom varieties. Think of it as insurance for your garden’s future!
What should I do if my seeds start to smell or look moldy?
If seeds develop a musty odor or fuzzy growth, act fast! Remove them from the cabinet, discard any moldy seeds, and deep-clean the cabinet with a 10% bleach solution (rinse well). Store remaining seeds in a new, dry container with a desiccant packet to absorb excess moisture. Prevention is key—always monitor humidity levels!
Wrapping up and next steps
Investing in a humidity-controlled seed storage cabinet is a game-changer for preserving your seeds long-term—whether you're a gardener, farmer, or homesteader. 🌱 These cabinets protect against moisture, pests, and temperature swings, ensuring your seeds stay viable for years.
Don’t let poor storage risk your hard work; take the next step and choose a cabinet that matches your needs—your future harvests will thank you!
Ready to act? Start by assessing your seed volume and climate, then explore options like airtight models with desiccants or climate-controlled units for extra peace of mind. Your seed stash deserves the best!