
Lawn
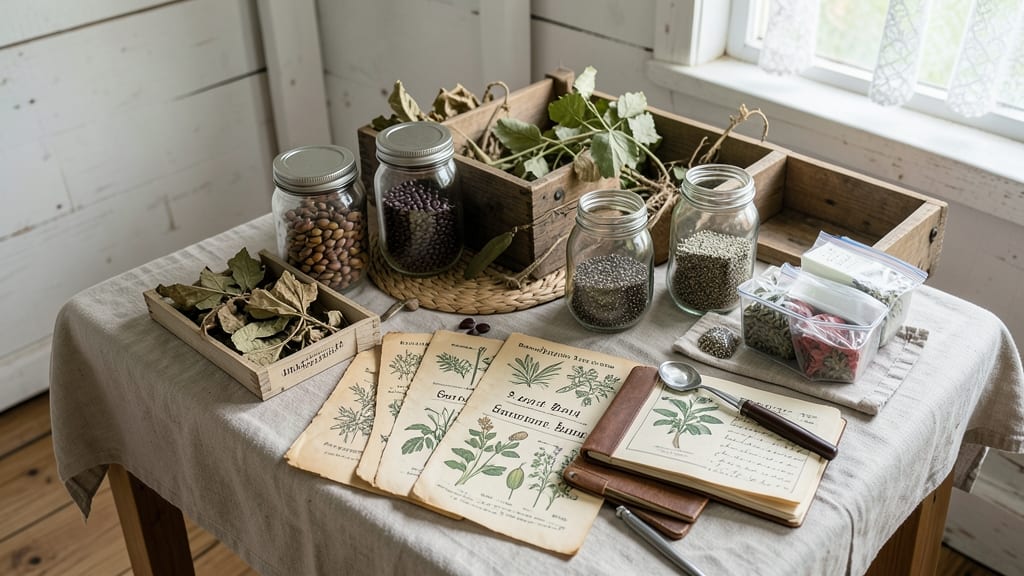
Saving seeds from your garden isn’t just about replanting—it’s about preserving the future of heirloom varieties. 🌱 The Seed Savers Exchange connects gardeners worldwide to protect genetic diversity, offering free resources, seed libraries, and a community dedicated to keeping open-pollinated plants alive.
What starts as a simple harvest can become a legacy for future generations.
Here’s the best part: you don’t need fancy equipment. A paper bag, a dry spot, and a little patience are all it takes to collect seeds from tomatoes, beans, or marigolds.
The Exchange provides step-by-step guides for beginners, so even if you’ve never saved seeds before, you’ll end up with viable, homegrown stock for next year’s garden.
Imagine opening a packet of seeds you grew yourself, knowing they’re adapted to your climate and free from corporate patents. You’ll save money, reduce waste, and grow plants that thrive in your unique conditions—no store-bought hybrids required. Plus, sharing seeds with others keeps these varieties alive for decades.
Whether you’re a backyard gardener or a small-scale farmer, this practice builds resilience in our food system. Start with one easy crop, like heirloom tomatoes or zinnias, and join a movement that’s rewriting the rules of gardening—one seed at a time.
📚 In This Guide
- What you need
- Instructions
- Tips and common mistakes
- Wrapping up and next steps
What you need
- ● Heirloom Seeds: Purchase or trade seeds from blank" rel="noopener noreferrer">Seed Savers Exchange—aim for 10–20 varieties to start (e.g., tomatoes, beans, peppers, herbs). Pro tip: 💡 Store seeds in a cool, dry place (50–70°F) in airtight containers.
- ● Seed Envelopes or Paper Bags: 50+ small, labeled envelopes or breathable bags (e.g., 3x5” or kraft paper). Pro tip: ✨ Use a permanent marker to jot seed names, varieties, and harvest years.
- ● Drying Trays or Paper Towels: Flat surfaces (like wire racks or cardboard) to dry seeds evenly. Avoid plastic—it traps moisture!
- ● Fine-Mesh Sieve or Sifter: A 1–2 mm mesh to separate seeds from chaff (e.g., tomato or pepper seeds).
- ● Storage Containers: Airtight jars (e.g., mason jars with silicone seals) or vacuum-sealed bags for long-term preservation.
- ○ Label Printer or Stickers: For permanent seed IDs (optional but handy!).
- ● Notebook or Digital Tracker: To log seed varieties, germination rates, and growing conditions.
- ● Humidity Packs: Silica gel packets for extra-dry storage environments.
- ● Germination Test Kits: Small pots or paper towels to test seed viability before planting.
- ● Seed Catalogs or Apps: For tracking seed swaps and community updates (e.g., blank" rel="noopener noreferrer">Seed Savers Exchange’s database).
- ● Garden Journal: Sketch plant growth stages, pests, or weather notes for future reference.
Step-by-step guide to preserving heirloom seeds for the seed Savers Exchange
Here's how to ensure your heirloom seeds stay viable year-round for future exchanges.
🌱 Step 1: Harvest Seeds at Peak Maturity
Collect seeds only when plants reach their full maturity—never before. For example, tomatoes should be left on the vine until they're completely soft and wrinkled, while beans are ready when pods turn fully brown and begin splitting open. I always wait until the first frost threatens; this guarantees maximum seed viability.
Use clean, dry hands or sterilized scissors to harvest. Place seeds in a paper bag (not plastic) to prevent moisture buildup. Label each bag immediately with the plant variety and harvest date—this prevents mix-ups when you're ready to package seeds for the exchange. If seeds are still moist, spread them on a screen or paper towel in a dry, shaded spot for 1-2 days to dry completely.
🌿 Step 2: Dry and Store Seeds Properly
Once seeds are fully dry, transfer them to labeled envelopes or small glass jars. Store them in a cool, dark place with consistent humidity—ideal conditions are 50-60% relative humidity and 35-45°F. I keep mine in the back of my refrigerator, where temperature and moisture stay stable year-round.
For long-term storage, add a small packet of silica gel or a moisture absorber to the container. Test seed viability annually by planting a small batch—if germination rates drop below 80%, it's time to refresh your stash. Properly stored heirloom seeds can last 5-10 years, depending on the variety, but regular checks ensure you're always ready for exchanges.
⏰ Step 3: Test Viability Before Exchanges
About 4-6 weeks before you plan to participate in the Seed Savers Exchange, conduct a germination test. Place 10 seeds from each variety between damp paper towels in a sealed plastic bag. Keep them in a warm spot (70-75°F) and check daily for sprouts. Count how many germinate within 7-10 days—this gives you a clear viability percentage.
If germination drops below 75%, consider saving fresh seeds from this year's harvest or sourcing new ones from trusted exchange members. Document your test results alongside your seed packets; this transparency builds trust within the exchange community and helps others assess the quality of seeds they receive.
📦 Step 4: Package Seeds for Exchange
Use #10 envelopes or small glassine bags for individual seed varieties. Include a handwritten label with the variety name, year saved, growing days to maturity, and any special notes (e.g., "drought-tolerant" or "requires trellis"). I also add a brief growing tip—like "direct sow after last frost"—to help fellow gardeners succeed with the seeds.
For bulk exchanges, organize seeds by category (vegetables, flowers, herbs) and include a master list with all varieties, quantities, and care instructions. Mail seeds during cool months (fall or spring) to prevent heat damage, and always use tracked shipping to ensure safe delivery. The Seed Savers Exchange thrives on generosity, so include a handwritten note thanking recipients for their part in preserving biodiversity.
Tips & tricks for perfect heirloom seed preservation
Mastering seed viability takes patience—but these insider tricks will help you avoid common pitfalls and maximize your harvest's potential.
Harvest Timing is Everything: The first frost isn't just a signal to harvest—it's your deadline. For tomatoes, wait until they're completely soft and wrinkled, not just slightly ripe. For beans, pods should turn fully brown and begin splitting open naturally. I've learned the hard way that harvesting too early means lower germination rates later. Use a small notebook to track when each variety reaches peak maturity—this becomes your future reference guide.
Drying Secrets for Maximum Viability: When seeds are still moist after harvest, resist the urge to rush drying. Spread them on a screen or paper towel in a dry, shaded spot for the full 1-2 days specified. The key is patience—proper drying prevents mold while preserving the seed's natural oils. I like to place my drying trays near a dehumidifier to control humidity levels, especially in humid climates. Remember, seeds dry faster in warm conditions, so adjust your drying time accordingly.
Storage Environment Matters More Than You Think: While the ideal storage temperature is 35-45°F, the real game-changer is humidity control. I've seen seeds stored at perfect temperatures spoil because of excess moisture. Use a small packet of silica gel or a moisture absorber in your storage containers, and consider adding a digital hygrometer to monitor humidity levels. The back of your refrigerator is perfect, but if you don't have that option, a cool basement or root cellar works well too—just avoid areas prone to temperature fluctuations.
Germination Test Precision: When conducting your 4-6 weeks pre-exchange viability test, precision matters. Use exactly 10 seeds per variety and maintain consistent conditions—same temperature, same moisture level, same light exposure. I've found that using a clear plastic bag with a twist-tie creates a perfect mini-greenhouse effect while keeping the seeds moist. Record your results not just as a percentage, but also note any variations between seed varieties—this helps you identify which types need more careful storage conditions.
Pro Tips for Seed Savers Exchange
- Mastering seed viability takes patience—but these insider tricks will help you avoid common pitfalls and maximize you...
- Harvest Timing is Everything: The first frost isn't just a signal to harvest—it's your deadline. For tomatoes, wait u...
- Drying Secrets for Maximum Viability: When seeds are still moist after harvest, resist the urge to rush drying. Sprea...
Frequently asked questions
Got questions about maximizing your seed-saving success with Seed Savers Exchange? You’re not alone! Here are answers to the most common queries—from timing to troubleshooting—so you can keep your heirloom harvest thriving year-round.
What’s the best time of year to save seeds from my garden?
Timing depends on the plant! For most vegetables, harvest seeds when the pods dry out but before they shatter (e.g., beans, peas, or tomatoes). Leafy greens like lettuce or spinach should be saved from mature, bolted plants. Pro tip: Check the Seed Savers Exchange database for variety-specific guidelines—some seeds need cold stratification or other tricks!
How long can I store seeds from Seed Savers Exchange before they lose viability?
Most heirloom seeds stay viable for 3–5 years if stored properly (cool, dark, and dry). Some, like beans or peas, may last longer, while others (like onions) degrade faster. Test germination every 1–2 years by planting a few seeds—if <70% sprout, it’s time to refresh your stash! Seed Savers Exchange offers tips on long-term storage.
Can I save seeds from hybrid plants, or do I need to stick to heirlooms?
Hybrid seeds (like F1 tomatoes) often won’t grow true to their parent plant, leading to disappointing results. Heirlooms are the gold standard for seed saving because their traits stay consistent. Seed Savers Exchange specializes in open-pollinated heirlooms—your best bet for reliable, year-after-year harvests!
How do I prevent cross-pollination when saving seeds from flowers or veggies?
Isolation is key! For wind-pollinated plants (like corn or wheat), space varieties by at least 100 feet. For insect-pollinated plants (tomatoes, peppers), use row covers or hand-pollinate with a paintbrush. Label everything and keep detailed records—Seed Savers Exchange even provides pollination charts for tricky crops!
My seeds sprouted mold or bugs—what went wrong?
Mold or pests usually mean high humidity or poor storage. Always use airtight, moisture-resistant containers (like glass jars with silica packets) and store seeds in a cool pantry or fridge. If bugs strike, freeze seeds for 48 hours to kill larvae, then reseal. Prevention tip: Add a deseiccant packet to your seed packets for extra protection.
Wrapping up and next steps
Joining the Seed Savers Exchange isn’t just about preserving heirloom seeds—it’s a celebration of sustainability, community, and self-sufficiency! 🌱 Whether you’re a seasoned gardener or a curious beginner, this blueprint empowers you to grow, save, and share seeds year-round.
Your next step? Pick a few heirloom varieties, connect with local seed savers, and start your own legacy—one seed at a time!
🌟 Ready to Grow?
- 📅 Plan your first harvest—start small with easy-to-save seeds like tomatoes or beans!
- 🌍 Explore the Seed Savers Exchange catalog or local seed libraries for inspiration.
- 🤝 Share your journey—tag #SeedSaversExchange and inspire others to join!