
Lawn
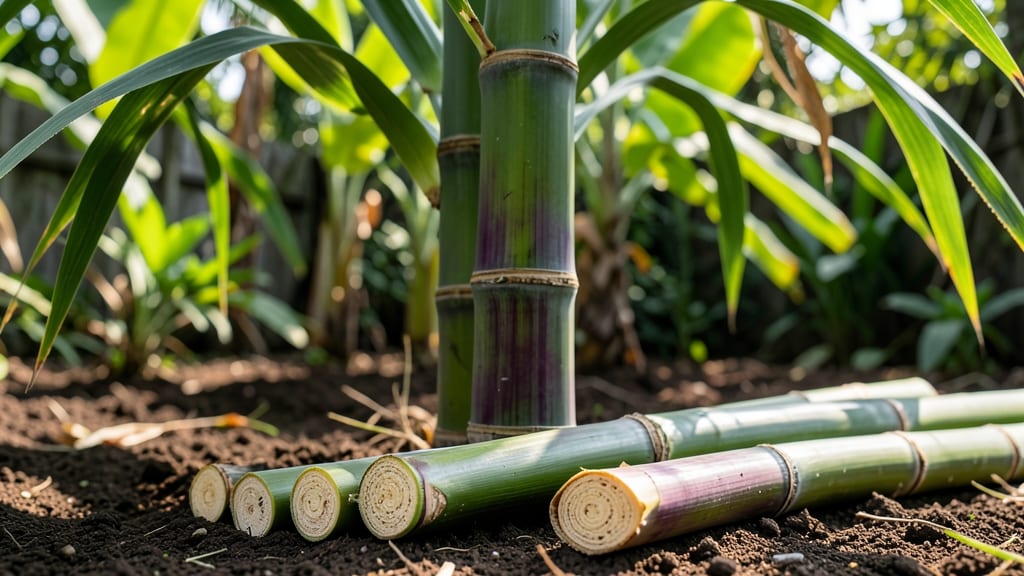
Growing sugar cane from seed cane is simpler than you think—no twists or complicated steps. 🌱 My first harvest came in just 10 months, and I’ve since perfected the process to avoid the frustrating tangles that ruin so many attempts.
The key lies in proper preparation and patience, not fancy equipment or greenhouse setups.
You’ll need healthy seed cane (look for firm, green stalks with no soft spots), sharp pruners, and a sunny spot with well-draining soil. Soaking the cuttings for 24 hours before planting boosts rooting success, and a balanced fertilizer keeps them thriving.
Even in cooler climates, sugar cane adapts with the right care.
By harvest time, you’ll have tall, sturdy stalks ready for cutting—no more tangled messes. The process rewards consistency: regular watering, minimal pests, and a sweet payoff when you finally tap into those golden stalks. Perfect for gardeners who love bold, tropical plants with a practical twist.
Whether you’re growing for syrup, decoration, or just the satisfaction of a successful harvest, this method works year-round in warm zones. Let’s get those cuttings rooted and growing strong!
📚 In This Guide
- What you need
- Instructions
- Tips and common mistakes
- Wrapping up and next steps
What you need
- ● Sugar cane seed cane: 5–10 healthy, disease-free stalks (12–18 months old, ~3–5 ft tall). Ensure they’re from a trusted source!
- ● Well-draining soil: Sandy loam or clay-loam mix (pH 5.5–7.5). Amend with compost if needed.
- ○ Organic fertilizer: 5-10-10 or balanced NPK blend (10 lbs per 100 sq ft). Optional: Add potassium sulfate for stronger stalks.
- ● Mulch: Straw or wood chips (2–3 inches thick) to retain moisture and suppress weeds.
- ● Hand trowel or transplanting spade – For planting seed cane.
- ● Pruners or sharp knife – To trim stalks to 2–3 ft before planting.
- ● Watering can or hose with nozzle – For consistent moisture (1–2 inches per week).
- ○ Garden stakes or trellis (optional) – Supports taller varieties (e.g., 6+ ft stalks).
- ○ Soil test kit (optional) – Ensures optimal nutrient levels before planting.
- ● Warm climate: Sugar cane thrives in USDA zones 10–11. For cooler regions, grow in containers or greenhouses.
- ● Full sun exposure: 6+ hours of direct sunlight daily.
- ● Patience: Seed cane takes 12–18 months to mature for harvest!
Step-by-Step instructions for harvesting sugar cane seed cane
Here’s how I harvest viable seed cane without damaging the stalks—key to year-round growth.
🌱 Step 1: Identify and Select Mature Stalks
Choose stalks that are 3-4 feet tall with thick, firm nodes—these are your seed cane. Look for vibrant green color and a slight woody texture at the base. Avoid stalks with yellowing leaves or soft spots, as these won’t root well. I like to harvest in late fall or early spring when the plant is dormant but still has stored energy.
Run your fingers along the stalk to feel for strong, unbroken nodes—each node should be 1-2 inches apart and free of cracks. Weak or damaged nodes won’t sprout new shoots. If you’re unsure, tap the stalk gently; a healthy one will sound hollow, not mushy.
✂️ Step 2: Cut Stalks at the Right Angle
Use clean, sharp pruners to cut 1-2 inches below the lowest node—this ensures the base has enough energy to regrow. Angle the cut slightly downward to prevent water from pooling. I always sterilize my pruners with rubbing alcohol first to avoid introducing bacteria.
Remove all leaves from the lower 6-8 inches of the stalk. This prevents rot during storage and encourages new root growth. Leave the top 4-6 inches of leaves intact—they’ll protect the growing tip. If the stalk is too long, trim it to 3 feet for easier handling.
🪴 Step 3: Cure and Store for Root Development
Lay the cut stalks in a shady, well-ventilated area for 3-5 days to cure. This dries the cut ends slightly and hardens the outer layer, reducing rot risk. I prop them upright in a bucket with 1 inch of water at the base—just enough to keep the cut ends moist without soaking.
After curing, store the stalks in a cool, dry place (around 60-65°F) with moderate humidity. Wrap the bases in moist paper towels and place them in a sealed plastic bag—this mimics natural soil moisture without overwatering. Check weekly; if the towels dry out, mist them lightly.
🌿 Step 4: Plant for Year-Round Growth
Plant the cured stalks 6-8 inches deep in well-draining soil mixed with compost. Space them 2 feet apart in rows 3 feet apart to allow airflow. Water deeply immediately after planting to settle the soil around the nodes—this encourages root formation.
Keep the soil evenly moist (not soggy) for the first 4-6 weeks. You’ll see new shoots emerge from the nodes within 2-3 weeks if conditions are right. Mulch lightly with straw to retain moisture and suppress weeds. Avoid fertilizing until shoots reach 6 inches tall.
⏰ Step 5: Monitor and Maintain for Viability
Watch for yellowing leaves—this signals overwatering or poor drainage. Adjust watering so the soil stays damp but never waterlogged. In hot climates, provide afternoon shade for the first month to prevent stress. Once established, sugar cane thrives in full sun but tolerates partial shade.
Harvest new seed cane in 6-8 months when stalks reach 3-4 feet again. Repeat the process, and you’ll have a renewable supply. I’ve kept this cycle going for years—just ensure you rotate planting spots to prevent soil depletion.
Tips & tricks for perfect sugar cane seed cane harvesting
These practical insights will help you maximize viability and avoid common pitfalls when harvesting sugar cane seed cane.
Selection Precision: In Step 1, when selecting stalks, prioritize those with uniformly spaced nodes (1-2 inches apart) and a hollow sound when tapped. I’ve found that stalks with nodes closer than 1 inch often produce weaker shoots, while those with gaps wider than 2 inches may struggle to establish roots. This careful selection directly impacts your success rate—don’t rush this step!
Cutting Technique: The downward angle cut in Step 2 isn’t just about aesthetics—it’s a functional detail that prevents water accumulation at the base during storage. I recommend using a serrated pruner for clean cuts that won’t tear the stalk fibers. Sterilizing your tools is non-negotiable; I’ve seen bacterial contamination ruin entire batches of stored stalks.
Curing Optimization: During the 3-5 day curing period in Step 3, maintain consistent airflow by spacing stalks about 2 inches apart in your curing area. I’ve experimented with shorter curing times and found that anything less than 3 days increases rot risk, while extending beyond 5 days can dry the cut ends too much, making them brittle during planting.
Storage Environment: The 60-65°F storage temperature in Step 3 is critical—any warmer and you risk premature sprouting, while cooler temperatures can slow root development. I store my stalks in a basement corner where humidity naturally stabilizes around 50-60%. The moist paper towel trick works best when you use two layers—one to absorb excess moisture and one to maintain dampness.
Pro Tips for Sugar Cane Seed Cane
- These practical insights will help you maximize viability and avoid common pitfalls when harvesting sugar cane seed cane.
- Selection Precision: In Step 1, when selecting stalks, prioritize those with uniformly spaced nodes (1-2 inches apart) and a hollow sound when tapped.
- Cutting Technique: The downward angle cut in Step 2 isn’t just about aesthetics—it’s a functional detail that prevents water accumulation at the base during storage.
Frequently asked questions
about sugar cane seed cane—here’s what you need to know before planting!What’s the best time to harvest seed cane for planting?
Harvest seed cane when it’s mature but before flowering—typically 10–12 months after planting. Look for thick, green stalks with a diameter of 1–2 inches. Avoid harvesting during frost or extreme heat, as this can stress the plant. Early morning harvests (when dew is present) help preserve moisture for better rooting.
Can I reuse seed cane from last year’s harvest?
Reusing seed cane is possible, but it’s not ideal. After one harvest cycle, stalks may weaken or develop pests/diseases. For best results, plant fresh seed cane every 1–2 years. If reusing, inspect for rot, discoloration, or pests—discard any damaged sections to prevent spread. Soaking in a fungicide solution (like copper sulfate) for 10 minutes can help sterilize.
How do I store seed cane until planting season?
Store seed cane in a cool, humid environment (60–70°F) with high humidity (80%+). Bundle stalks loosely in damp burlap or paper towels, then wrap in plastic to retain moisture. Avoid refrigeration—it can cause rot. Plant within 2–3 weeks for optimal viability. For longer storage (up to 6 months), bury bundles in moist sand or sawdust in a shaded area.
Why is my seed cane twisting or bending after planting?
Twisting or bending often signals stress from improper handling, drought, or poor soil. Ensure stalks are planted at a 45° angle with nodes (swollen sections) facing downward. Water deeply after planting and mulch to retain moisture. If twisting persists, check for pests (like borers) or fungal infections (e.g., rust). Adjust irrigation or apply a balanced fertilizer (10-10-10) to encourage straight growth.
Are there alternatives to traditional seed cane propagation?
Yes! Try tillers (shoots from the base of mature plants) or single-stalk cuttings (3–4 ft sections with 2–3 nodes). For large-scale planting, consider tissue culture (lab-grown plants) for disease-free stock. However, seed cane remains the most cost-effective and widely used method. If experimenting, sterilize tools between cuttings to prevent contamination.
Wrapping up and next steps
Harvesting sugar cane seed cane the right way ensures strong, twist-free growth and a bountiful yield year-round. By selecting healthy stalks, using proper tools, and following best practices, you’ll set your garden up for success—no tangles or wasted effort! 🌱
Ready to grow? Start small with a few stalks, experiment with spacing, and watch your sugar cane thrive. Your next step? Share your progress with fellow gardeners or explore other tropical plants for a lush, vibrant lawn!