
Lawn
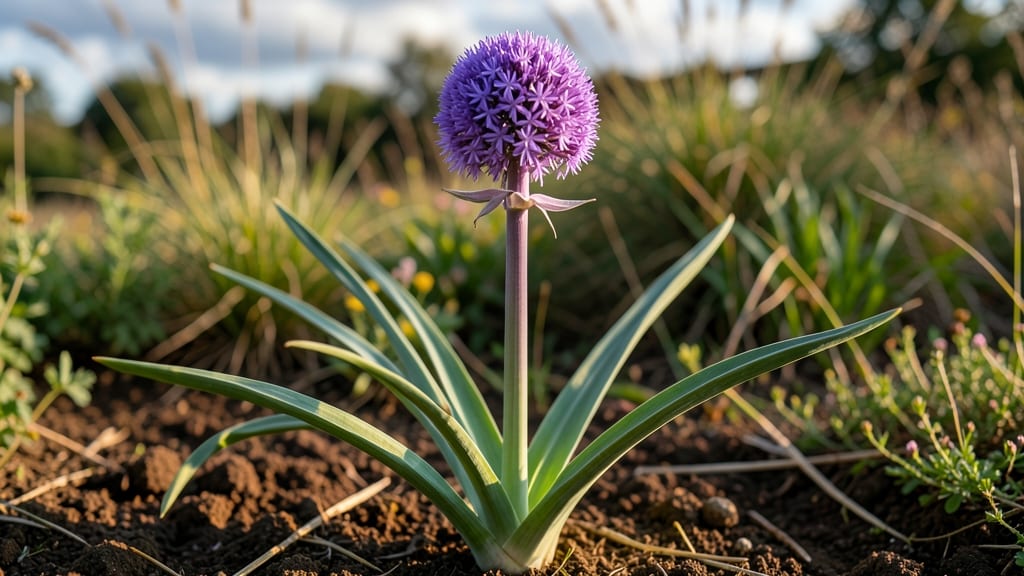
Allium seed pods turn your garden into a self-sustaining seed factory. 🌱 I used to toss those dried spheres—until I realized they’re the secret to free, organic seeds for next year’s chives, garlic chives, and ornamental alliums.
The process is hands-off once you know the timing, and you’ll end up with pods that dry to stunning paper-like textures or crunchy edible bulbs, depending on the variety.
Harvesting starts when 50-70% of the pods turn brown and papery—usually late summer to early fall, though ornamental alliums like Allium cristophii may wait until October. Leave a few pods on the plant until they’re fully dry to ensure viability.
For edible varieties like garlic chives, harvest pods when they’re still slightly green for a milder, onion-like crunch. The key is patience: rushing means lower germination rates.
Once dry, gently rub the pods between your palms to release seeds—no tools needed. Store seeds in paper envelopes in a cool, dark place for up to 2 years, or let the pods dry on stems for a rustic garden centerpiece.
You’ll save money, reduce waste, and have seeds tailored to your microclimate. My garlic chives now self-seed everywhere, and my ornamental alliums produce dozens of new plants from just a handful of pods.
Works for all allium varieties, from kitchen herbs to showstopper blooms. The only mistake? Harvesting too early—wait until pods are fully mature, even if it means leaving them through frost. Next year, you’ll be the gardener everyone asks for seeds from.
📚 In This Guide
- What you need
- Instructions
- Tips and common mistakes
- Wrapping up and next steps
What you need
- ● Allium plants: Choose mature varieties like garlic, onions, chives, leeks, or shallots (ensure they’ve bolted and formed seed pods). Aim for 3–5 healthy plants per batch.
- ● Scissors or pruning shears: Sharp, clean tools to snip seed stalks (avoid dull blades to prevent crushing pods).
- ● Brown paper bags or breathable mesh bags: 2–3 large bags (12x15 inches) to collect pods and allow airflow.
- ● Labeling supplies: Waterproof markers or tags + twine to label bags with the allium type and harvest date.
- ● Drying rack or screen: Elevates pods for even drying (e.g., a wire mesh tray or wooden frame).
- ● Fan or dehumidifier: Speeds up drying in humid climates (place on low setting).
- ● Fine-mesh sieve or colander: Separates seeds from chaff during cleaning (1–2 mm mesh size works best).
- ● Glass jars with lids: Airtight containers for long-term seed storage (quart-sized jars suffice).
- ● Hand lens or magnifying glass: Helps inspect seed viability (especially for tiny allium seeds).
- ● Patience: Allium seed pods take 4–6 weeks to fully mature after bolting—wait until pods turn brown and papery.
- ● Dry, shaded space: A garage, shed, or indoor area with 50–70°F temperatures and low humidity.
- ○ Gloves (optional): Protects hands from allium sap, which can irritate skin.
Step-by-step guide to harvesting allium seed pods for zero-waste seed saving
Here's how to collect seeds from alliums like garlic, onions, and chives without losing a single pod.
🌱 Step 1: Wait for Pods to Dry Naturally on the Plant
Leave mature seed pods on the plant until they turn a papery brown color—this usually happens 4-6 weeks after flowering. You'll know they're ready when the pods feel dry and brittle to the touch, almost like thin paper. If you harvest too early, seeds won't be fully developed.
Resist the urge to cut stems prematurely. The drying process on the plant ensures maximum seed viability. I like to wait until at least 70% of pods on a plant have turned brown before harvesting—this guarantees a good yield while still catching any stragglers.
🌿 Step 2: Collect Pods Using the "Shake-and-Catch" Method
On a dry, sunny day, hold a clean white sheet or tray beneath the plant. Gently grasp the stem near the base and give it a firm shake—this dislodges the dry pods without damaging the plant. You'll see them flutter down like tiny brown parachutes. This hands-off approach prevents seed loss from spills or wind.
For larger alliums like garlic, I sometimes use a small mesh bag over the pods before shaking to contain any loose seeds that might escape. The mesh lets seeds fall through while catching stray pods. Collect all fallen pods immediately to prevent them from scattering.
🪴 Step 3: Clean and Store Seeds for Future Planting
Spread the collected pods on a clean, dry surface and let them air-dry for 24-48 hours in a well-ventilated area. This final drying step prevents mold during storage. Once completely dry, gently rub the pods between your fingers to release the seeds—you'll hear a soft rattling sound as they separate.
Store seeds in a paper envelope (not plastic) labeled with the variety and harvest date. Place the envelope in a cool, dark location like a seed drawer or pantry. Allium seeds remain viable for 2-3 years when stored properly, making this a zero-waste gardening practice.
⏰ Step 4: Optional - Preserve Extra Pods as Decorative Elements
If you have leftover pods after seed extraction, don't discard them! Tie small bundles with twine and hang them in your kitchen or craft room for a rustic, organic decoration. The papery texture and earthy tones make them perfect for dried flower arrangements or potpourri.
For a more structured look, press individual pods between heavy books for 1-2 weeks until completely flat. These make beautiful, lightweight filler for holiday wreaths or framed botanical art. It's a creative way to extend the life of your allium harvest beyond just seeds.
Tips & tricks for perfect allium seed pod harvesting
Here's what nobody tells you about maximizing your seed yield without wasting a single pod.
Patience Pays Off: The 4-6 week window after flowering is critical—don't rush it! I've learned the hard way that harvesting too early means immature seeds that won't germinate properly. For best results, wait until you can gently crumple a pod between your fingers without resistance. This paper-thin texture is your green light to harvest. The extra patience ensures you get plump, viable seeds ready for planting.
Weather Matters: The shake-and-catch method only works on dry, sunny days when humidity is low. I've tried this on damp mornings and ended up with moldy pods that wouldn't dry properly. Check the forecast for clear skies and low wind—ideal conditions make all the difference between a clean harvest and a messy cleanup. A light breeze helps the pods disperse evenly, but strong winds can scatter them everywhere.
Storage Wisdom: That 24-48 hour final drying period is non-negotiable for preventing mold. I've seen home gardeners skip this step and end up with seeds that sprouted prematurely in storage. Use a well-ventilated area with good airflow—an open windowsill works perfectly. For extra protection, place a small fan nearby to maintain gentle circulation without creating drafts that could scatter your seeds.
Creative Reuse: Those leftover pods aren't trash—they're crafting gold! I started pressing pods between heavy books as a kid and now use them in holiday wreaths every year. For the best results, choose pods that are completely dry but still intact. The 1-2 week pressing time might seem long, but it creates sturdy, flat decorations that hold their shape for years. It's a zero-waste win-win that gives your harvest new life beyond the garden.
Pro Tips for Allium Seed Pods
- Here's what nobody tells you about maximizing your seed yield without wasting a single pod.
- Patience Pays Off: The 4-6 week window after flowering is critical—don't rush it!
- Weather Matters: The shake-and-catch method only works on dry, sunny days when humidity is low.
Frequently asked questions
Got questions about allium seed pods?
You’re not alone! Whether you’re a first-time gardener or a seasoned seed saver, these answers will help you master hands-off harvesting. Let’s dive in:
When are allium seed pods ready to harvest?
Allium seed pods (like garlic, onions, or chives) are ready when they turn tan or brown and the outer skin easily crumbles when gently squeezed. Avoid harvesting when pods are still green—this means they’re not fully mature. Wait until 70-80% of the pods in a cluster have dried out for best results.
How long do allium seed pods take to dry?
Once harvested, allium seed pods need 2-4 weeks to fully dry in a cool, well-ventilated spot (like a paper bag or mesh bag). Spread them in a single layer to prevent mold. If your climate is humid, dry them indoors near a fan or in a dehydrator at 95°F (35°C) for faster results.
Can I save seeds from store-bought alliums?
Technically yes, but it’s not recommended for seed saving. Store-bought alliums are often hybrids or treated to prevent bolting (flowering). For reliable seeds, grow your own from open-pollinated varieties or source seeds from trusted organic seed suppliers. Save your efforts—and seeds—for plants you’ve grown yourself!
What do I do if my allium seed pods mold or rot?
Mold or rot usually happens due to high humidity or overcrowded drying conditions. Act fast: remove any moldy pods immediately, then move the rest to a dry, airy space (like a mesh bag with holes). If mold spreads, try drying the seeds in a dehydrator at 95°F (35°C) for 24 hours to kill spores. Discard severely affected pods.
Are allium seed pods edible, or just for planting?
While the seeds inside are edible (mild, onion-like flavor), the pods themselves are tough and fibrous—best used for planting. You can roast the seeds like popcorn for a crunchy snack, but they’re not as flavorful as fresh allium greens. Save the pods for seed saving and enjoy the harvest in your next garden!
Wrapping up and next steps
Allium seed pods—from onions to garlic—offer a simple, zero-waste way to save seeds and reduce food costs while embracing sustainable gardening. 🌱 By mastering hands-off harvesting, you’ll unlock a self-sufficient cycle of flavorful, homegrown alliums year after year.
Whether you’re a seasoned gardener or just starting, these seed pods are your ticket to effortless abundance.
Ready to dive deeper? Start small: pick one allium variety (like shallots or garlic) and experiment with seed-saving this season. Share your harvest with fellow gardeners—every pod saved is a step toward a greener, more resilient future!