
Lawn
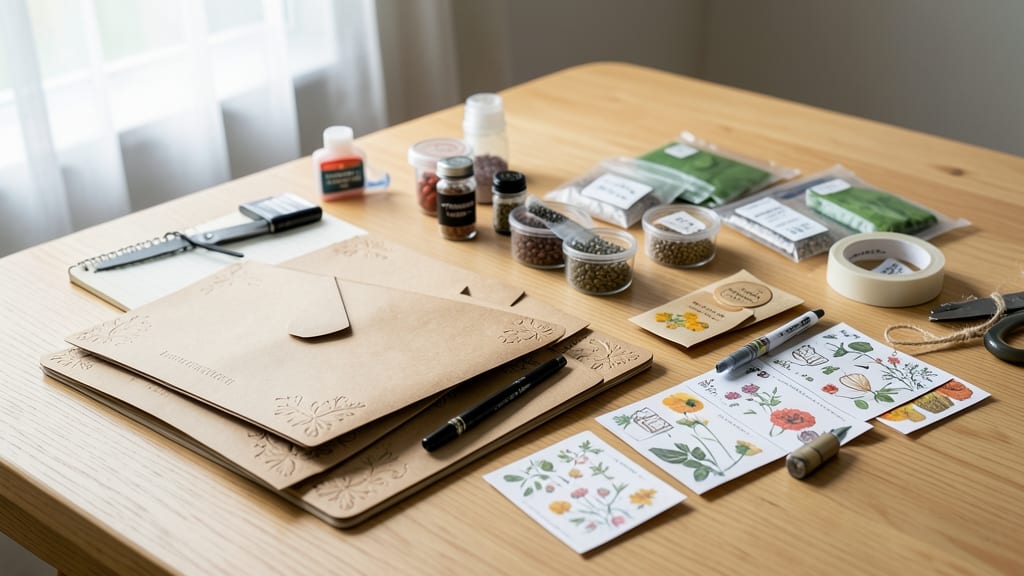
Saving seeds from your garden means next year’s harvest starts now. 🌱 I’ve turned my best-performing plants into seed packets—no fancy tools, just a little patience and these simple steps that preserve viability for years.
The best part? You’ll never buy seeds again for your favorite varieties, and you’ll cut waste by reusing what you already grow.
You’ll need dried seed pods, envelopes (or small paper bags), a permanent marker, and silica gel packets for extra protection. First, let seeds dry completely on the plant or in a warm, dry spot—this prevents mold and ensures long-term storage.
Once fully dry, remove them gently and store in a cool, dark place where they’ll last 3-5 years (some even longer!).
Labeling is where most people trip up—write the plant name, harvest date, and any notes (like “heirloom” or “needs trellis”). I add a tiny reminder like “plant after last frost” to avoid confusion later. A simple system keeps your collection organized and ready for next spring’s planting.
This method works for tomatoes, beans, peppers, and even flowers—just avoid hybrid seeds (they won’t “true” to type). Store packets in a sealed container with a silica packet to absorb moisture, and you’ll have a zero-waste seed library that grows with your garden. Ready to start?
📚 In This Guide
- What you need
- Instructions
- Tips and common mistakes
- Wrapping up and next steps
What you need
- ● Seed envelopes: 3.5" x 2.5" brown kraft paper envelopes (or DIY alternatives like folded paper or recycled paper bags). Quantity: 1 per seed type.
- ● Seeds: Clean, dry, and labeled seeds (ensure they’re fully mature and viable). Pro tip: Store seeds in a cool, dark place for 1–2 weeks before packaging to dry them out!
- ● Permanent markers: Waterproof (e.g., Sharpie or fine-tip) for labeling.
- ● Ruler or measuring tape: For precise envelope sizing (if DIYing).
- ● Glue or tape: Acid-free (e.g., archival tape) to seal envelopes.
- ● Small paper clips or twist ties: To secure envelope flaps.
- ● Silica gel packets: Include 1–2 in each envelope to absorb moisture.
- ● Desiccant crystals: A pinch in the envelope to prevent mold.
- ● Clear plastic bags: For bulk seed storage (reusable!).
- ● Printed seed labels: Pre-cut templates for professional-looking packets.
- ● Essential oils (clove or cedar): A drop in the envelope to deter pests.
Step-by-step instructions for creating homemade seed packets
Here's how to save seeds from your garden and package them for next season—simple, eco-friendly, and foolproof.
🌱 Step 1: Harvest Seeds at Peak Maturity
Wait until plants have fully matured and seeds are completely dry on the plant. For example, tomato seeds should come from deep red fruit, while pea seeds are ready when pods turn brown and papery. Harvest on a dry day to avoid moisture issues.
Gently remove seeds from pods or fruit—some, like tomatoes, need fermenting (place pulp in water for 3 days, then rinse), while others, like beans, can dry directly. Let seeds air-dry on a paper towel for 3-5 days until completely hard and dry to the touch.
✂️ Step 2: Test and Store Seeds Properly
Before packaging, test viability by placing 10 seeds between damp paper towels in a sealed bag. Store them in a warm spot for 5-7 days. If 80% or more sprout, your seeds are good to save. Discard old or low-quality seeds immediately.
For long-term storage, place dried seeds in airtight containers like glass jars or small envelopes. Add a silica gel packet or a few grains of rice to absorb excess moisture. Label each container with the plant name, variety, and harvest year.
📄 Step 3: Package Seeds for Next Year
Use small, resealable envelopes or folded paper squares for individual seed packets. Write the plant name, variety, and germination instructions (like "needs light to germinate" or "soak seeds overnight") directly on the packet. Include the harvest year to track seed freshness.
For extra protection, place packets in a larger, airtight container like a mason jar or a sealed plastic bag. Store them in a cool, dark place like a pantry or basement, where temperatures stay between 35-50°F for maximum longevity.
🌿 Step 4: Organize and Label for Easy Use
Group seeds by plant family or type for quick reference. For example, keep tomatoes, peppers, and eggplants together since they’re all nightshades. Use a small notebook or spreadsheet to track germination rates, planting dates, and any special care notes.
When ready to plant, test a few seeds from each packet to confirm viability. If germination is slow, store the remaining seeds in the freezer for 1-2 months to break dormancy—this trick often works wonders for stubborn seeds.
Tips & tricks for perfect homemade seed packets
A few key strategies will help you preserve seeds effectively and avoid common pitfalls in the process.
Harvest Timing: Pay close attention to the signs of seed maturity for each plant—some, like tomatoes, need fully ripe fruit, while others, like beans, require dry, brown pods. Harvest on a dry day to prevent mold growth during the drying process. I've learned the hard way that rushing the drying step can lead to seeds that won't sprout!
Fermentation Secret: For seeds that require fermenting (like tomatoes), the 3-day water soak is crucial—it removes the gelatinous coating that can inhibit germination. After fermenting, rinse seeds thoroughly and spread them on paper towels. This step might seem tedious, but it's worth it for better germination rates.
Viability Test: The 10-seed test in Step 2 is your quality control measure. If fewer than 80% sprout after 5-7 days, those seeds may not be worth saving. This test saves you from wasting time planting low-quality seeds later. Keep a small notebook to track which varieties perform best each year.
Storage Wisdom: When storing seeds in airtight containers, add a silica gel packet or a few grains of rice to absorb any lingering moisture. I've found that even small amounts of humidity can reduce seed viability over time. Label containers with both the plant name and harvest year—this simple step prevents mix-ups when you're ready to plant next season.
Pro Tips for Make Seed Packets
- A few key strategies will help you preserve seeds effectively and avoid common pitfalls in the process.
- Harvest Timing: Pay close attention to the signs of seed maturity for each plant—some, like tomatoes, need fully ripe...
- Fermentation Secret: For seeds that require fermenting (like tomatoes), the 3-day water soak is crucial—it removes th...
Frequently asked questions
Got questions about saving seeds and crafting your own packets? Here are some of the most common ones—plus quick, practical answers to help you get started!
How do I know which seeds can be saved for next year?
Not all seeds are created equal! Open-pollinated and heirloom varieties (like tomatoes, beans, and peas) are the best candidates. Avoid hybrid seeds (marked "F1" or "hybrid")—they won’t grow true to type. When in doubt, check seed packets for a "save seeds" label or research the plant online!
When is the best time to collect seeds?
Timing matters! Harvest seeds when the plant’s pods or flowers dry out but before they shatter or attract pests. For example:
- Tomatoes: Let them fully ripen on the vine, then scoop out the jelly-like gel and dry the seeds.
- Peppers: Wait until they’re wrinkled and brown inside.
- Herbs (like dill or cilantro): Collect seeds when they turn tan and fluffy.
What’s the best way to store seed packets long-term?
Keep your handiwork viable for years with these tips:
- Store packets in a cool (32–40°F), dry place (like a fridge or freezer).
- Use airtight containers (like glass jars) with silica gel packets to absorb moisture.
- Label everything with the plant name, date, and germination tips (e.g., "Needs light to sprout").
Can I reuse seed packets from store-bought seeds?
Skip the waste by cleaning and reusing the original packets. Just:
- Rinse them gently with soapy water.
- Let them dry completely (sunlight works great!).
- Add your custom labels or designs.
What if my seeds get moldy or infested?
Don’t panic! Mold or pests usually mean the seeds weren’t fully dry before storage. To salvage what you can:
- Spread seeds on a paper towel in a dry, warm spot for 1–2 days to dry further.
- Discard any seeds with visible spots, holes, or foul smells.
- Store the "clean" seeds in a new, dry container.
Wrapping up and next steps
Creating your own seed packets is a rewarding way to reduce waste, save money, and ensure your garden thrives year after year.
With just a few simple materials and a little creativity, you can turn leftover seeds into eco-friendly keepsakes that’ll sprout new possibilities. Now that you’re equipped with the know-how, why not gather your favorite seeds today?
Start small—try saving seeds from one or two plants this season, and soon you’ll have a stash of zero-waste treasures ready for next year’s harvest. Happy gardening! 🌱✨