
Lawn
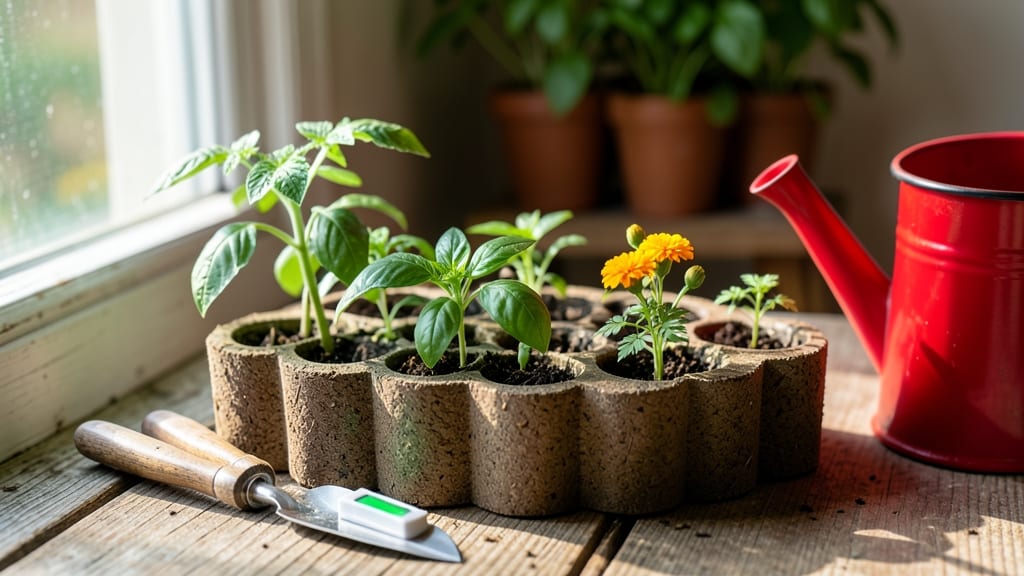
Learning how to use Jiffy seed starter trays cuts germination time by nearly half—that’s the secret I discovered after struggling with soggy, moldy flats. These little peat pots create the perfect moisture balance, keeping roots happy without drowning them, and the built-in aeration means stronger seedlings from day one.
No more weak stems or leggy sprouts—just fast, sturdy starts that transplant like pros.
Start by soaking the trays in water for 10-15 minutes until they double in size—this primes the peat for ideal moisture retention. Then, pop them into a shallow tray with ¼-inch water to keep the bottoms damp but never soggy.
The key is layered moisture: the trays wick up just enough water while preventing the dreaded "bottom rot" that kills so many seedlings. I’ve used these for everything from tomatoes to delicate herbs, and the results speak for themselves.
Plant your seeds ½-inch deep (or follow the packet’s guidelines), press them gently into the peat, and cover with a humidity dome if your setup allows. Within 5-7 days, you’ll see those first green shoots—faster than any flat or solo pot I’ve tried.
The trays even transplant straight into the ground or pots, roots and all, so no messy root-ball separation. It’s the foolproof method I wish I’d known years ago.
Where most beginners mess up is overwatering or skipping the soak step—both lead to weak, waterlogged seedlings. My best tip? Use a spray bottle for the first few days to avoid disturbing the soil while seeds germinate.
And if you’re growing heat-loving crops like peppers, keep them in a warm spot (70-75°F) for extra speed. Once your seedlings hit 2-3 inches tall, they’re ready to graduate to bigger pots or your garden beds.
📚 In This Guide
- What you need
- Instructions
- Tips and common mistakes
- Wrapping up and next steps
What you need
- ● Jiffy Seed Starter Trays – 1 pack (typically 200-500 pellets, depending on your needs). Look for biodegradable or compostable options for eco-friendly planting.
- ● Water – Room-temperature water (avoid tap water if it’s heavily chlorinated; let it sit for 24 hours or use filtered water).
- ● Seedlings or seeds – Choose fast-sprouting seeds (like lettuce, herbs, or flowers) or young seedlings ready for transplanting.
- ● Tray or shallow container – A flat tray, baking sheet, or even a roasting pan to hold the trays while soaking.
- ● Spray bottle or watering can – For gentle moisture control after soaking.
- ● Scissors or knife – To open the trays and separate individual cells if needed.
- ● Plant labels or markers – To track seed types and planting dates.
- ● Grow lights or sunny windowsill – For consistent light exposure (6-8 hours/day).
- ● Humidity dome or plastic wrap – To retain moisture while seeds germinate.
- ● Potting mix or compost – If transitioning seedlings to soil later.
- ● Fertilizer (mild, seed-safe) – A diluted liquid fertilizer for post-germination growth.
Step-by-Step guide for using Jiffy seed starter trays
Here’s how to maximize their moisture-retaining design for rapid, healthy germination.
Prepare the Trays and Water Thoroughly
Start by filling each Jiffy cell with cool, room-temperature water until it’s fully saturated. The compressed peat material will expand to twice its original size within minutes—this is normal. Let them sit for 10-15 minutes until the water drains completely through the bottom tray. You’ll know they’re ready when excess water stops dripping and the surface feels uniformly damp but not soggy.
I always use a spray bottle for this step to avoid overfilling. If water pools on top, the peat won’t absorb it properly, and you’ll end up with uneven moisture distribution. The goal is consistent hydration throughout each cell, not a soggy mess.
Plant Seeds at the Correct Depth
Once the trays are prepped, place 1-2 seeds per cell at a depth of ¼ inch—about the diameter of most small seeds. Press them gently but firmly into the expanded peat to ensure good soil contact. The Jiffy design holds seeds securely, so there’s no need to bury them deeply. Cover lightly with a pinch of additional peat if the seeds are very fine.
I tap the tray gently on the table to settle the seeds into place. This prevents them from shifting later when you water. For larger seeds like beans or peas, you can press them slightly deeper (½ inch) to protect them from drying out too quickly.
Maintain Optimal Moisture Without Overwatering
The beauty of Jiffy trays is their self-regulating moisture—they hold water like a sponge but won’t drown roots. After planting, mist the surface lightly with water until the top layer feels damp. Place the tray in a humidity dome or sealed plastic bag to retain warmth and moisture, then position it in a spot with consistent temperatures between 65-75°F.
Check moisture daily by pressing a finger into the peat. If it feels dry at the surface but still damp ½ inch down, it’s time for a light misting. Overwatering here is the biggest mistake—Jiffy trays can’t drain excess water, so never let them sit in standing water. You’ll see condensation on the dome; this is normal and indicates proper humidity levels.
Provide Light and Monitor Germination
Once seeds sprout, remove the humidity dome immediately to prevent damping-off. Place the trays under grow lights or in a sunny window (south-facing is ideal) for 14-16 hours of light daily. You’ll notice the first true leaves emerge in 7-14 days, depending on the seed type. At this stage, the peat will start to break down slightly—this is expected and helps roots establish.
If seedlings look leggy (long, thin stems), your light source is too far away. Move it within 2-3 inches of the trays. Strong seedlings will have thick stems and dark green leaves. Avoid moving the trays frequently—seedlings are sensitive to position changes and may stress easily.
Transplant When Ready
When seedlings have 2-4 true leaves and the peat has fully decomposed (usually 4-6 weeks after planting), they’re ready for transplanting. Gently squeeze the Jiffy pot to release the root ball—it should come out intact. Plant directly into the garden or larger pots, ensuring the soil line matches the original planting depth.
Water deeply after transplanting to help roots establish. The decomposed peat will integrate seamlessly into the soil, so there’s no need to remove it. This is where Jiffy trays shine—they eliminate transplant shock by keeping roots undisturbed.
Tips & tricks for perfect Jiffy seed starter trays
These small details make all the difference when working with Jiffy trays—trust me, I’ve learned them the hard way after watching seedlings fail.
Moisture Mastery in Step 1: The 10-15 minute draining period is non-negotiable. If you rush this, you’ll end up with waterlogged cells that suffocate seeds. Place the tray on a wire rack over a bowl to catch excess water—this ensures complete drainage without soggy bottoms. The peat should feel like a wrung-out sponge, not a dripping mess.
Seed Placement Precision: In Step 2, don’t just drop seeds in—press them gently into the peat so they make firm contact with the moisture. For tiny seeds like lettuce, I use a toothpick to create a shallow dimple first, then nestle them inside. This prevents them from floating to the surface when you water later. Larger seeds like beans need that extra ½-inch depth to stay hydrated during germination.
Temperature and Light Balance: The 65-75°F range in Step 3 is ideal, but don’t assume your kitchen maintains this. If your home runs cooler, place the trays on top of the fridge (not inside) for gentle warmth. For light in Step 4, position grow lights at a 2-3 inch distance—closer than that can scorch seedlings, while farther away causes leggy growth. I rotate my trays daily to ensure even light exposure on all sides.
Transplanting Timing: Those 4-6 weeks in Step 5 are crucial for root development. Wait until you see secondary roots growing through the peat—this tells you the root ball is strong enough to handle transplanting. If you rush it, you’ll pull fragile seedlings that snap easily. I always transplant on a cloudy day to reduce stress from direct sunlight.
Pro Tips for Jiffy Seed Starter Trays How To Use
- These small details make all the difference when working with Jiffy trays—trust me, I’ve learned them the hard way after watching seedlings fail.
- Moisture Mastery in Step 1: The 10-15 minute draining period is non-negotiable.
- Seed Placement Precision: In Step 2, don’t just drop seeds in—press them gently into the peat so they make firm contact with the moisture.
Frequently asked questions
Got questions about using Jiffy seed starter trays? You’re not alone! Here are some of the most common queries—and their straightforward answers—to help you grow like a pro.
How do I know when my Jiffy pellets are ready to plant?
Your Jiffy pellets are ready when they’ve fully expanded (about 2–3 times their original size) and feel lightly moist but not soggy. Press gently—if they hold their shape but still feel soft, they’re perfect! Plant seeds on top or just below the surface (check seed packet instructions).
How long does it take for seeds to sprout in Jiffy trays?
Sprouting time varies by plant type, but most seeds germinate within 5–14 days in Jiffy trays. Keep them in a warm, humid spot (like a seedling heat mat) and maintain consistent moisture. Fast growers (like lettuce or radishes) may pop up in 3–7 days, while slower ones (tomatoes, peppers) take 10–20 days.
What if my Jiffy pellets dry out or mold?
Dry pellets:
Soak them in warm water for 5–10 minutes until plump again. Mold: Toss the tray and start fresh—mold means too much moisture or poor airflow. For prevention, use sterilized trays and avoid overwatering. If mold appears, never use those pellets.
Can I reuse Jiffy seed starter trays?
Yes! After your seedlings are ready for transplanting, rinse the trays with soapy water, scrub off debris, and sterilize them in a 10% bleach solution (1 part bleach to 9 parts water) for 10 minutes. Rinse thoroughly and air-dry before reuse. Pro tip: Label trays to track reuse cycles (aim for 3–5 uses per tray for best results).
What’s a good alternative if I don’t have Jiffy trays?
No problem! Try these DIY options:
- Egg cartons: Poke drainage holes, fill with soil, and plant seeds directly.
- Toilet paper rolls: Cut into 2-inch sections, fold into cones, and fill with soil.
- Peat pots: Biodegradable and great for transplanting (just plant pot-and-all!).
- Yogurt cups: Poke holes in the bottom, line with coffee filters, and fill with potting mix.
Wrapping up and next steps
Mastering Jiffy seed starter trays is your ticket to a thriving garden—without the guesswork! 🌱 With their built-in moisture control and easy setup, these trays make sprouting seeds faster and more reliable.
Whether you're a beginner or a seasoned gardener, this method simplifies the process while giving your plants the best start.
Now that you’re ready, grab your trays, seeds, and a sunny spot—your green thumb is about to level up! 🌿 Try it today and watch your seedlings grow in no time.