
Propagation
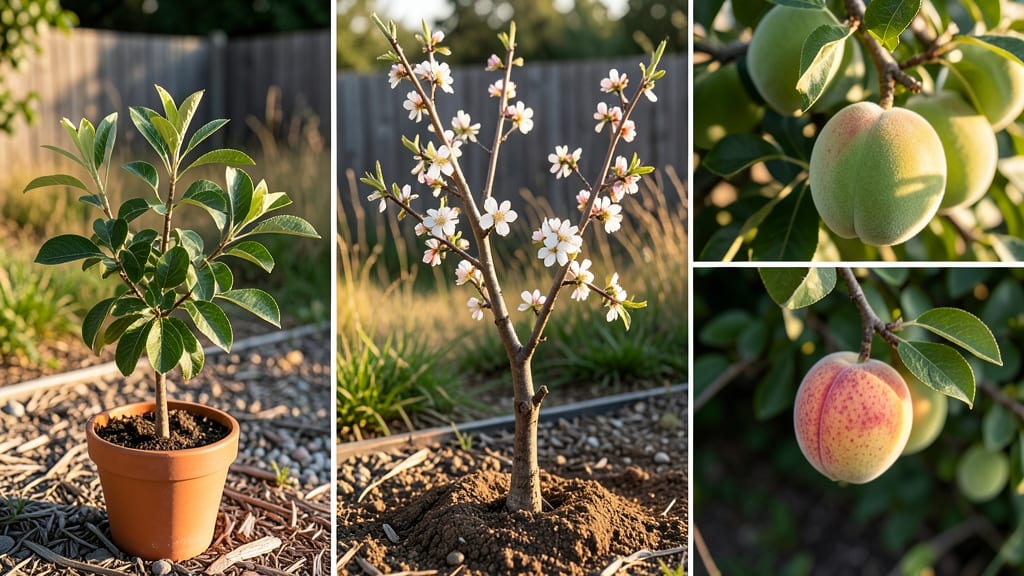
Growing a peach tree from seed to fruit is the ultimate gardening marathon—one that turns a grocery-store pit into a tree that could produce fruit in 5-7 years (yes, it takes patience). 🌱 I’ve grown three from seed, and while they’re not guaranteed to match the parent tree’s flavor, the journey of watching roots form, branches grow, and finally—finally—seeing that first fuzzy peach is worth every season of waiting.
The magic starts indoors in winter, where a warm spot and damp paper towel coax the seed to life. Most people quit here, but sticking with it through the transplanting phase (and the inevitable leggy seedling stage) is where the real reward begins.
By year three, you’ll be pruning like a pro, shaping a tree that’ll eventually stand taller than you. What you end up with isn’t just a tree—it’s a living legacy.
The first harvest might be small, but the satisfaction of eating fruit from a tree you grew from a seed you saved? That’s the kind of gardening story you’ll tell for decades. And the best part? Every pit you save becomes another potential tree.
Here’s the thing—this process isn’t about rushing. It’s about observing how roots spread, how branches respond to pruning, and how the tree slowly learns to thrive in your climate.
You’ll need to troubleshoot pests, adjust watering as the seasons change, and maybe even deal with a few failed attempts before success. But each challenge teaches you more about growing fruit trees than any book ever could.
The real game-changer? Zero-waste seed saving. Once your tree fruits, you’ll have a never-ending supply of seeds to plant, share, or experiment with. Imagine handing a seed to a neighbor and saying, “This could be your first peach tree.” That’s the kind of gardening that creates connections—and delicious rewards.
📚 In This Guide
- What you need
- Instructions
- Tips and common mistakes
- Wrapping up and next steps
What you need
- ● Peach pit (seed): 1-2 fresh, plump pits from a ripe, organic peach (avoid store-bought pits treated with fungicides).
- ● Potting soil: 2-3 bags of well-draining, sterile seed-starting mix (avoid garden soil—it’s too dense!).
- ○ Small pots or seed trays: 2-4 (4-6 inches deep) with drainage holes. Optional: Biodegradable pots for transplanting.
- ● Grow lights or sunny windowsill: A full-spectrum LED grow light (12-16 hours/day) or a south-facing window with 6+ hours of sunlight.
- ● Misting bottle: 1 for gentle watering (overhead watering can cause rot).
- ● Plastic wrap or humidity dome: 1 sheet to retain moisture during germination.
- ● Fertilizer: A balanced, water-soluble fertilizer (e.g., 10-10-10) or organic compost tea for seedlings.
- ● Pruning shears: Sharp, small pair for trimming seedlings.
- ● Garden gloves: 1 pair to protect hands from thorns (yes, they’re sharp!).
- ○ Heating mat: 1 (optional) to speed up germination (70–75°F is ideal).
- ● pH test kit: To ensure soil pH is 6.0–7.0 (peaches prefer slightly acidic soil).
- ○ Epsom salt: A pinch (optional) for magnesium boost during early growth.
- ● Tree support stakes: 2-3 (for later) to stabilize the tree as it grows.
- ● Pest control: Neem oil or insecticidal soap (if pests appear).
- ● Patience: Peach trees from seed take 3–7 years to bear fruit (grafted trees fruit faster!).
- ● Space: Permanent planting spot with full sun (6+ hours/day) and well-draining soil.
- ● Climate knowledge: Peach trees thrive in USDA Zones 5–9 (check your local frost dates!).
- ● Time: Dedicate 10–15 minutes daily for watering, monitoring, and care.
Instructions: growing a peach tree from seed to fruit
Here's how I turn a single peach pit into a thriving tree bearing fruit—step by step.
🌱 Step 1: Extract and Stratify the Seed
Save a fresh peach pit from a ripe fruit (the sweeter the peach, the better the chance of success). Remove all flesh by rinsing under water and scraping with a spoon. Let the pit dry completely for 2-3 days—this prevents mold during stratification.
Place the pit between two damp paper towels, fold them to cover completely, and seal in a plastic bag. Store in the refrigerator for 6-8 weeks—this cold treatment mimics winter and breaks seed dormancy. Check weekly to ensure the towels stay moist but not soggy.
☀️ Step 2: Germinate and Transplant the Sprout
After stratification, plant the pit 2 inches deep in a 4-inch pot filled with sterile potting mix. Water lightly until the soil feels damp to the touch. Place the pot in a warm spot (around 70°F) with bright, indirect light.
Germination can take 2-6 weeks. You'll know it's working when a tiny shoot emerges from the soil. Once the seedling reaches 4-6 inches tall, transplant it into a 1-gallon container with fresh potting mix. This prevents root-bound stress as it grows.
🌿 Step 3: Nurture the Sapling for Two Years
Keep the young tree in full sun for 6-8 hours daily. Water when the top 1-2 inches of soil feel dry—overwatering will rot delicate roots. Fertilize lightly with a balanced 10-10-10 formula every 4-6 weeks during spring and summer.
Prune leggy branches to encourage bushier growth. By its second year, the tree should have a 3-4 foot trunk and multiple sturdy branches. This is when you'll see the first signs of peach blossoms—though fruit may not appear for 3-5 years.
⏰ Step 4: Prepare for Fruit Production
Once the tree reaches 5-6 feet tall, move it to a permanent outdoor location after the last frost. Choose a spot with full sun exposure and well-draining soil. Amend the soil with compost to improve fertility and drainage.
Thin branches to create an open canopy, allowing sunlight to reach all fruit. Mulch around the base to retain moisture and regulate soil temperature. In late winter, apply a slow-release fertilizer to support the energy demands of flowering and fruiting.
Tips & tricks for perfect peach tree cultivation
Turning a single peach pit into a fruit-bearing tree takes patience—but these tricks will help you avoid common pitfalls and maximize your success.
Stratification Success: The 6-8 week cold treatment in Step 1 is non-negotiable for breaking dormancy. I've learned the hard way that skipping this step results in seeds that either never sprout or produce weak seedlings. Use a small plastic bag with ventilation holes to prevent condensation buildup, which can cause mold. Place the bag in the crisper drawer of your fridge where temperatures stay consistently cold.
Germination Environment: That 70°F warm spot in Step 2 needs to stay consistent. I use a seedling heat mat under my 4-inch pot to maintain this temperature without needing to monitor constantly. If your home stays cooler than 70°F, consider placing the pot on top of your refrigerator (not inside) for gentle warmth. Watch for condensation on the inside of the plastic bag—this is your signal that the soil is too moist.
Transplanting Timing: The moment your seedling reaches 4-6 inches in Step 2 is critical. At this stage, roots are developing rapidly and can become root-bound quickly. Use a clean, sharp knife to gently loosen the root ball before transferring to the 1-gallon container. This reduces transplant shock and gives your young tree room to grow. I always add a handful of perlite to the new potting mix for better drainage.
Sunlight Strategy: Those 6-8 hours of full sun in Step 3 are essential, but don't rush it. Start with morning sun and gradually increase exposure over a week to prevent sunburn on tender new leaves. If you're growing in a container, rotate it weekly so all sides get even light exposure. I've seen seedlings develop uneven growth when kept in one position too long—this creates weak branches that break easily later.
Pro Tips for Peach Tree From Seed To Fruit
- Turning a single peach pit into a fruit-bearing tree takes patience—but these tricks will help you avoid common pitfalls and maximize your success.
- Stratification Success: The 6-8 week cold treatment in Step 1 is non-negotiable for breaking dormancy.
- Germination Environment: That 70°F warm spot in Step 2 needs to stay consistent.
Frequently asked questions
Got questions about growing peaches from seed to fruit? You’re not alone! Here are some of the most common queries—and their no-nonsense answers—to help you avoid pitfalls and savor sweet success.
How long does it take for a peach tree grown from seed to bear fruit?
A peach tree grown from seed can take 5–7 years (or longer!) to produce fruit, depending on the variety and growing conditions. Patience is key—seedlings often yield smaller, less predictable fruit than grafted trees. For faster results, consider grafting a known variety onto your seedling later.
Can I grow a peach tree indoors or in a container?
Peach trees thrive outdoors in warm climates, but you can try dwarf varieties in large containers (15+ gallons) with full sun exposure. Move pots indoors during winter if temps drop below 20°F (-6°C). Just know: indoor trees may struggle with pollination and fruit production without outdoor conditions.
What pests or diseases should I watch for on my peach tree?
Common threats include:
- Peach tree borers: Look for sawdust-like frass near the trunk—treat with neem oil or prune infected branches.
- Leaf curl: Fungal disease causing puckered leaves; prune affected areas and apply copper fungicide.
- Aphids/spider mites: Spray with soapy water or insecticidal soap early in the season.
Do peach trees need a cold period to fruit?
Yes! Most peach varieties require 200–1,000 hours of chilling (below 45°F/7°C) during winter to trigger blooming. Without this, your tree may produce leaves but no fruit. If you’re in a warm climate, choose low-chill varieties like ‘Redhaven’ or ‘Elberta.’
Can I save seeds from store-bought peaches to grow my own tree?
Just ensure the peach is fully ripe and not treated with fungicides (organic peaches are best). Clean seeds thoroughly, dry them, and plant them in well-draining soil. Pro tip: Soak seeds in water for 24 hours before planting to speed up germination.
Wrapping up and next steps
Growing a peach tree from seed to fruit is a rewarding journey that connects you to nature’s cycle—plus, it’s a sustainable way to enjoy fresh, homegrown peaches! 🌱 From selecting the right seed to nurturing your tree through each season, every step is an opportunity to learn and savor the process.
Whether you’re a beginner or a seasoned gardener, your patience will soon be rewarded with juicy, sun-ripened fruit straight from your own backyard.
Ready to take the next step? Start small: plant your seed this fall, and by next summer, you’ll be one step closer to harvesting your first peaches. Share your progress with fellow gardeners—you’ve got this! 🌟